Gardening Checklist for the Second Week of February, 2025
It's easy to feel impatient or even behind at this time of year, and while some of you in the more tropical parts of the Northern Hemisphere can begin to garden (or never stopped) – shoutout to my readers from Puerto Rico and Hawaii, hello! – for most of us, we still need to be patient. But that doesn't mean we can't do ANYTHING. In fact, the more we do now, the better we will be set for success as spring arrives.
With that in mind, here is your Weekly Gardening Checklist for the Second Week of February:
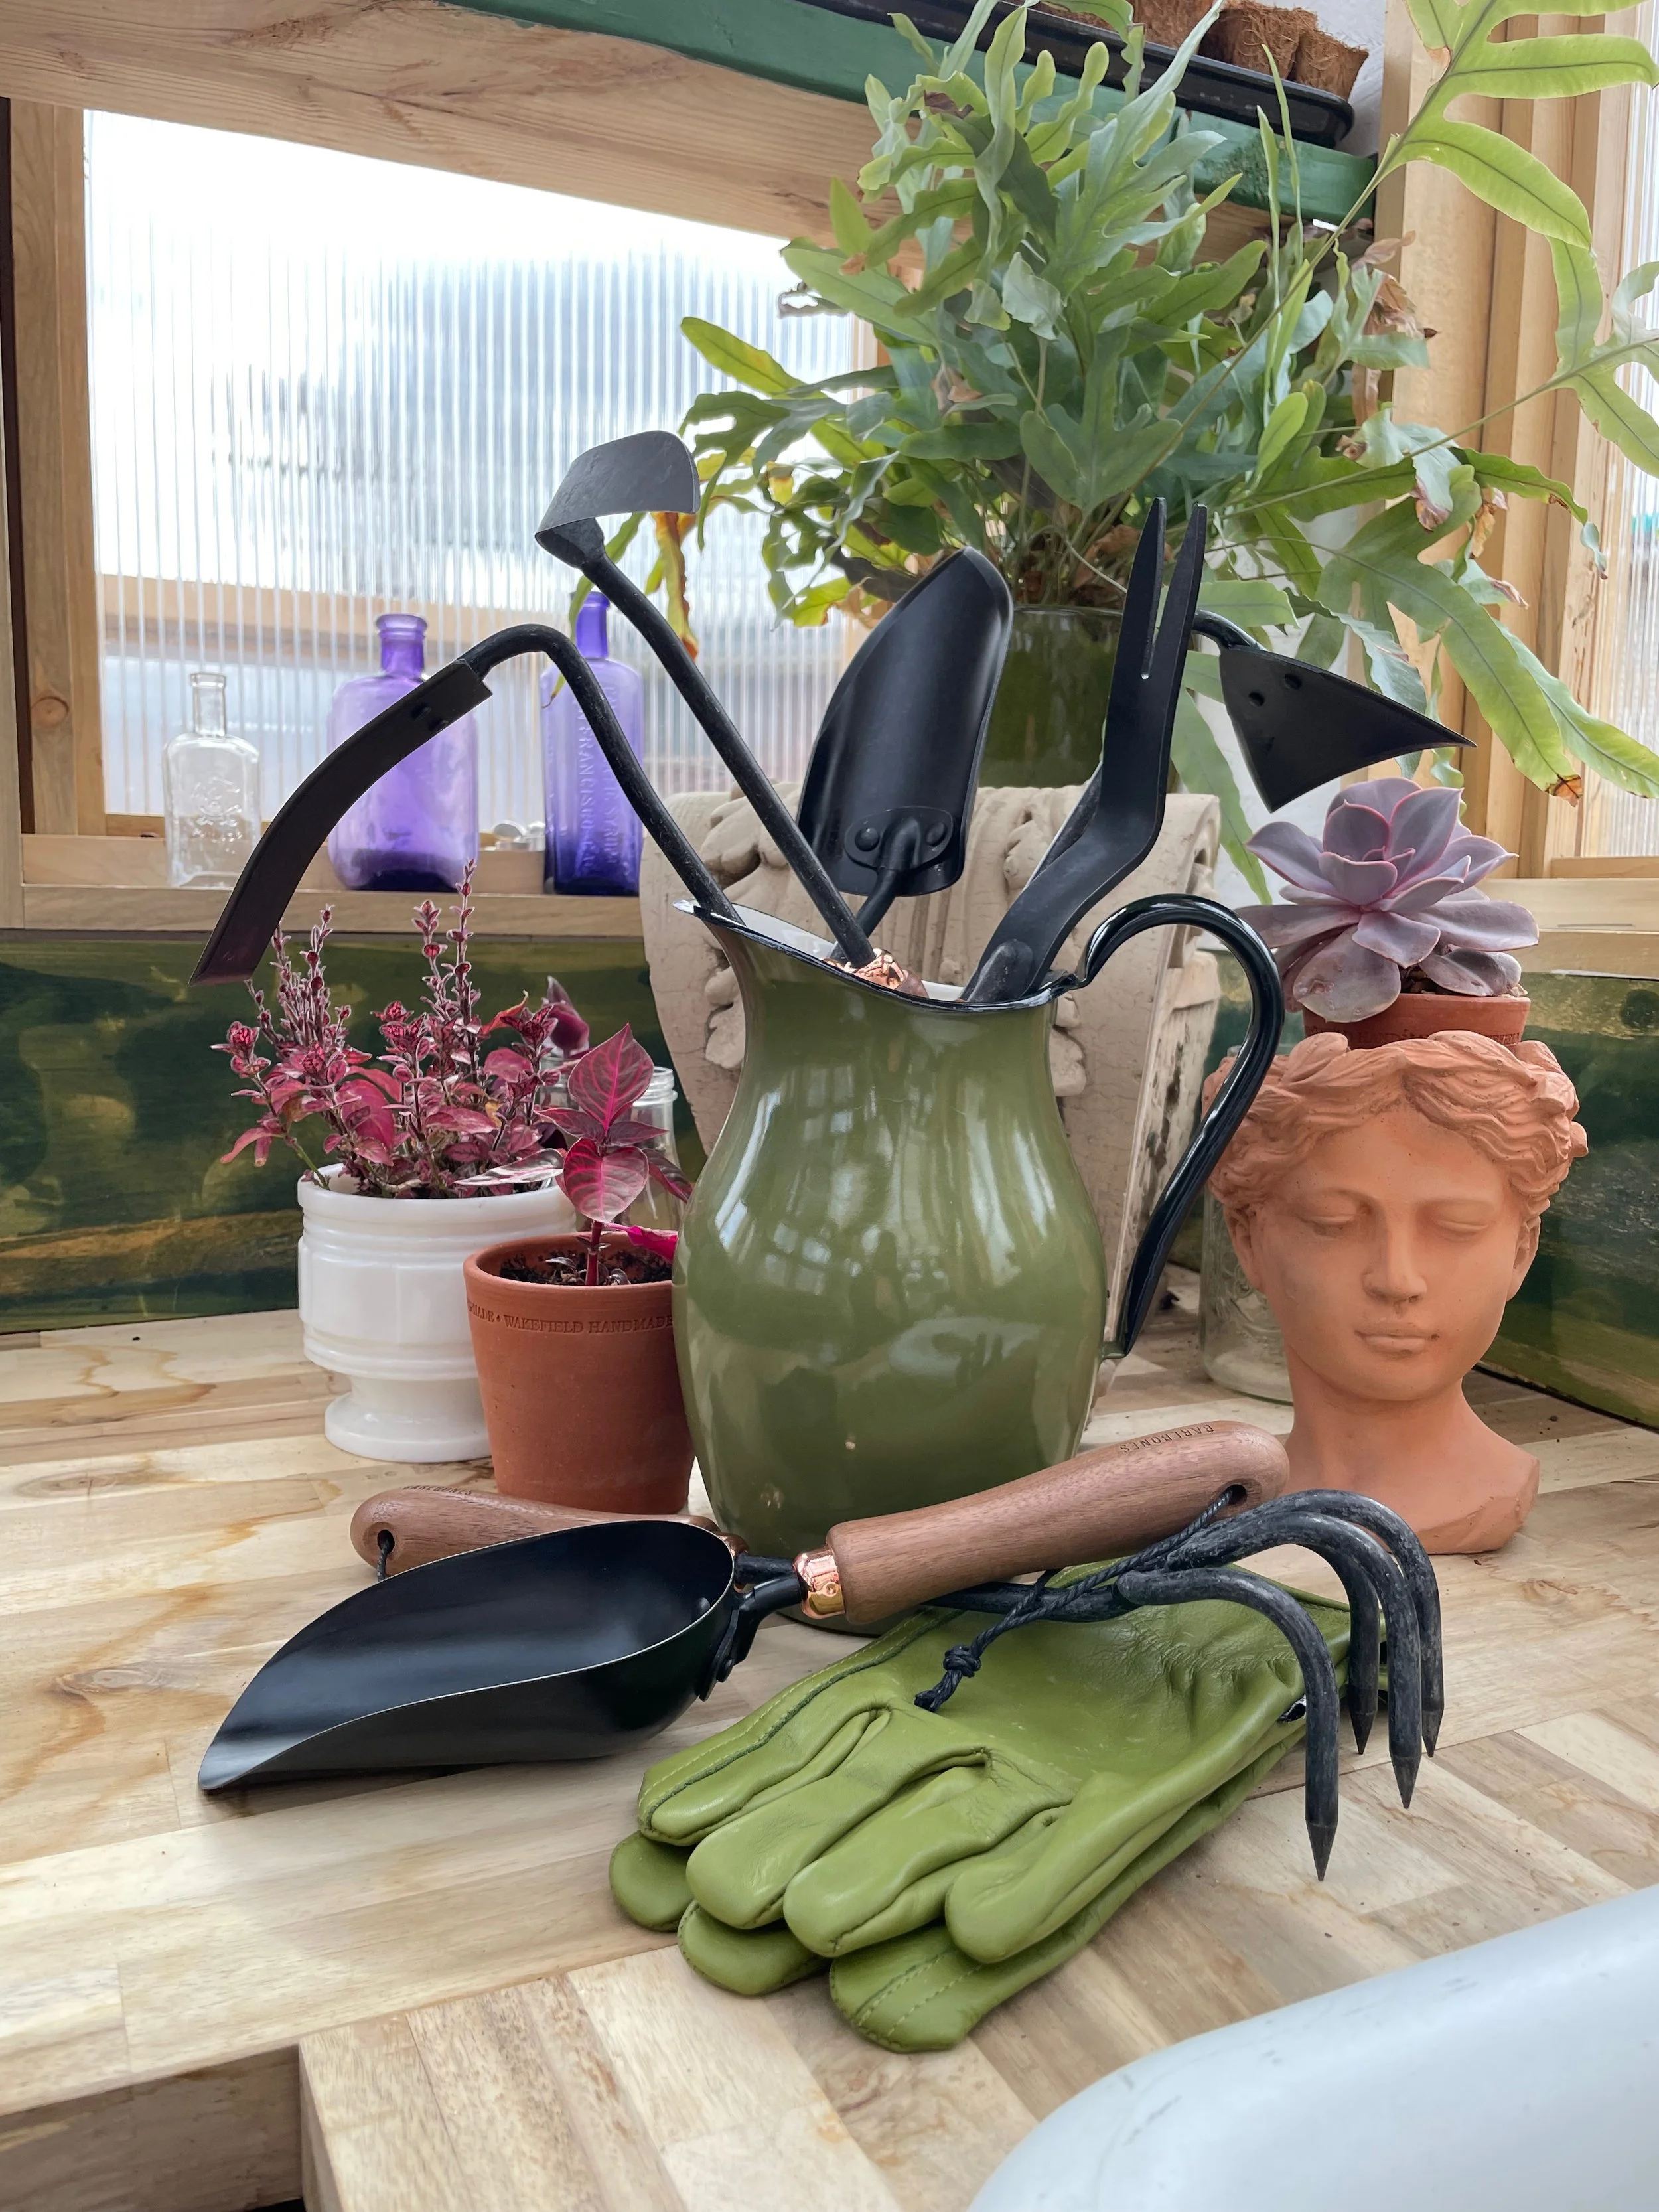

All-Purpose Gloves: my favorite go-to gloves have leather fingers and palms as well. If I only had one pair, this would be it!

Leather Gloves: I love buttery-soft leather gloves. They are great for working in the yard in general, but they don't handle wet tasks well. So I tend to use them when I am raking leaves or mulching. They offer good protection from most pokes and scrapes as well as blisters. Indispensable when weeding thistles!
How to Wash Gardening Gloves
I put almost all of my gloves in the washing machine. The only ones I don't machine wash are gloves that are only made of leather. These I hand wash using the steps below.
Place your gloves in a delicates bag – or several bags. I usually put 3-4 pairs in each bag.
Wash with other dirty gardening items like towels, aprons, or rags. Don't put them in with your finest clothing!
Wash on a quick, cold cycle with detergent.
Air dry on a towel or a rack.
If your gloves have leather or suede parts, they will be crispy when dry. Rub in a little leather conditioner after they have completely dried.
How to Wash and Repair your Gardening Gloves
I wear gardening gloves as much as possible. They protect my hands from sun exposure as well as pokes and pricks and cuts and bites. And I have a whole bin of gloves – different types for different tasks.
Leather Gloves: I love buttery-soft leather gloves. They are great for working in the yard in general, but they don't handle wet tasks well. So I tend to use them when I am raking leaves or mulching. They offer good protection from most pokes and scrapes as well as blisters. Indispensable when weeding thistles!
Nitrile Gloves: These are my favorite gloves for wet tasks like seed sowing or spring planting. I can feel more through the fingertips than any other kind of glove; they are good for judging the temperature of soil, too. But thorns and prickles go straight through them, so they are terrible for weeding thistles or pruning.
Rose Gloves: Rose gloves have a longer cuff which covers more of your arm. Good rose gloves also are at least partly made from leather – on the fingers and palms – to protect your hands when pruning the thorniest of roses.
All-Purpose Gloves: my favorite go-to gloves have leather fingers and palms as well. If I only had one pair, this would be it!
Honestly, gloves are a very intimate choice, and when you find something you love, buy a few pairs, because they inevitably wear out or get lost in a season.
I do wash my gardening gloves over the winter – and usually at least one other time in the year. And it's shocking how much better they feel when they are clean!

Nitrile Gloves: These are my favorite gloves for wet tasks like seed sowing or spring planting. I can feel more through the fingertips than any other kind of glove; they are good for judging the temperature of soil, too. But thorns and prickles go straight through them, so they are terrible for weeding thistles or pruning.

Rose Gloves: Rose gloves have a longer cuff which covers more of your arm. Good rose gloves also are at least partly made from leather – on the fingers and palms – to protect your hands when pruning the thorniest of roses.
How To Clean Leather Gardening Gloves
Brush off any dirt or residue you can remove.
Start by spot-treating dirty areas with leather soap – rub in and wipe away. You may be happy with the end result here, in which case skip to the last step!
If heavily soiled: soak in a tub of warm (not hot) water with a little (very little) Dawn dish soap.
Scrub soiled spots with a leather soap or a drop of Dawn.
Rinse in another tub of warm (not hot!) water.
Allow to air dry.
Apply a good leather conditioner after they have completely dried.
Inspect your gloves for holes. My rule is: if the hole is on a seam, I repair it. If not, then I replace the gloves. My right index fingers always wear out first! But I only throw out the gloves that are holy. I keep the mates, and somehow they always end up being used!

It’s Time to Force Bulbs
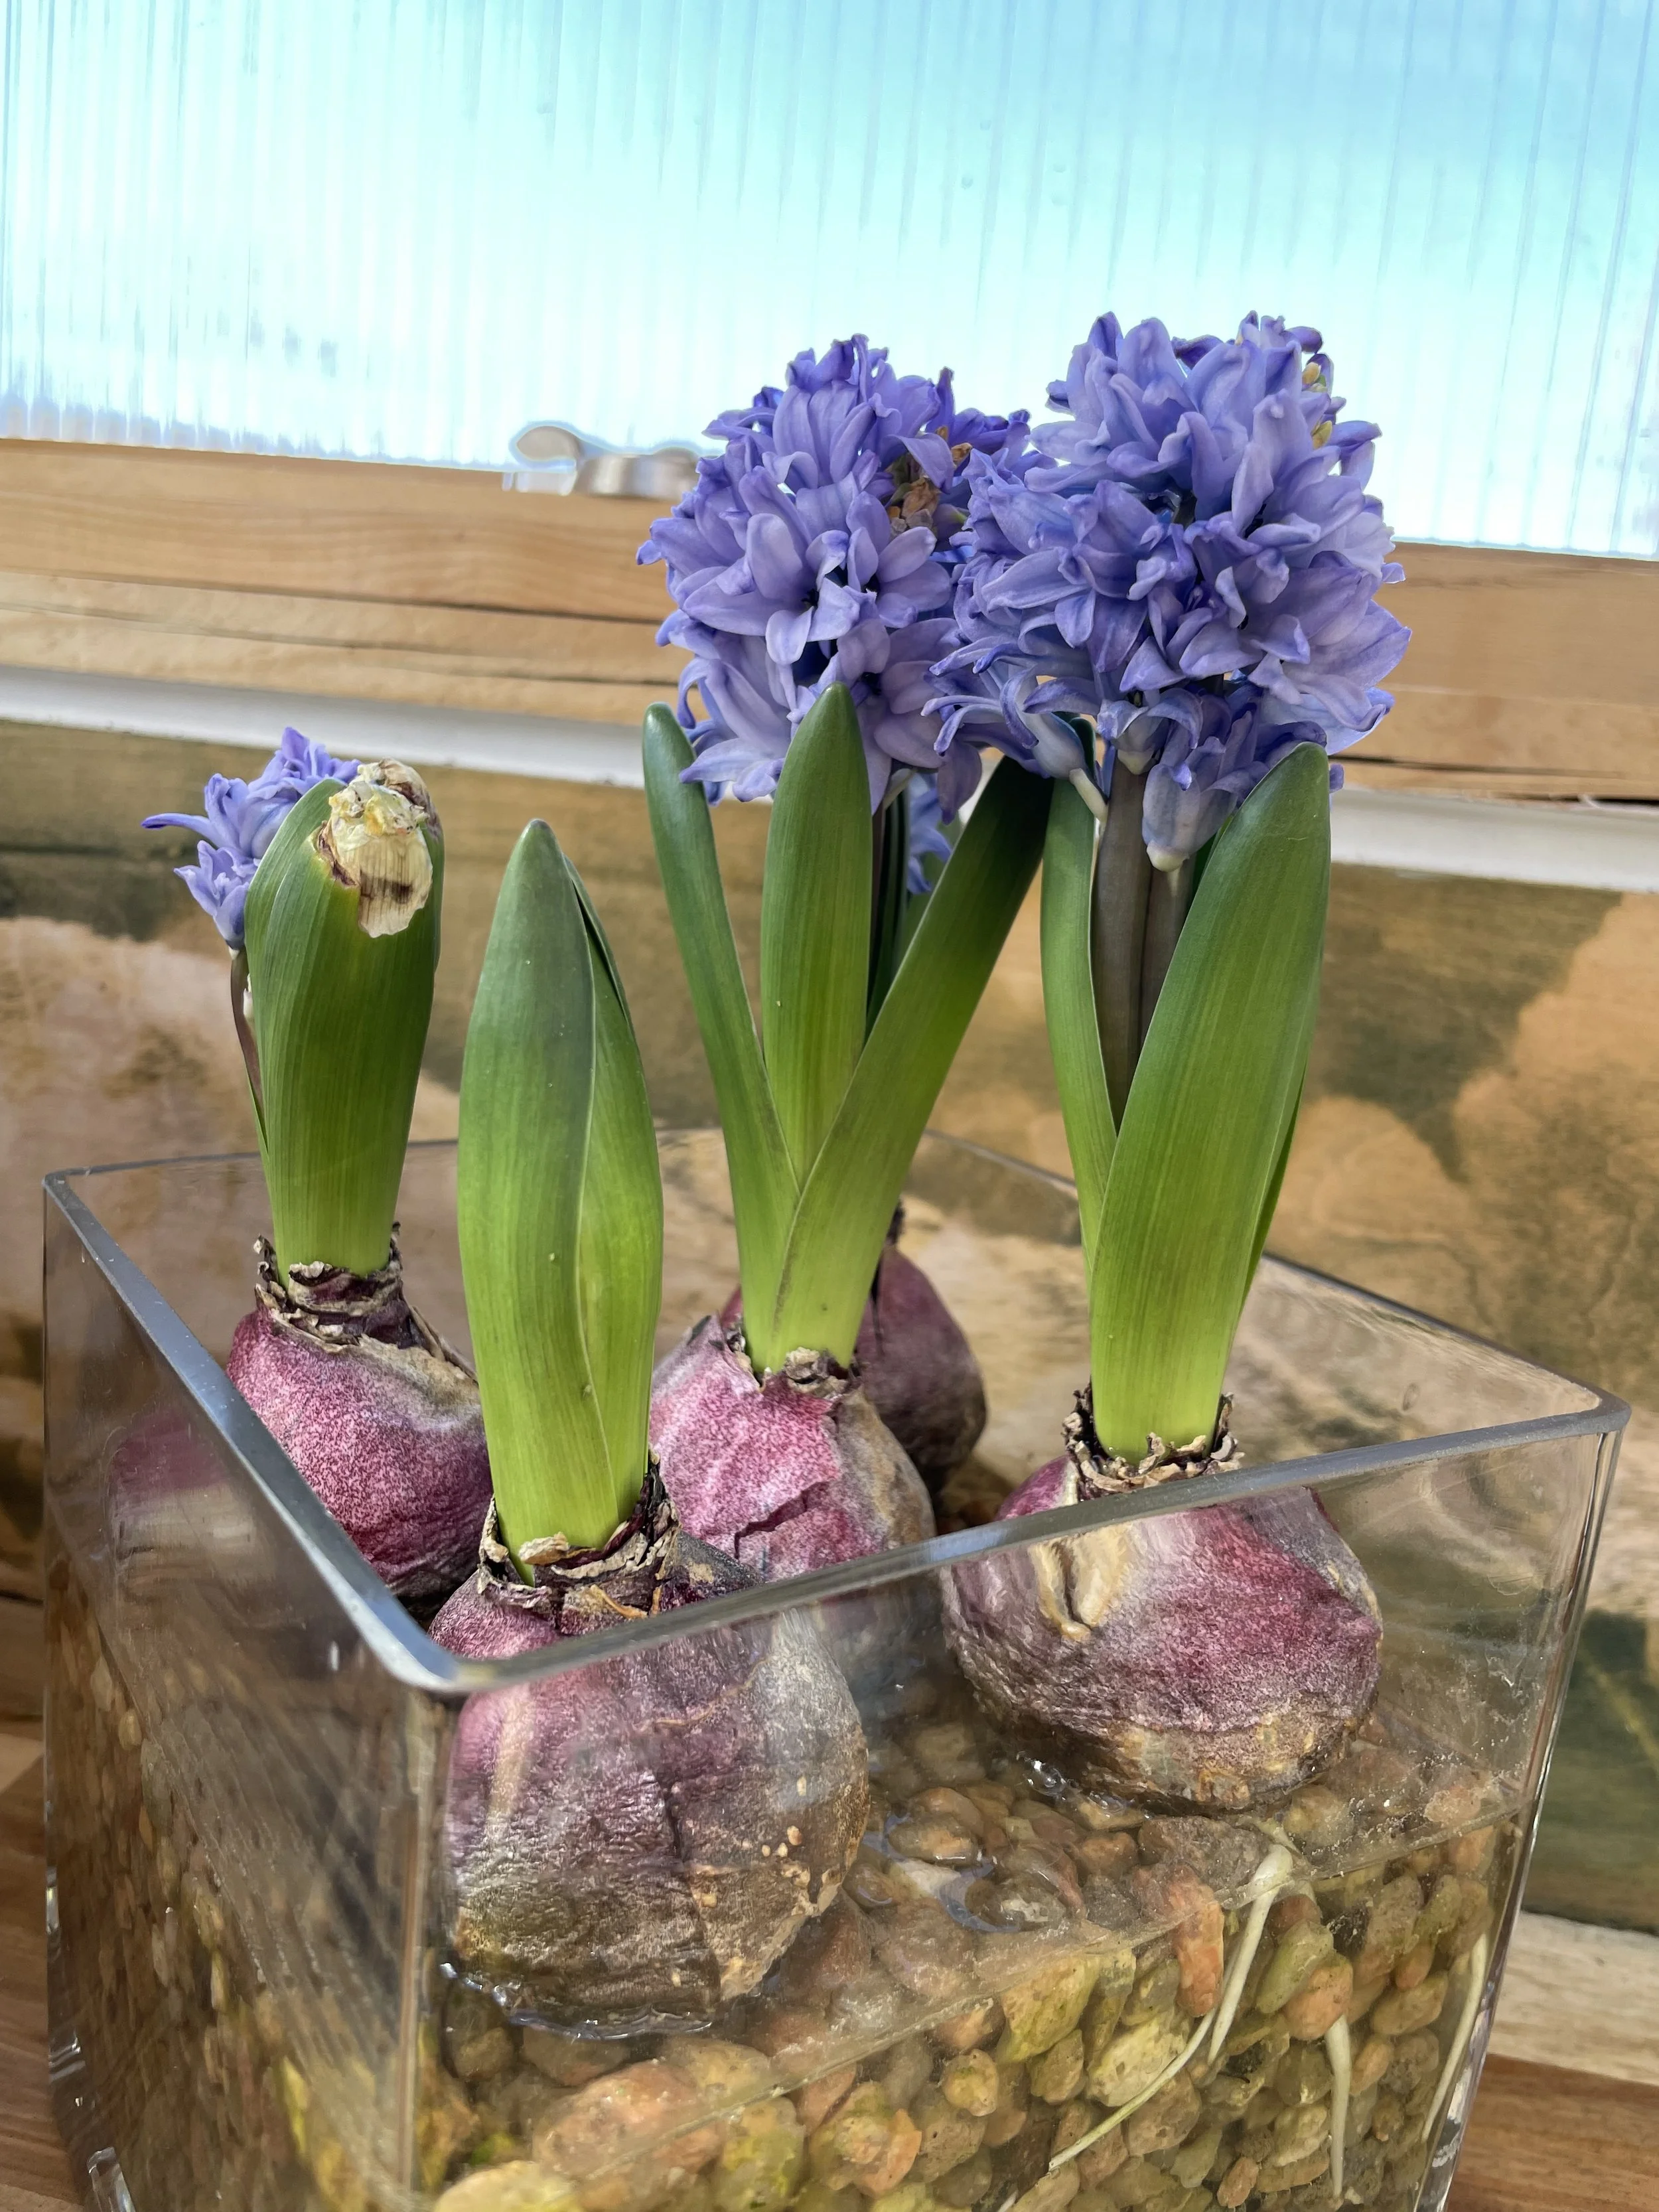
Forcing on Gravel: hyacinth can also be forced easily on gravel. It's really just another form of water forcing, but you can have multiple bulbs in one container, and the gravel keeps the bulbs in place.

Forcing in Soil: this is potting up your bulbs in a pot of soil and waiting for them to emerge. If you do this, however, keep the pot in a garage or other sheltered spot until green growth appears. This will keep the pots from freezing and thawing repeatedly which can disrupt the growth of the plant. If you are past your last frost date, though, put those pots outside and let them bloom!
Honestly, I love forcing bulbs! It can be a very cheap way to buy bulbs – they are the leftovers from the fall orders, usually! And I get flowers sooner which is always a joy!
For those of you in very warm parts of the country, pre-chilled bulbs are the key to growing daffodils and tulips and hyacinth outside, too! While there are some varieties that don't need as much cold in the winter, it's harder to get a reliable display the warmer your winter is. Buying pre-chilled bulbs skips that whole process! You can plant your bulbs in the ground in January or February, and they will come up. Or pot them up for a beautiful display! They are less likely, however, to be perennial, unless you dig them up and chill them for 12-16 weeks, so keep that in mind.
If you ordered pre-chilled bulbs, it is time to pot them up! Pre-chilled bulbs have been kept at a cold temperature at the grower or nursery so they are ready to go when they arrive at your house. There are three ways to force bulbs, and which way you go, depends on what kind of bulb you have – and what kind of container, too.
I have a full how-to for each of these methods. Click the links for more details:

Water Forcing: this is the traditional way to force hyacinth, but it works for daffodils, too. Place your bulb so that the root plate is just touching the water, and monitor the water levels, changing the water every few days.

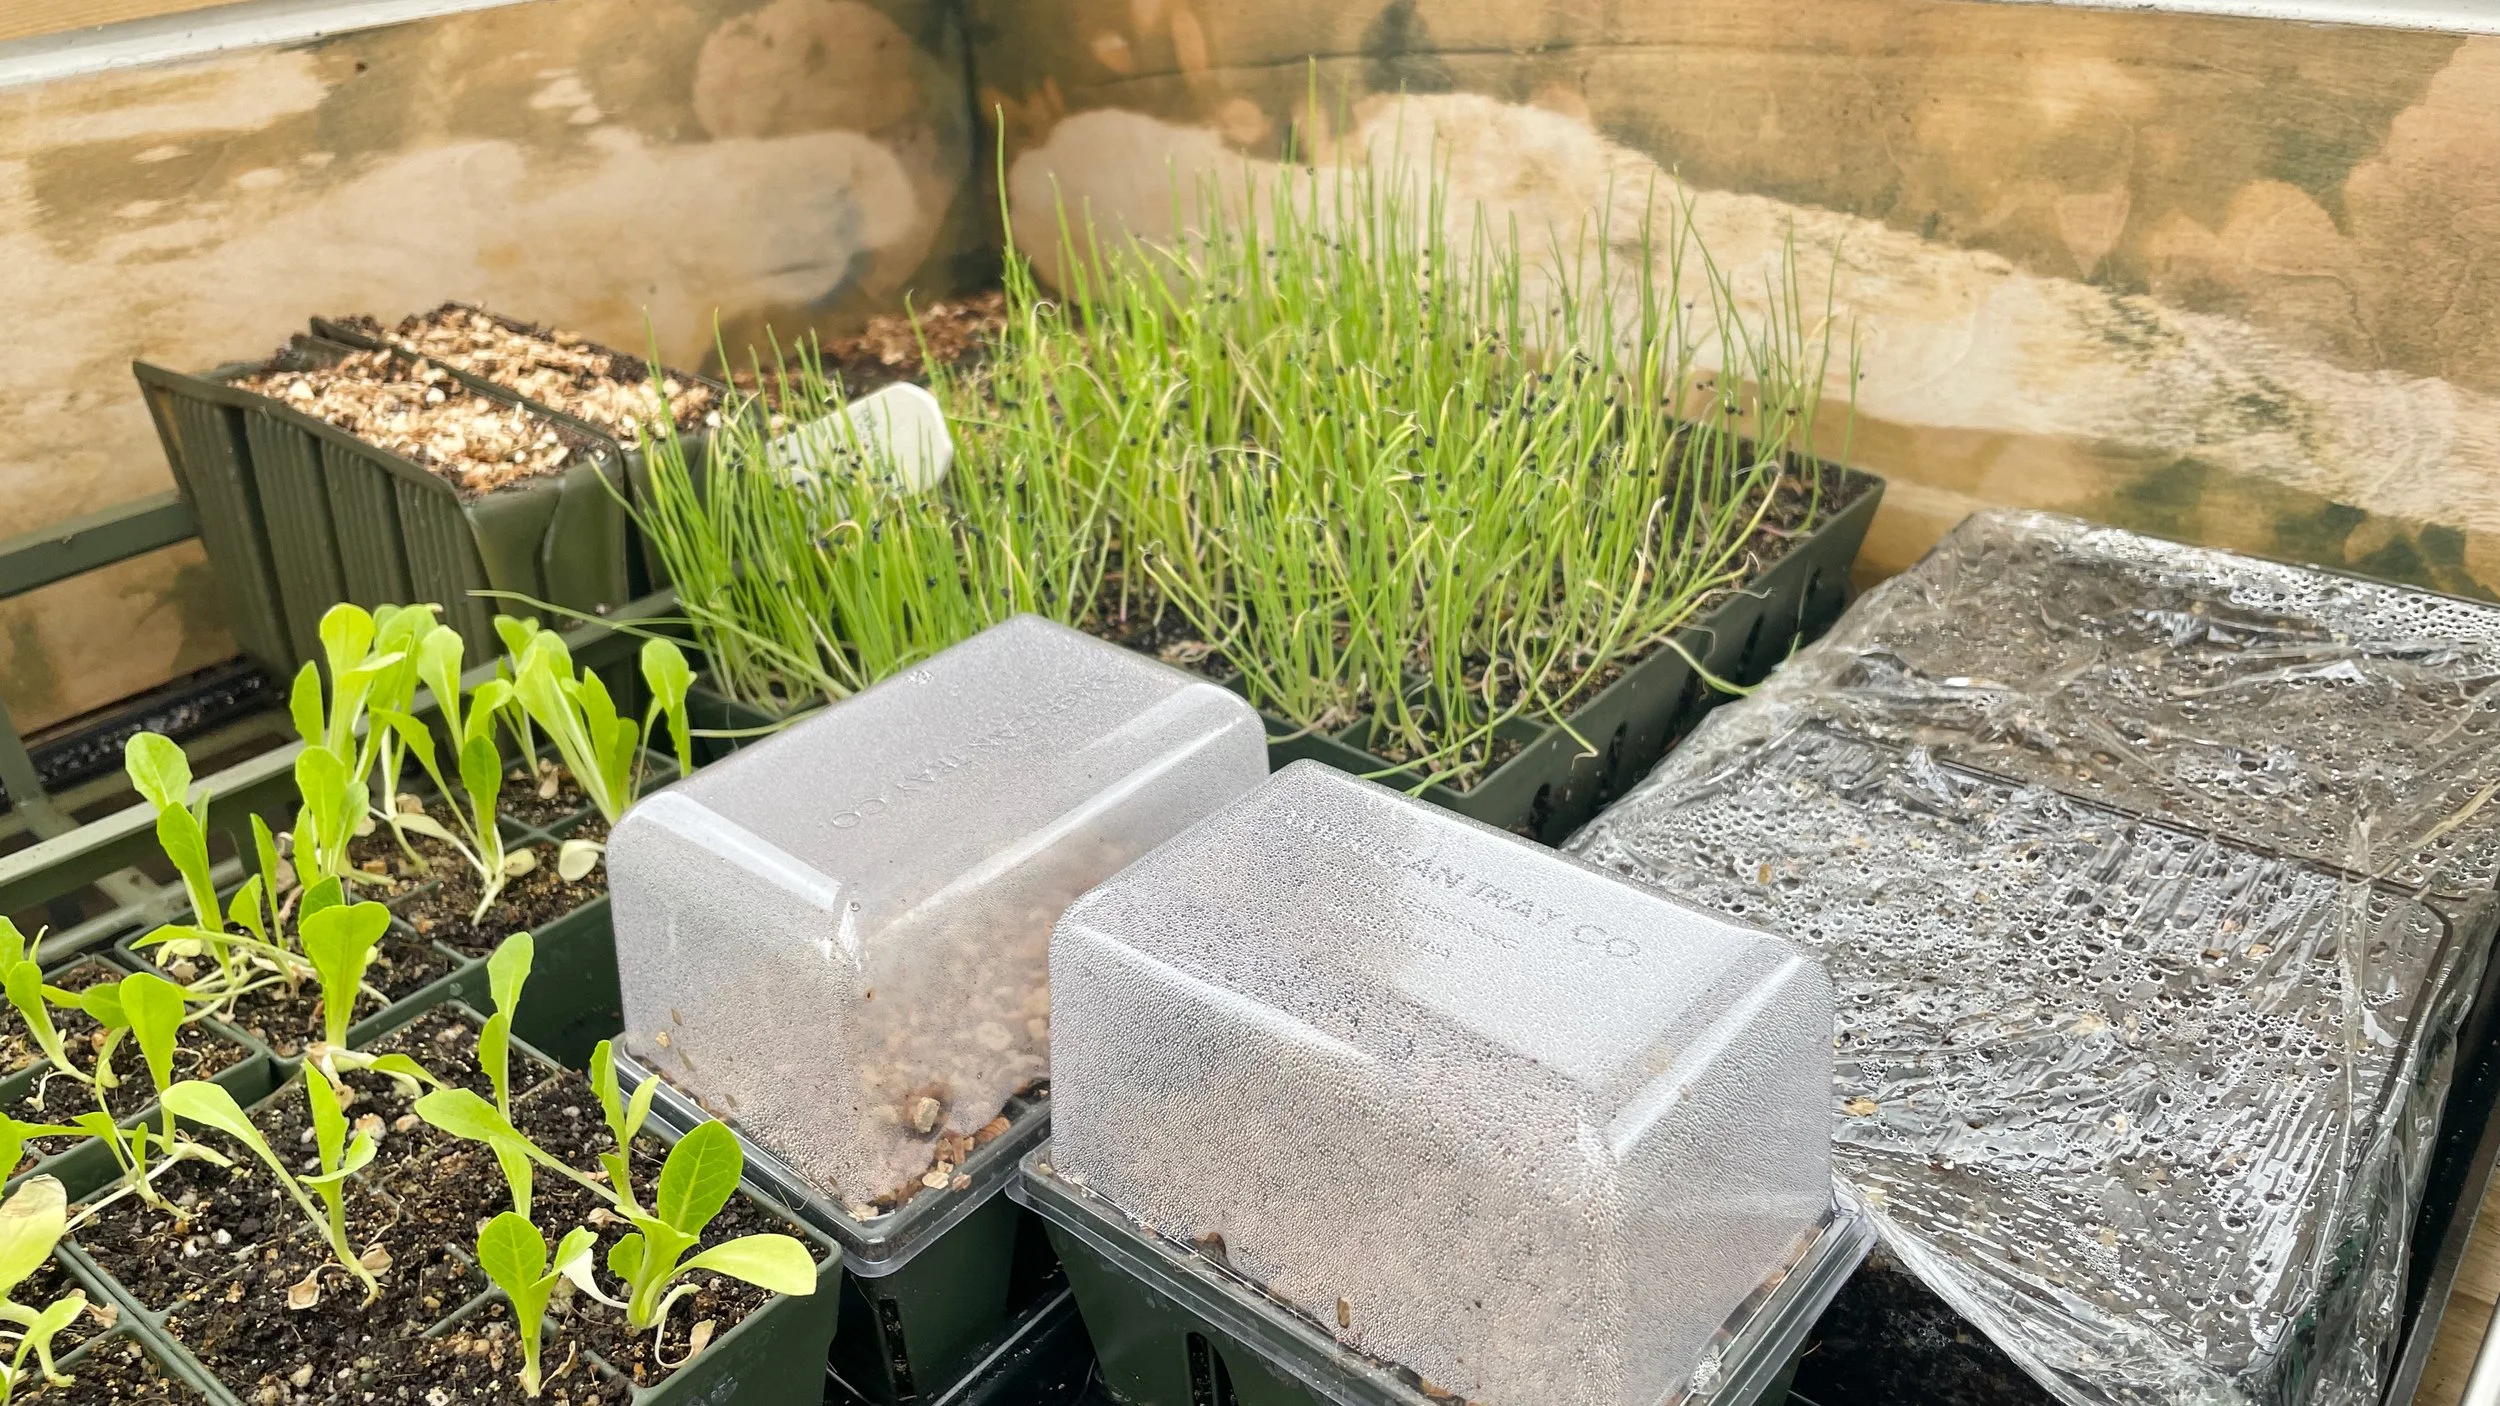
What should you wash?
seed trays
bottom trays
humidity domes
trowels and scoops
I do most of my cleaning outside on a sunny day.
Using a little soapy water and an old scrub brush, wash every seed tray making sure to remove all of the soil remnants.
Rinse well.
Allow to dry in the sunshine.
Bonus: you can spray everything down with a diluted bleach spray for extra caution.
If it's too cold to do this outside, a kitchen sink works well! And, there are some brands that specify that their seed starting gear can go in the dishwasher! Thank you, SiliSeedlings! I do run anything I can through the dishwasher, frankly. But most humidity domes and lots of trays will warp – especially on the bottom rack. So double-check before you stick them in.
Wash your Seed-Starting Gear
Sometimes I do this in the fall. Other times it happens in the spring, but no matter when it happens, it's important to wash all of your seed starting trays and gear. If you had damping off or any other fungal or disease issues – known or unknown – you'll want to make sure that your gear is all clean and disease-free before you start this year.
And that is your Weekly Gardening Checklist!
Looking for seed-starting gear recommendations? I have you covered! Here's my Seed Starting Gear Guide which includes a full list of what I like and why!