How to Fill Your Raised Beds
Creating a raised garden bed is a great way to start growing your own vegetables, herbs, and flowers, especially if you have poor or compacted soil in your garden. But filling a raised bed with the right materials can be a daunting task, especially if you're looking for a cost-effective and sustainable solution. One excellent method is to use yard waste as the bottom layer of your raised bed, which not only reduces waste but also improves the soil structure over time. In this guide, I’ll walk you through how to fill a raised bed with soil and organic material, using yard waste as the base layer to create a fertile environment for your plants to thrive.
I garden almost exclusively using raised beds, and filling them with materials from a store is cost-prohibitive. But using the layered method and building up layers of yard waste at the bottom is both environmentally-friendly and easy on your wallet. And you can grow almost anything in beds filled with these materials! So let's tuck in and take a look at how to fill your gorgeous raised beds – and get your garden growing faster on the cheap!

Why Use Yard Waste in Your Raised Beds?
Before diving into the process of filling your raised bed, let’s discuss why using yard waste as a bottom layer is an excellent idea for gardeners. Yard waste, such as leaves, grass clippings, and small branches, is often abundant in most gardens. By using these organic materials, you are repurposing waste that might otherwise end up in a landfill.
Here are some key benefits of using yard waste in your raised bed:
Cost-Effective: Yard waste is free! It’s an excellent alternative to purchasing expensive organic compost or soil amendments.
Improves Soil Structure: Yard waste adds organic matter that breaks down over time, improving soil aeration, moisture retention, and drainage.
Promotes Healthy Microbial Activity: Organic matter from yard waste feeds soil microbes and earthworms, which are essential for nutrient cycling and plant health.
Reduces Waste: By using materials that would otherwise be discarded, you are making an environmentally friendly choice and reducing your carbon footprint.
Now that we understand the benefits, let’s move on to the process of filling your raised bed.
“HOT TIP: Late summer and fall are FABULOUS times to fill your raised beds. That might seem counter-intuitive, but there is more yard waste to be had in the fall – plus fallen leaves, branches, and tree-trimmings. Your neighbors might be out doing yard work, too. You can collect from the neighborhood. Plus, if you are using manure in your raised beds, it needs to mature or rot down before you should grow in it – especially if you are growing vegetables or anything edible. So filling your beds in the fall and then letting them mellow over the winter can be a fabulous strategy!”
Gather Your Materials
The first step in filling your raised bed is to gather the right materials. In addition to your raised bed frame, you'll need a mix of organic materials and soil to create a fertile growing environment. Here’s a list of the materials you’ll need:
1. Yard Waste for the Bottom Layer:
Yard waste, often referred to as "green waste," can include a variety of organic materials:
Leaves: Fallen leaves are one of the best materials for this layer because they break down quickly and are abundant in most gardens.
Grass Clippings: Freshly mowed grass clippings add nitrogen, which will help boost the decomposition process.
Small Twigs or Branches: These provide structure and help create air pockets for good drainage.
Plant Debris: Make sure these are weed-free to avoid introducing unwanted seeds into your bed.
2. Peat-free Mix for the Top Layer:
Check out my recipe for a good peat-free mix for raised beds. You'll need 12" of this mix for your bed.
3. Other Organic Materials:
Manure: Well-aged manure from chickens, cows, or horses can be added to further enrich the soil.
Coconut Coir: helps with moisture retention and improves soil aeration.

When I filled the beds for the Potager Garden, I needed so much yard waste that I called a local tree company. They dropped off a truckload of shredded tree material. For free! It was more than I needed, but our neighbors came and took some for their gardens, too, and within a few weeks the mountain was gone. Now that shredded mulch is happily decomposing beneath my Potager Garden – a process that helps keep the soil warmer, too!

Layering the Materials
The key to filling your raised bed with the right materials is creating a layered system that will allow for proper drainage and promote healthy soil structure. This technique is often referred to as “lasagna gardening” or “sheet mulching.” By layering materials of different textures and sizes, you’ll encourage decomposition and create a rich environment for plant roots. Here’s how to layer your raised bed:
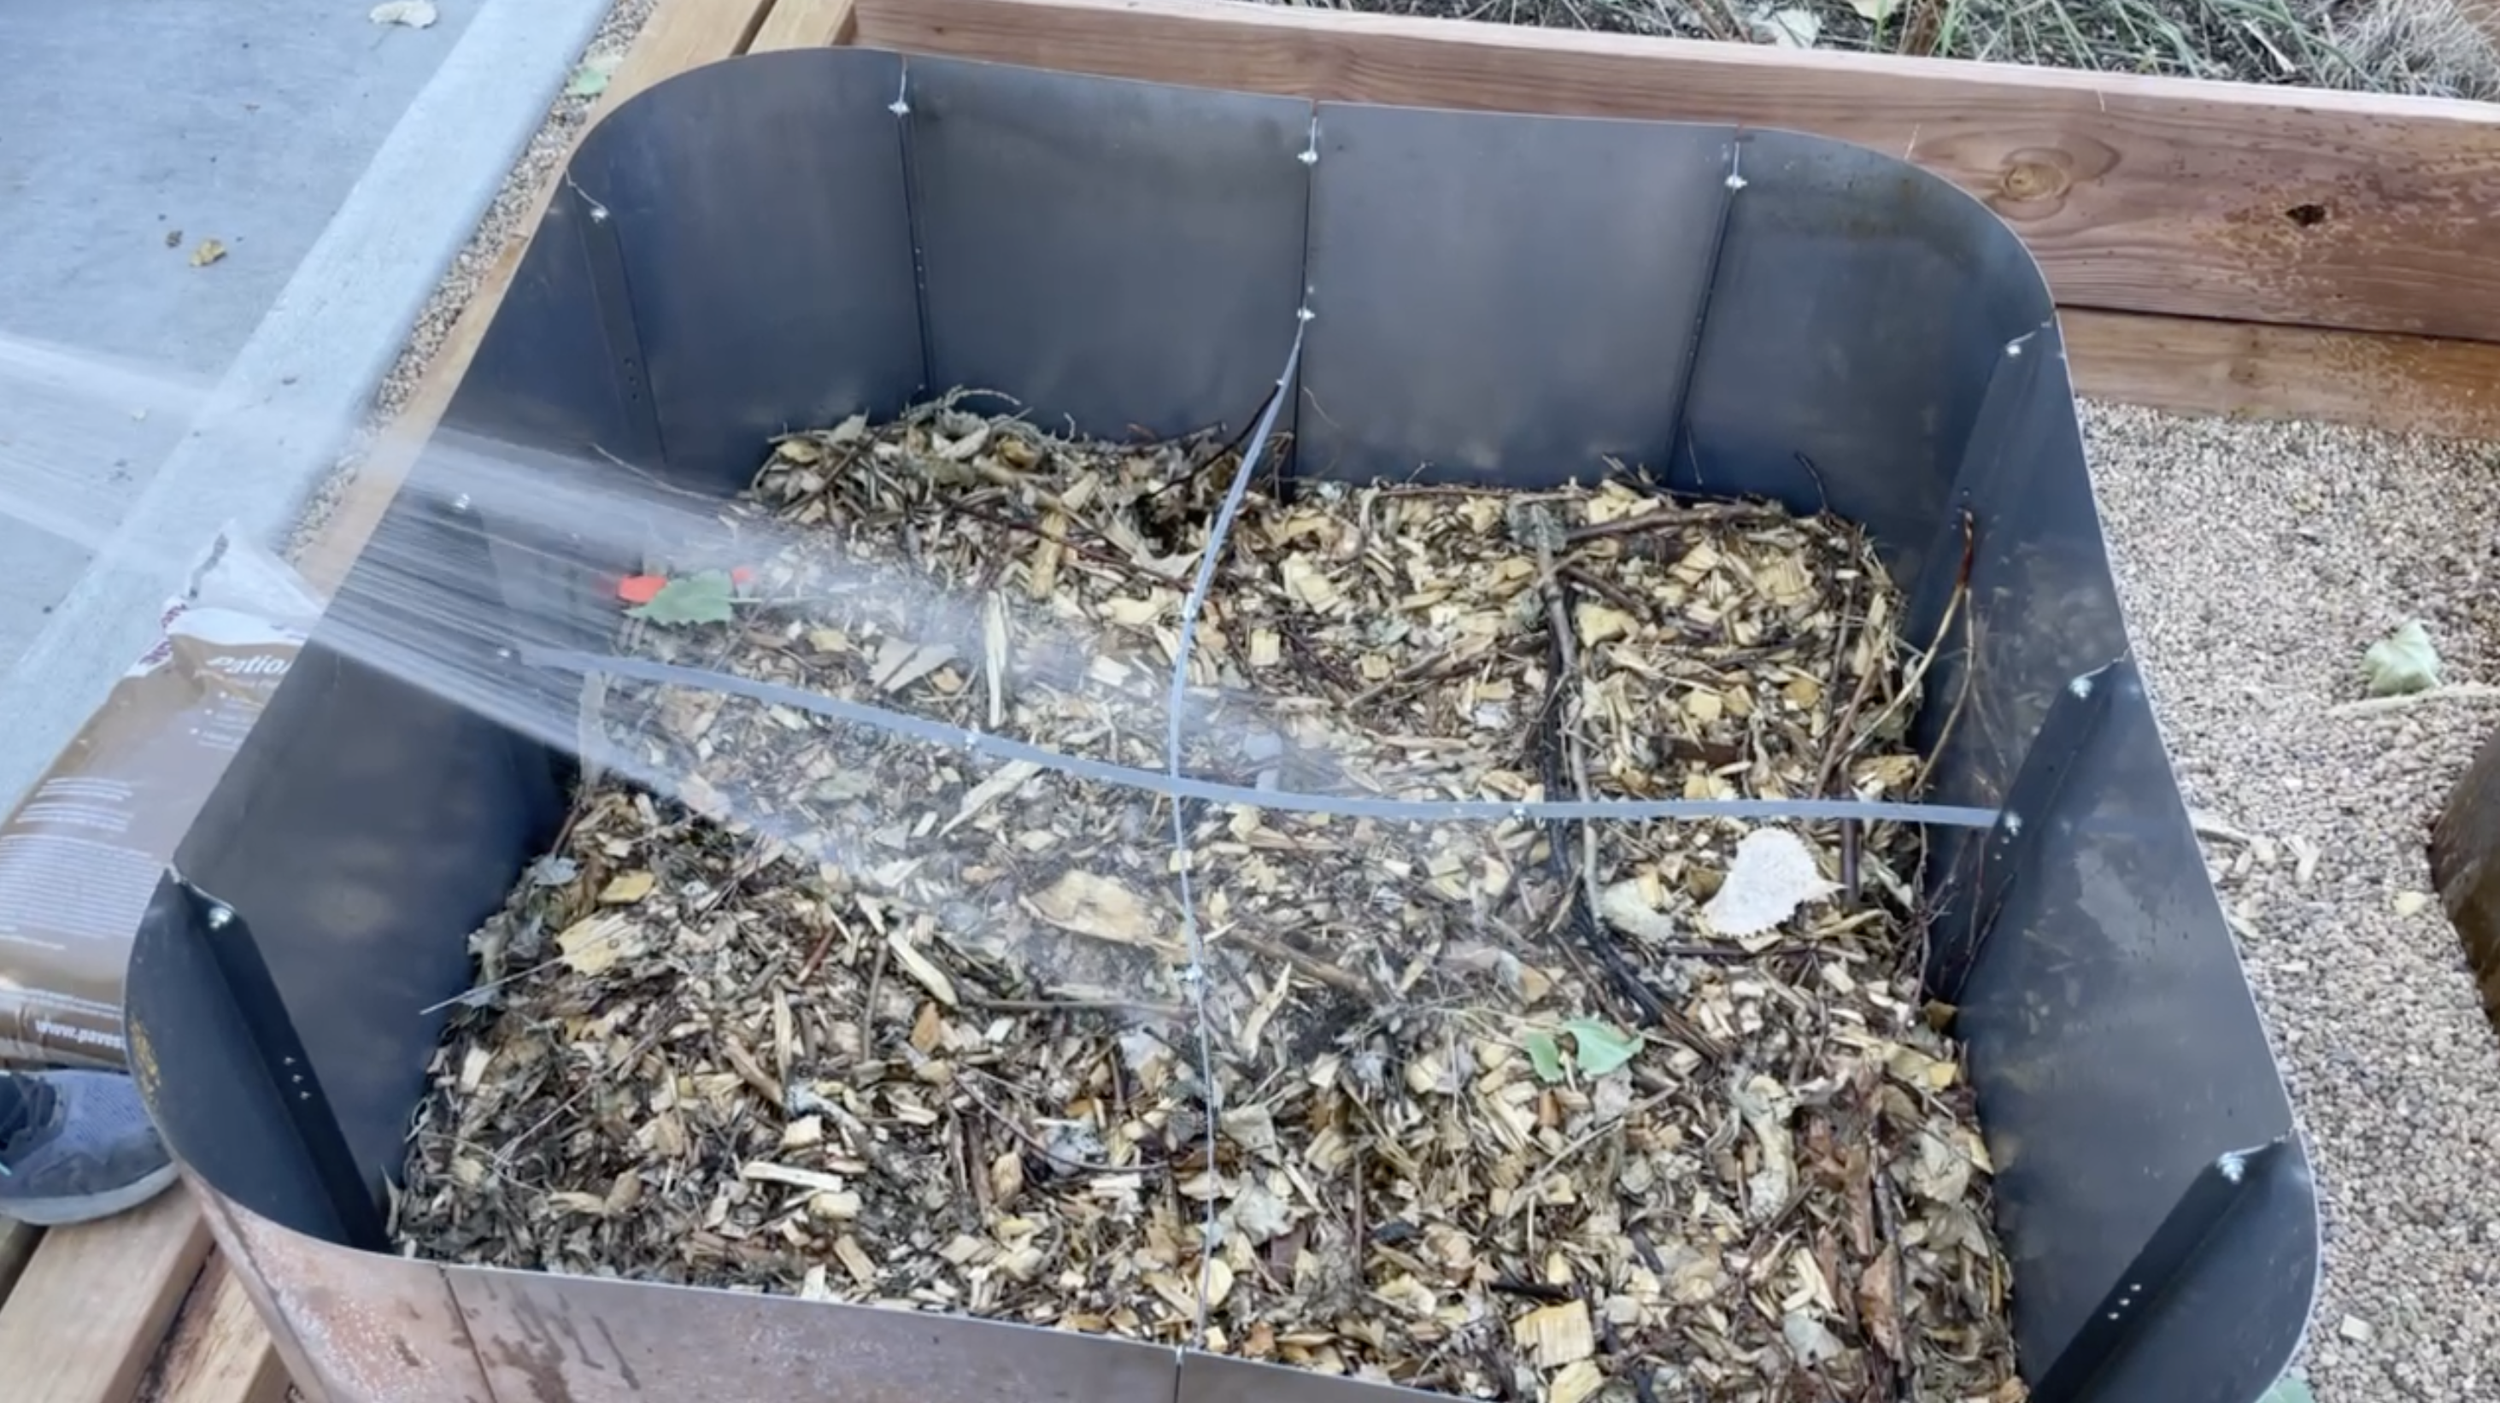
1. The Bottom Layer: Yard Waste
Start by placing your yard waste at the bottom of the raised bed. This layer should fill about ⅓ of the depth of your raised bed, depending on the size of your bed. The deeper your bed will be, the more of this material you can use. When I filled my Birdie's Beds, for example, I filled them nearly 1/2 full of yard waste because I knew I would be growing shallow-rooted plants in those very deep beds.
Large Materials First: Begin by placing larger items, such as small twigs or branches. These materials create air pockets that will allow for drainage and prevent the soil from becoming too compacted. They’ll also decompose slowly, adding structure to your bed over time. Some people swear by putting logs in here, but that's too expensive and too slow for me. I stick with twigs, sticks, and mulch.
Add Leaves and Grass Clippings: Next, cover the larger materials with leaves and grass clippings. This organic material will break down more quickly, releasing nutrients into the soil as it decomposes. If your leaves are large, it’s a good idea to chop them into smaller pieces to speed up the decomposition process.
2. The Middle Layer: Green Materials and Compost
Once the yard waste is in place, it’s time to add your green materials, which include things like kitchen scraps or manure. These materials provide essential nutrients for plants, as they are rich in nitrogen and other important elements.
Kitchen or Garden Scraps: Add a generous layer of green waste. Don't include meat, bones, fish, or other especially fragrant scraps. But cuttings from fruits and vegetables, grass clippings, trimmings from green plants – anything that would go into your yard compost pile – are great.
Manure or Other Organic Matter: If you’re using manure, ensure that it is well-aged to avoid burning your plants. Add about 2-3 inches of manure or other organic material like shredded cardboard or paper.
3. The Top Layer: Soil for Planting
Finally, finish off with a rich, well-draining soil mixture. You want a soil that is nutrient-rich and provides good structure for your plants to establish healthy roots.
Watering & Settling
Once you’ve filled your raised bed with the organic materials and soil, it’s important to water the layers thoroughly. Watering helps the materials start the decomposition process and also helps to settle the soil, eliminating air pockets and making the bed more compact.
Water Each Layer: As you add each layer, water it well to ensure good moisture retention and help the materials begin breaking down. This is particularly important for the yard waste layer, as it will need moisture to start decomposing.
Allow for Settling: After watering, let the bed sit for a few days. The soil and organic matter will settle over time, and you may notice that the bed reduces in height. If necessary, top off the raised bed with more soil to ensure your plants have enough growing space.
Planting Your Garden
Filling a raised bed with soil and organic material using yard waste as the bottom layer is an eco-friendly and cost-effective way to create a healthy, fertile environment for your plants. By following these steps, you can recycle yard waste and improve your soil’s structure, making your garden more productive in the long run. The combination of yard waste, compost, manure, and high-quality soil will promote nutrient cycling, healthy microbial activity, and better drainage, all of which contribute to robust plant growth. So, gather your materials, layer your raised bed, and get ready to grow a flourishing garden while reducing your environmental impact.
Happy gardening!
Once your raised bed is filled and settled, it’s time to plant your garden. The layers of organic material you’ve added will provide the nutrients, moisture retention, and structure needed for healthy plant growth. Here are a few tips for planting in your newly filled raised bed:
Choose Plants Based on Soil Depth: Different plants have varying root depths. Be sure to select plants that are suitable for the depth of your raised bed. Shallow-rooted plants, such as lettuce, herbs, and radishes, will thrive in the topsoil, while deeper-rooted plants, such as tomatoes and carrots, will benefit from the extra organic matter beneath.
Consider Companion Planting: Raised beds are perfect for companion planting, which can help reduce pests and improve plant health. Consider planting complementary plants like basil with tomatoes or marigolds with beans to create a natural balance in your garden.
Maintain Your Raised Bed: Over time, as the organic material in the bottom layer continues to decompose, your bed may sink slightly. Top off the bed with compost or peat-free raised bed mix as needed to keep the growing environment optimal for your plants.