Refresh an Established Garden Bed
Using Native North American Plants
If you've been around for a while, you know that when we bought this house, there was almost nothing growing other than invasive weeds. And I do mean nothing. And there was NO curb appeal at all. My mom came to help us settle in while my husband was on a business trip, and as we surveyed a flower bed filled with thistles she turned to me and said, "WHY did you buy this house again?" I was feeling the same way, trust me.
One of our first steps to take outside was to begin to divide the space and to lay out raised beds. Raised garden beds can be a fantastic way to delineate spaces – particularly when the landscape feels vast and undefined as ours did.
So we built some raised beds, and I filled them with plants – desperate for some green growth and beauty. Several years later, one of those early beds was in desperate need of a refresh, and tackling that project was both gratifying and beautifying.
Refreshing an already established garden bed can feel intimidating — especially when it’s full of mature plants, memories, and years of growth. But one of the most important lessons gardening teaches us is also one of the simplest: gardens take time, and they are meant to change.
If your garden bed or border is starting to look crowded, tired, or out of sync with its environment, that doesn’t mean you’ve failed. It means your garden is doing exactly what gardens do — growing, shifting, and asking for a reset.
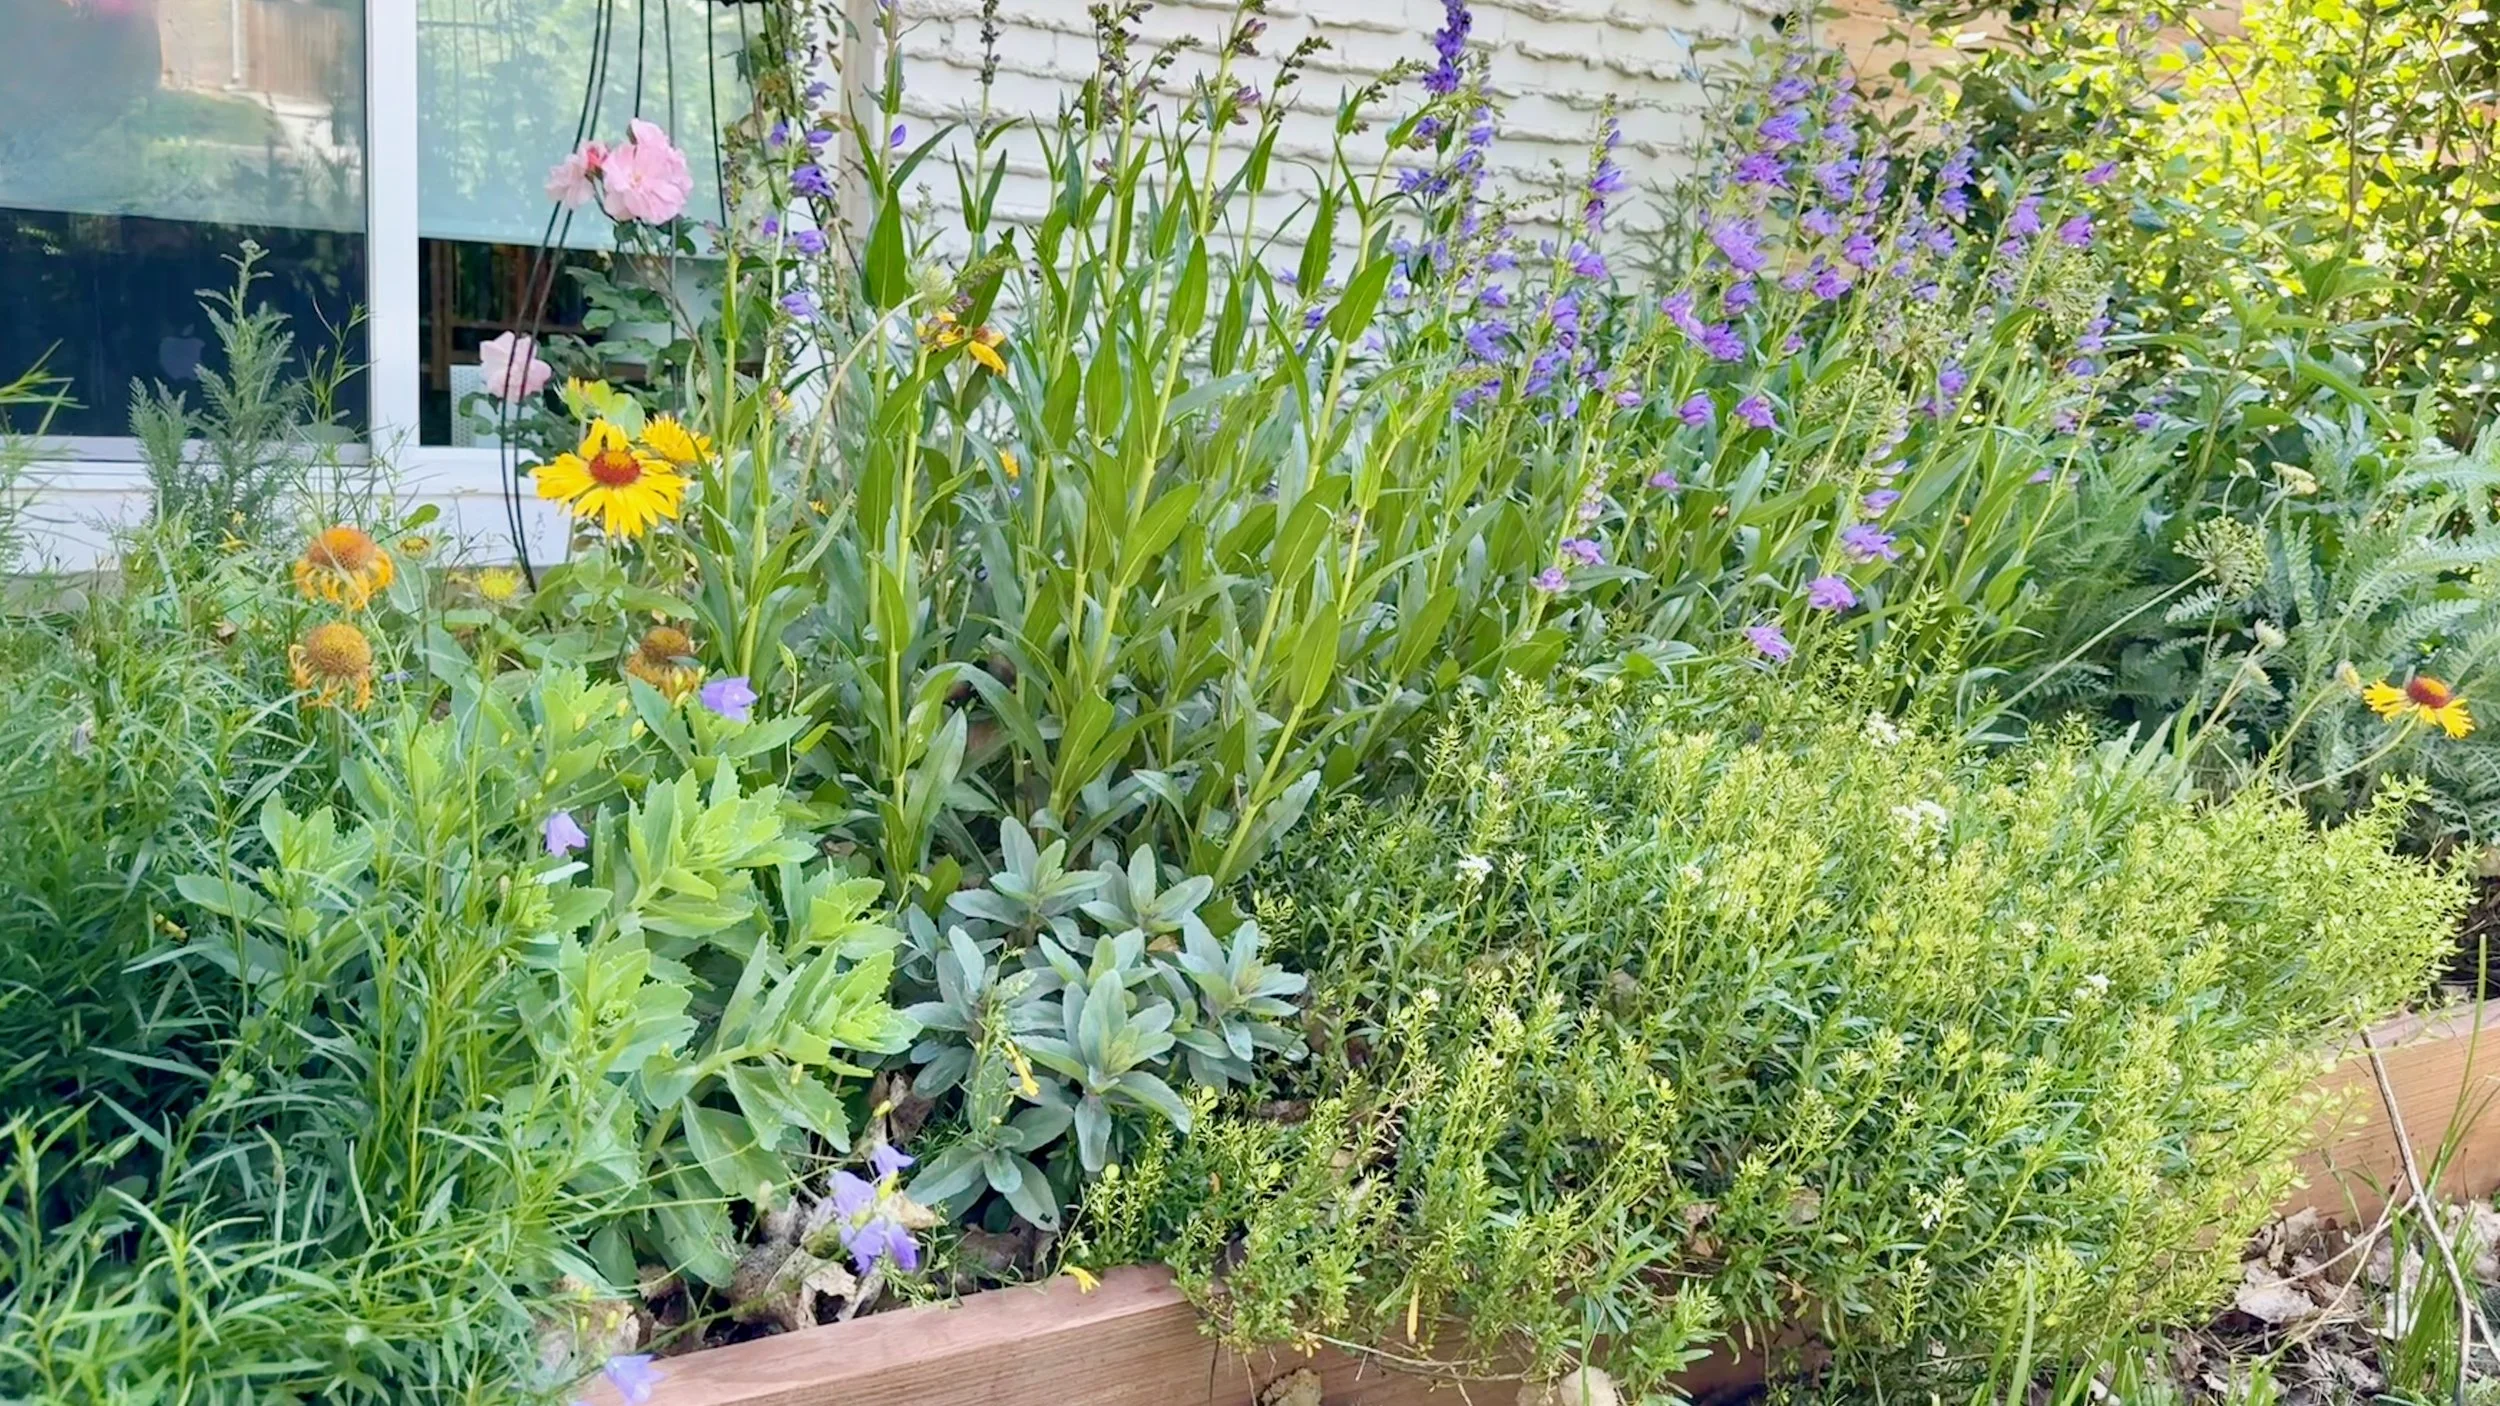
So let's look at how I refreshed my five-year-old garden bed using mostly native North American plants, focusing on drought tolerance, wildlife value, and long-term ease of care.
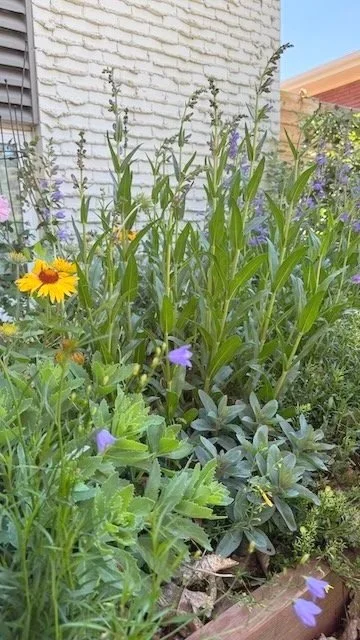
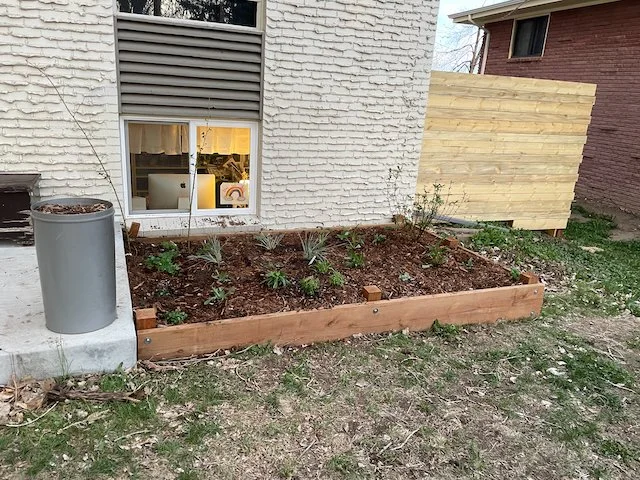
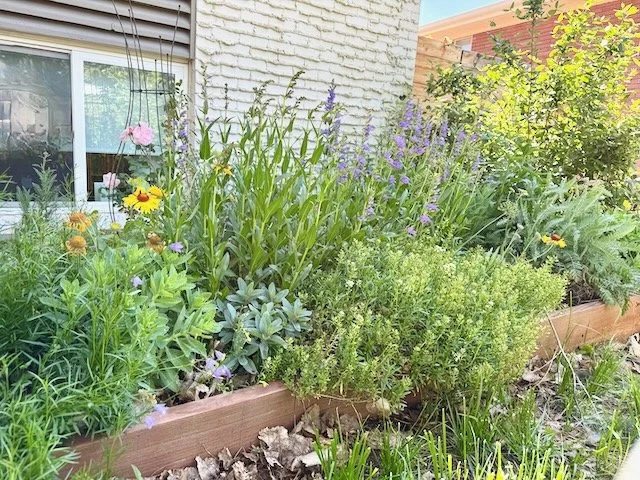
Top: the garden bed when it was planted out
Bottom: the same garden bed after 5 years of growth at the end of a hot, dry summer
Why Established Garden Beds Eventually Need Renovation
When a bed is first planted, everything looks tidy and well-spaced. But over time:
Perennials grow larger than expected
Some plants thrive while others struggle or die
Maintenance becomes harder as beds get deeper and more crowded
The original planting plan no longer fits the reality on the ground
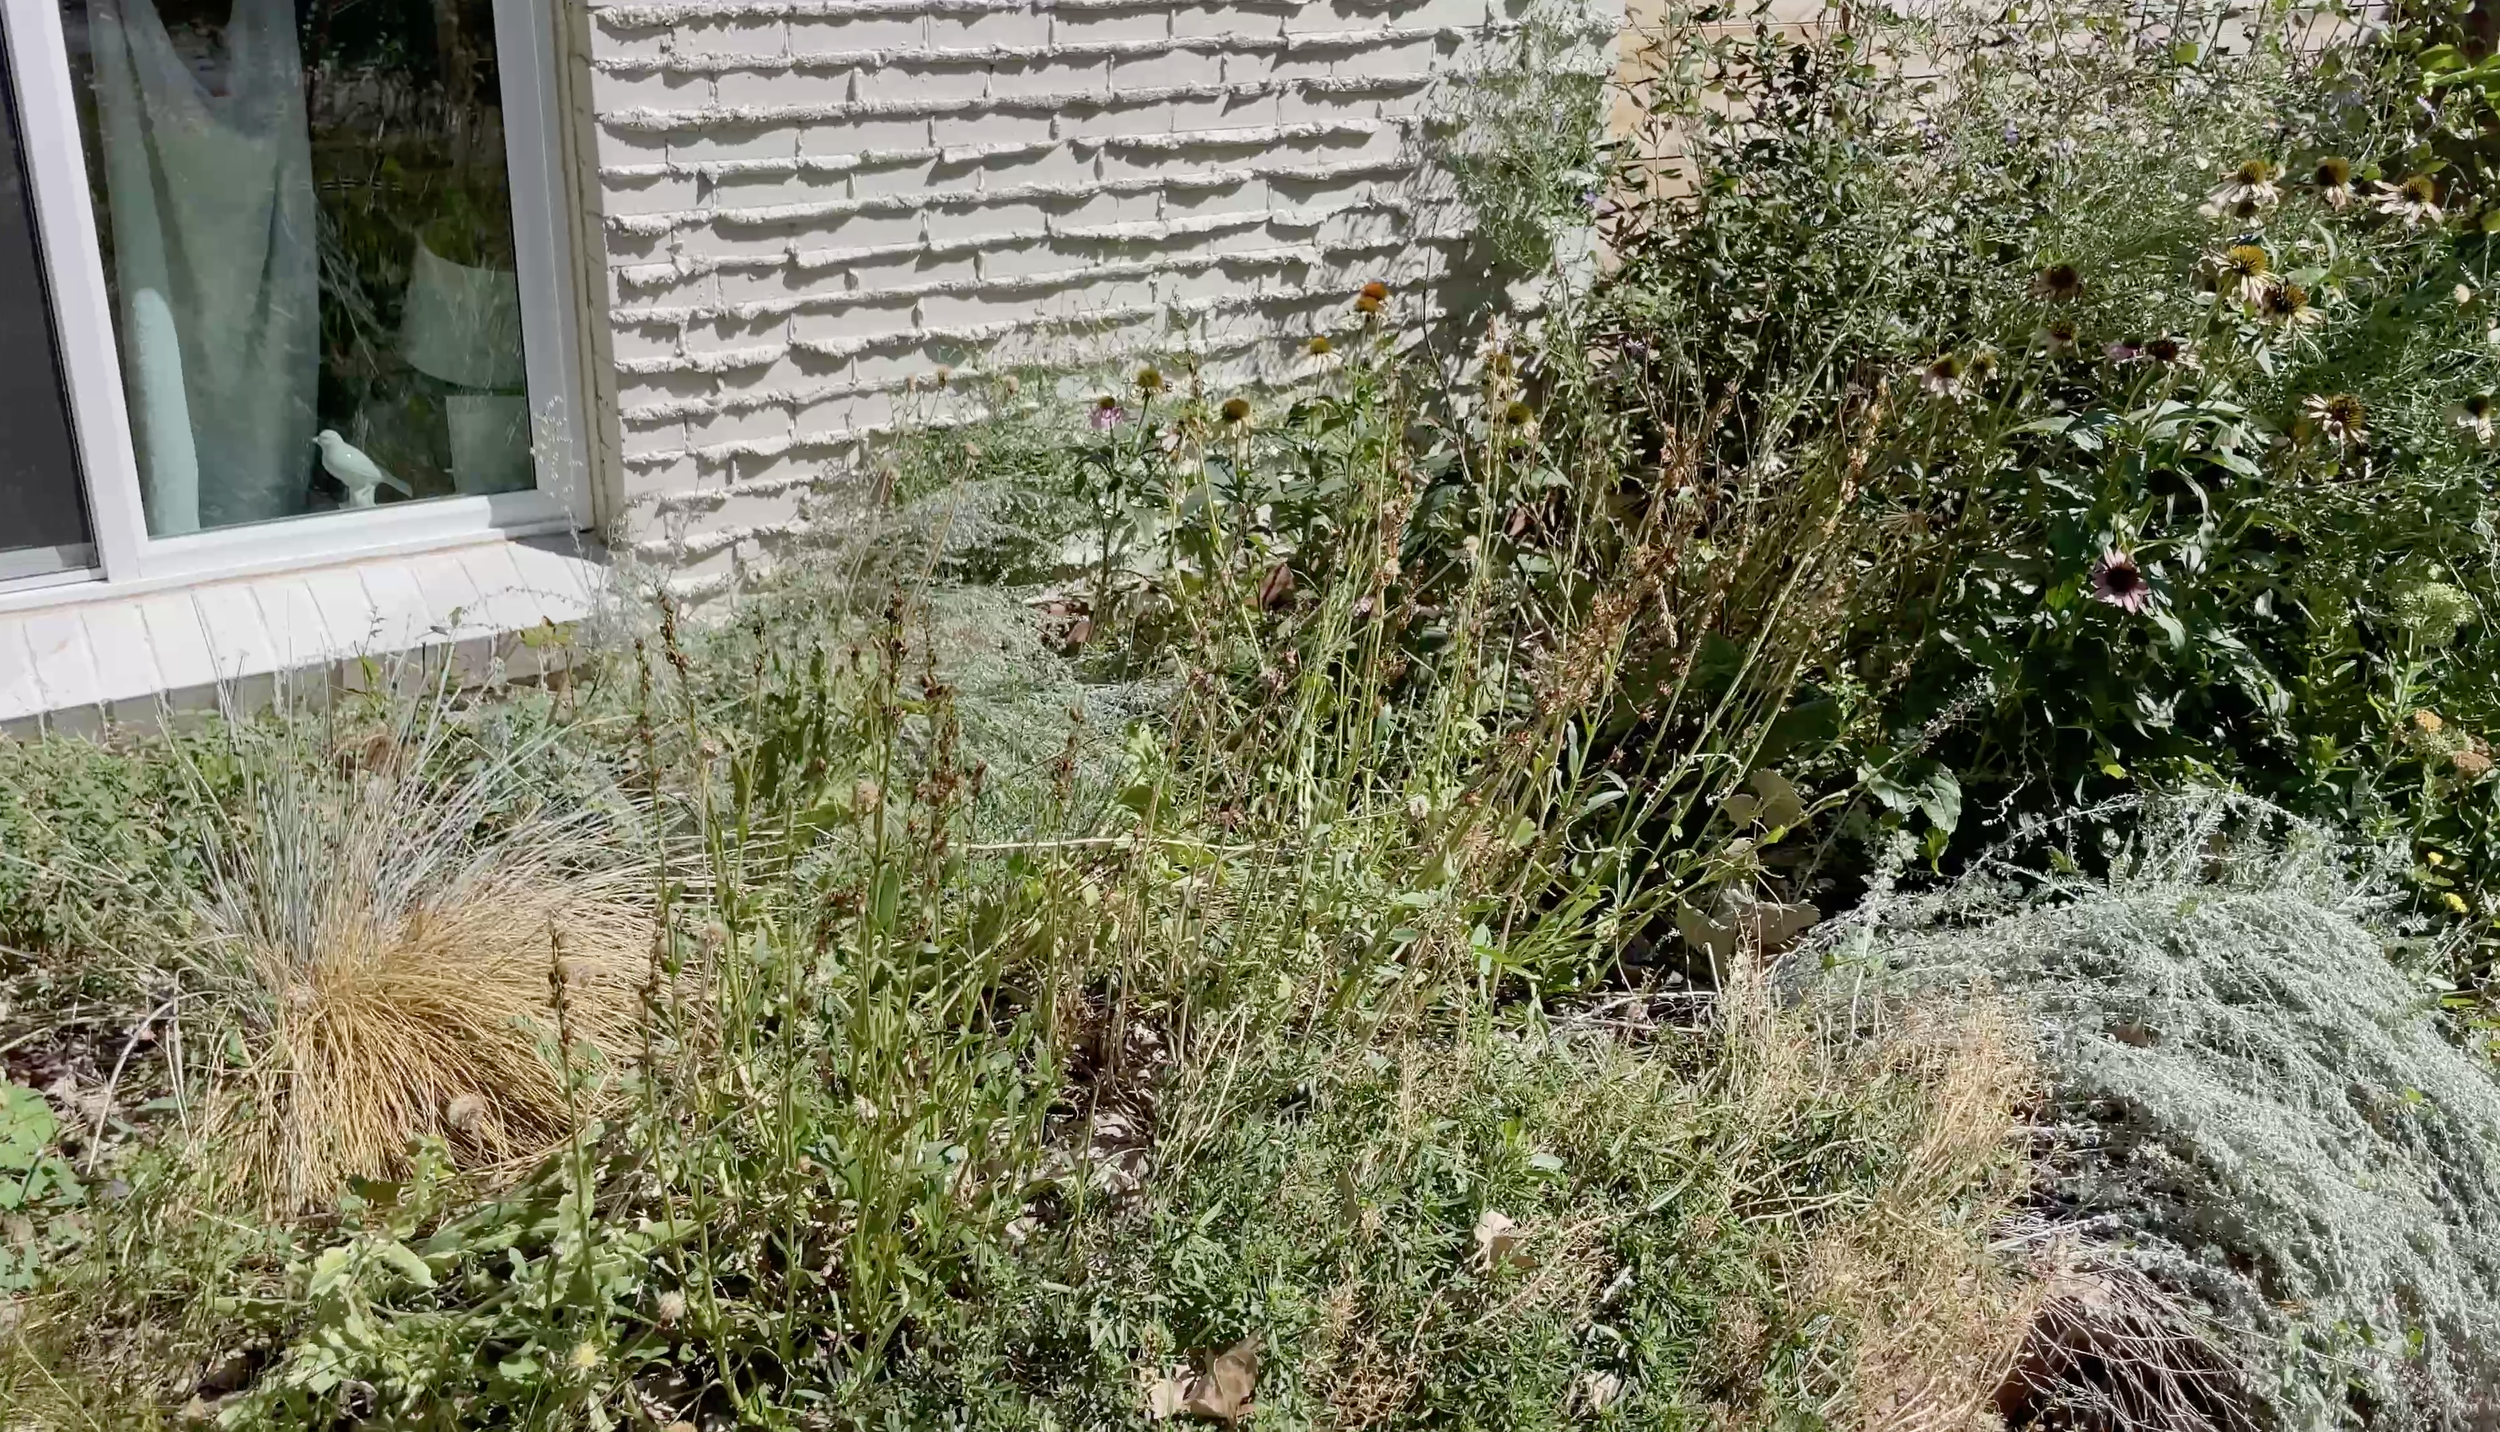
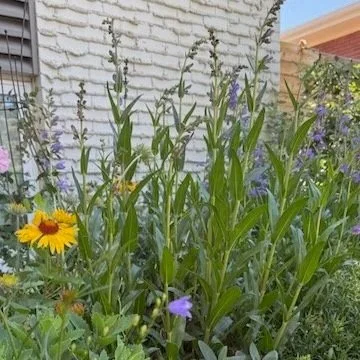
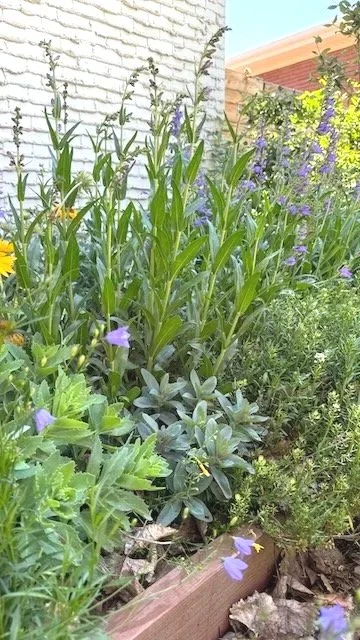
In my case, this garden bed had plenty of healthy plants — they’d simply outgrown their arrangement. Weeding had become difficult, access was limited, and parts of the bed (especially near the house) were too dry and hot for some of the original choices. A few of the original plants had died, and I didn't love the original arrangement – they blocked my office window.
Rather than tearing everything out and starting over, I focused on using what I already had, moving plants that still had life in them, and supplementing with a few well-chosen natives.
How to Move Plants & Refresh a Garden Bed
Here’s a peek into this garden bed renovation with a look at what I did, and how it looks 9 months later, too!
Observe the Site and Its Challenges
Before moving a single plant, it’s important to understand what your garden bed is telling you.
This particular garden bed:
Sits on the west side of the house
Receives intense afternoon and evening sun
Gets very little natural rainfall near the foundation and under the eaves
Reflects heat off the house wall
Those conditions immediately point to one thing: plants here must tolerate heat and dry soil. That was certainly true of the plants that were established. They had been chosen for their drought-tolerance and resilience. But the original planting scheme wasn't as full as I hoped, and it didn't flower as long as I wanted, so for several months each year it just looked… tired. And my office looks out onto it – I wanted it to be beautiful all year!
So I set out a few simple goals:
Put in a small stone path for weeding
Install a weeper hose for easier watering
Plant to frame the window and the view – rather than blocking it
More flowers – something in bloom every month from April - October
Use plants that attract and feed wildlife
This particular garden bed is 12 feet by 6 feet – a very nice size. It's framed out in pressure-treated lumber using the same method we have used for most of our raised beds. Super simple construction. Read about it here!
Improving Access With a Simple Garden Path
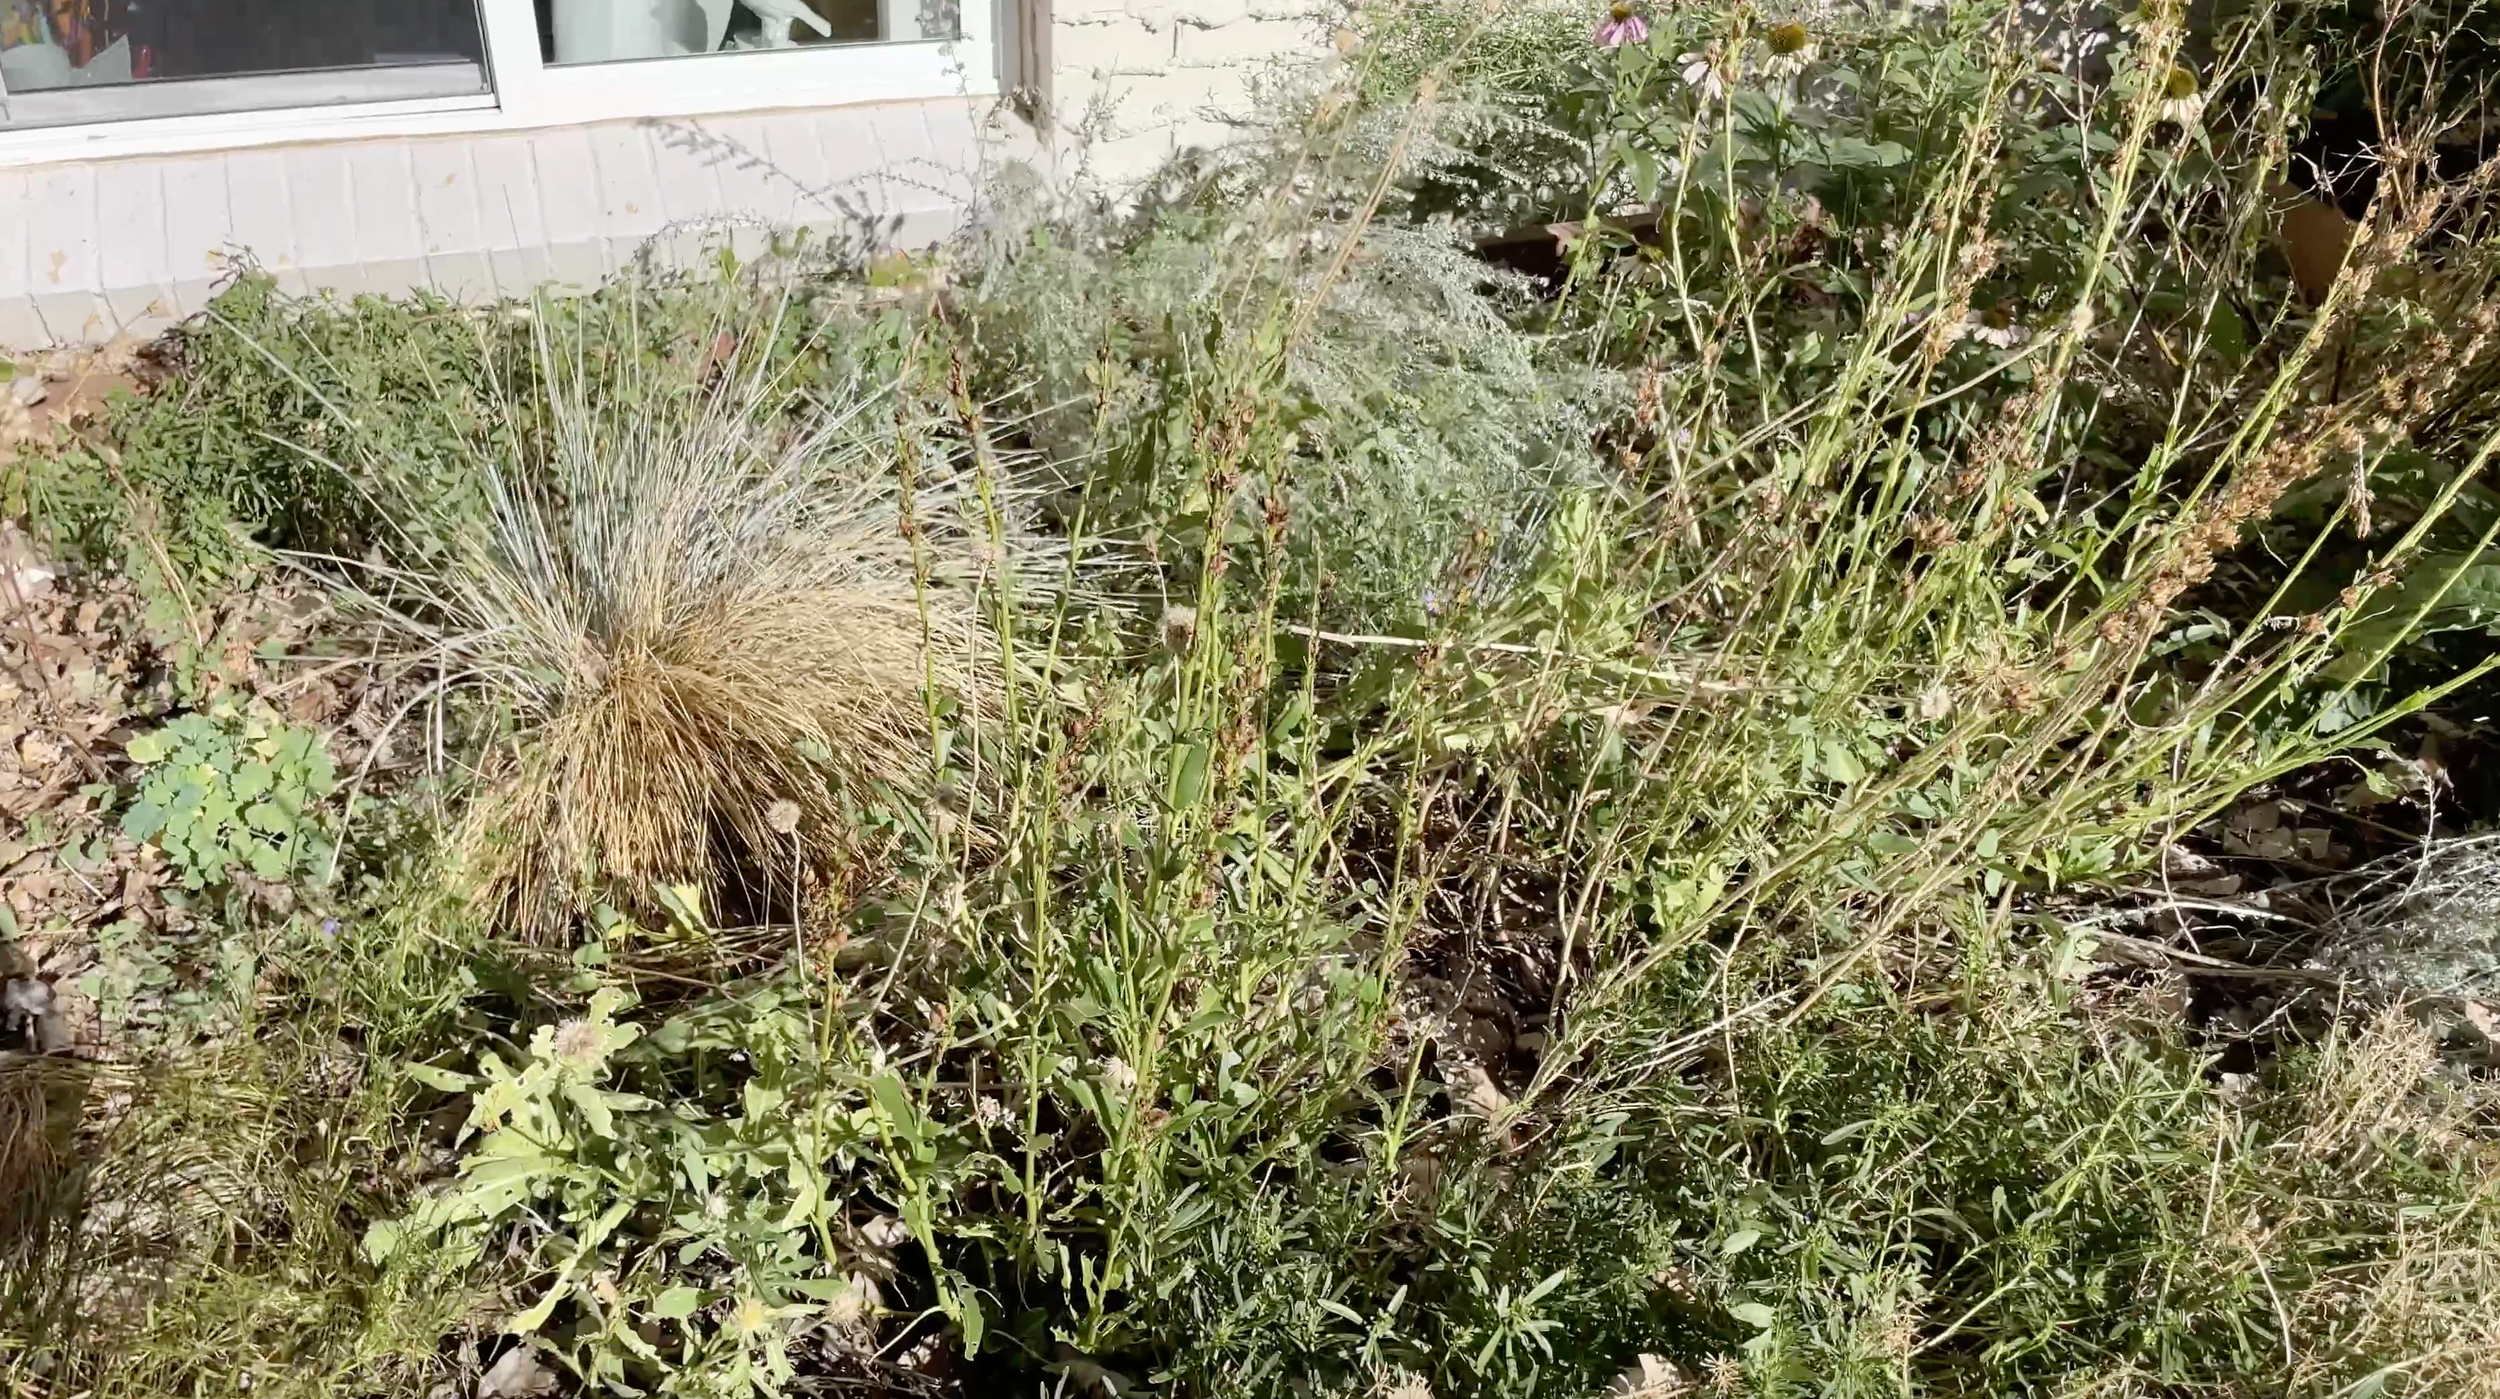
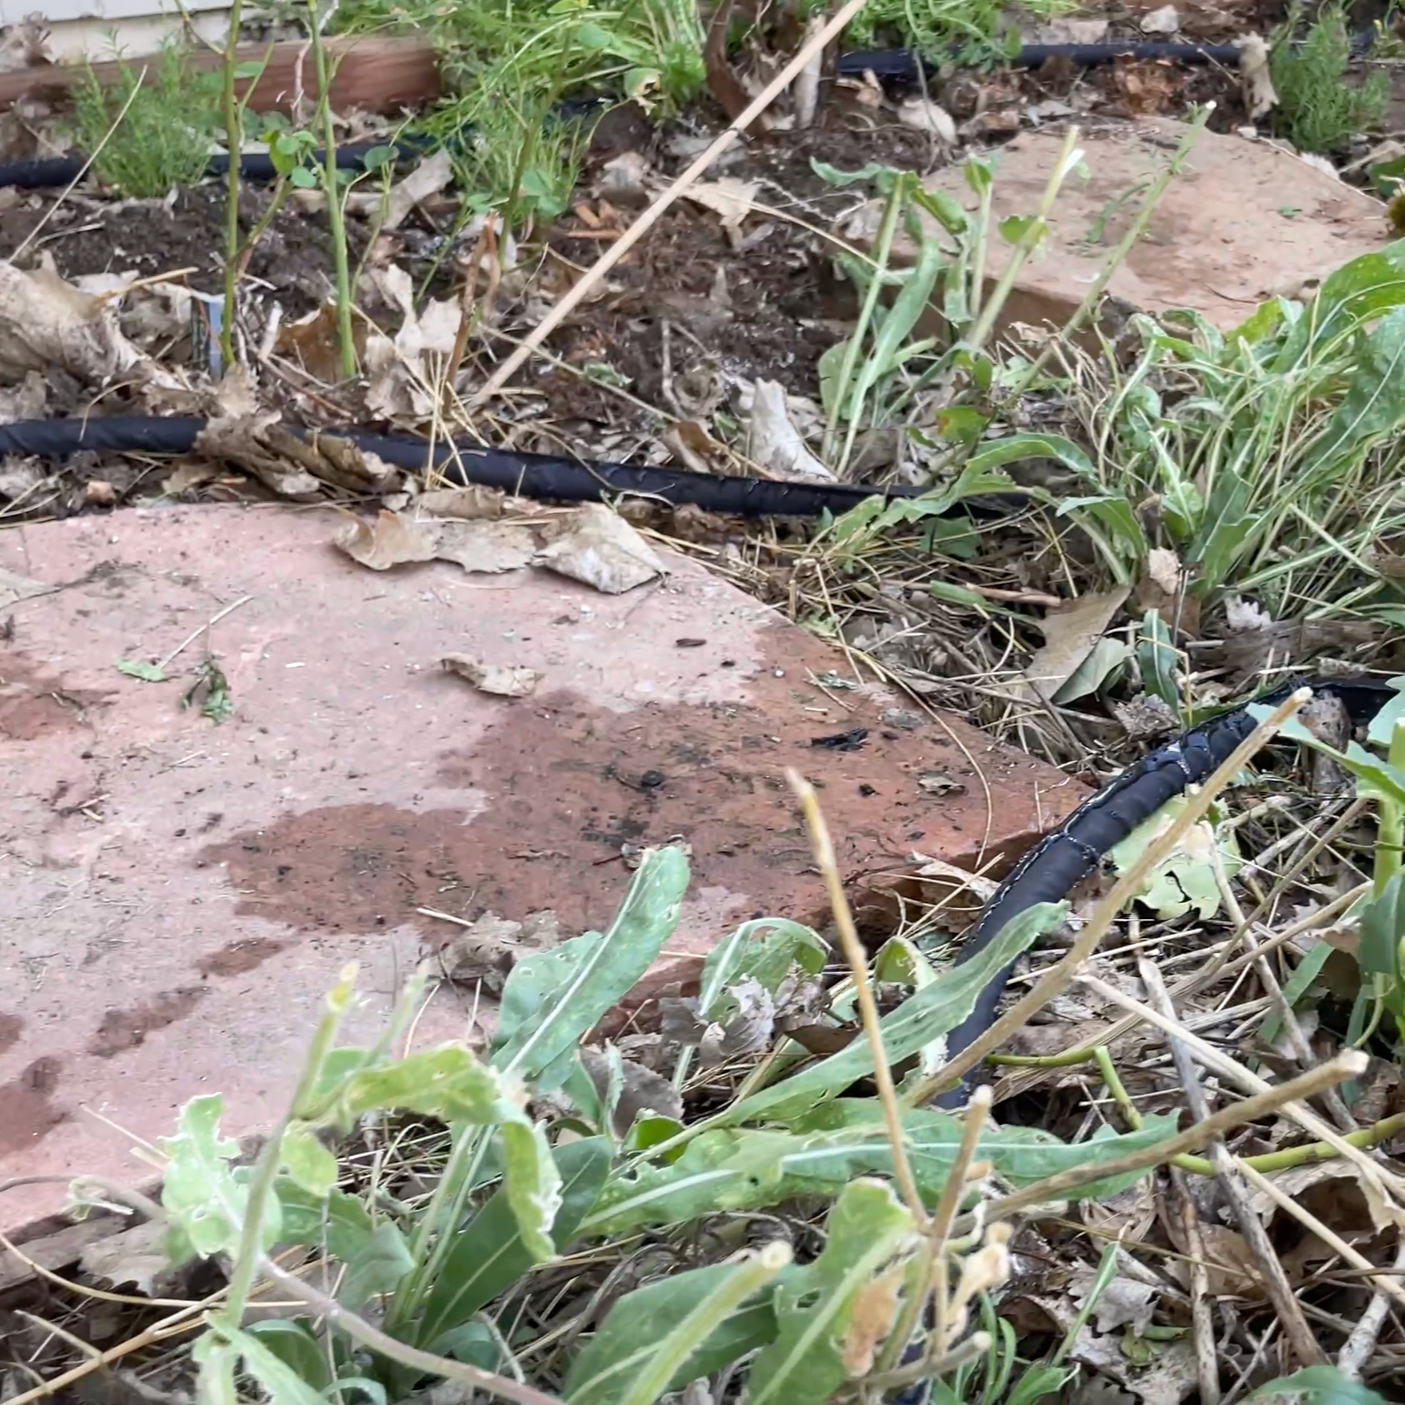
One of the biggest issues with this bed was accessibility. It was deep enough that reaching the center to weed or divide plants was genuinely difficult. And this location, like so many in my garden, is infested with Field Bindweed, so being able to weed the garden bed and to maintain the plants is critical.
The solution was simple: add stepping stones through the bed.
This small change made maintenance easier immediately and allowed me to keep the bed large and full — which is always a win for both aesthetics and wildlife. I had some large red stones which I relocated to make a center line through the bed. They are just big enough to give me a place to put my feet. But when the whole bed is grown up, they disappear into the foliage.
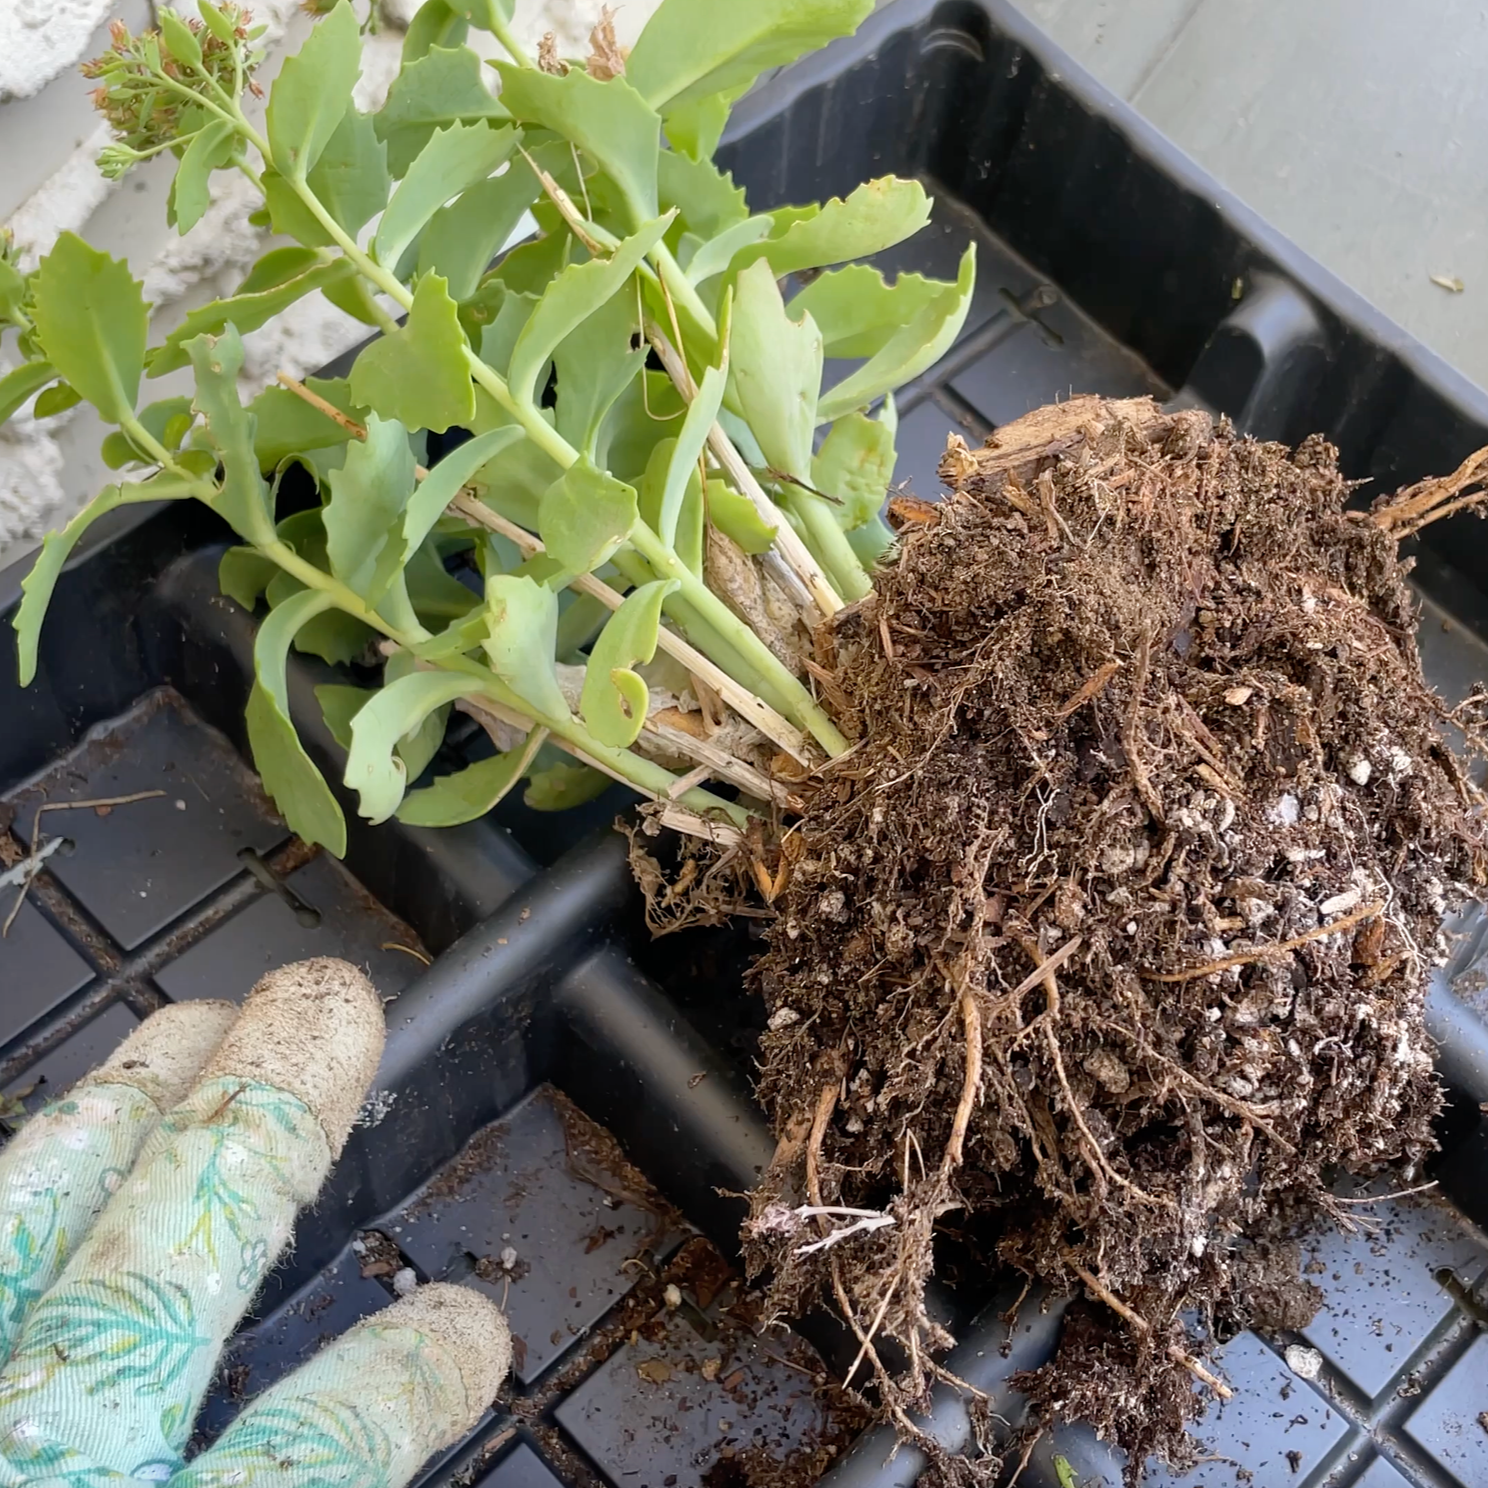
Don’t Be Afraid to Move Plants
Many gardeners hesitate to move established plants, but plants are more resilient than we often give them credit for — especially perennials.
When moving plants:
Dig up as much of the root ball as possible
Transplant during cooler weather when you can (late spring or early fall is ideal)
Water deeply and consistently after moving
In this project, I moved several perennials to better locations and divided others that had simply gotten too large. I reused some of these plants – like the Sedum which had clearly self-seeded – in the same bed. I clustered like plants together to give them more presence.
Others I moved to other beds nearby. If a plant isn’t thriving where it is, that doesn’t mean it’s a bad plant — it may just be in the wrong place.
And one plant which was absolutely thriving – a variety of Artemisia – set off a horrible allergy attack. So that went into the compost bin. There's no sense in having that kind of hazard in my garden!

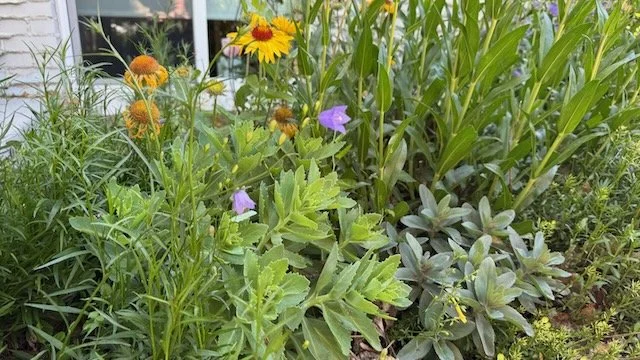
Designing With Native North American Plants
Every new plant added to this bed is a North American native chosen for drought tolerance, heat resistance, and wildlife value. I am fully committed to filling my garden with at least 80% native North American plants, and this is a great place to pack in some more.
Rather than worrying too much about color coordination, I focused on:
Matching plants with similar water and soil needs
Creating dense planting so bare soil disappears by mid-summer
Supporting pollinators and beneficial insects
Native plants often look good together naturally, because they evolved together — and they tend to require less long-term maintenance once established.
All of these plants are perennial in my area, too (Colorado, Zone 5|6). That's critical for me. I use annuals sparingly and focus on perennials because they are cheaper, less work, and more reliable over the long run. For more about annuals vs. perennials, check out this post.
Fall planting is especially effective for perennials. Warm soil allows roots to grow before winter dormancy, giving plants a strong head start in spring.
Drought and Heat-Tolerant Garden Bed
Full Plant List | Colorado Zone 5|6
Established Plants:
Sedum ‘Autumn Joy’ | Autumn Joy Stonecrop
Helictotrichon sempervirens | Blue Avena Grass
Campanula rotundifolia ‘Olympica’ | Blue Harebell
Iberis sempervirens | Evergreen Candytuft
Artemisia frigida | Fringed Sage
Gaillardia aristata | Native Blanket Flower
Aquilegia caerulea | Rocky Mountain Columbine
Penstemon strictus | Rocky Mountain Penstemon
Machaeranthera bigelovii | Santa Fe Aster
Echinacea tennesseensis | Tennessee Purple Coneflower
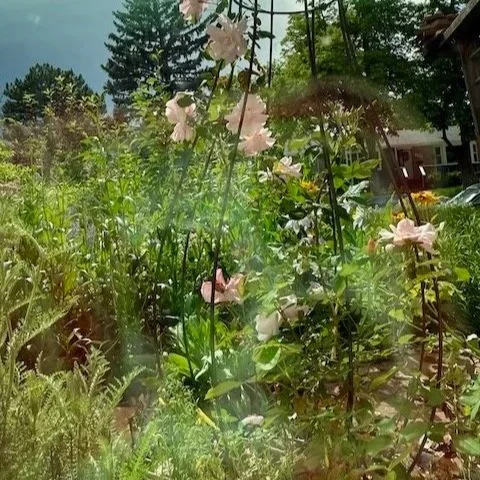
A Rose | Unknown Variety
Sedum | Unknown Variety
Daffodils
Alliums
New Additions:
Penstemon pinifolius 'Mersea Yellow' | Pineleaf Penstemon
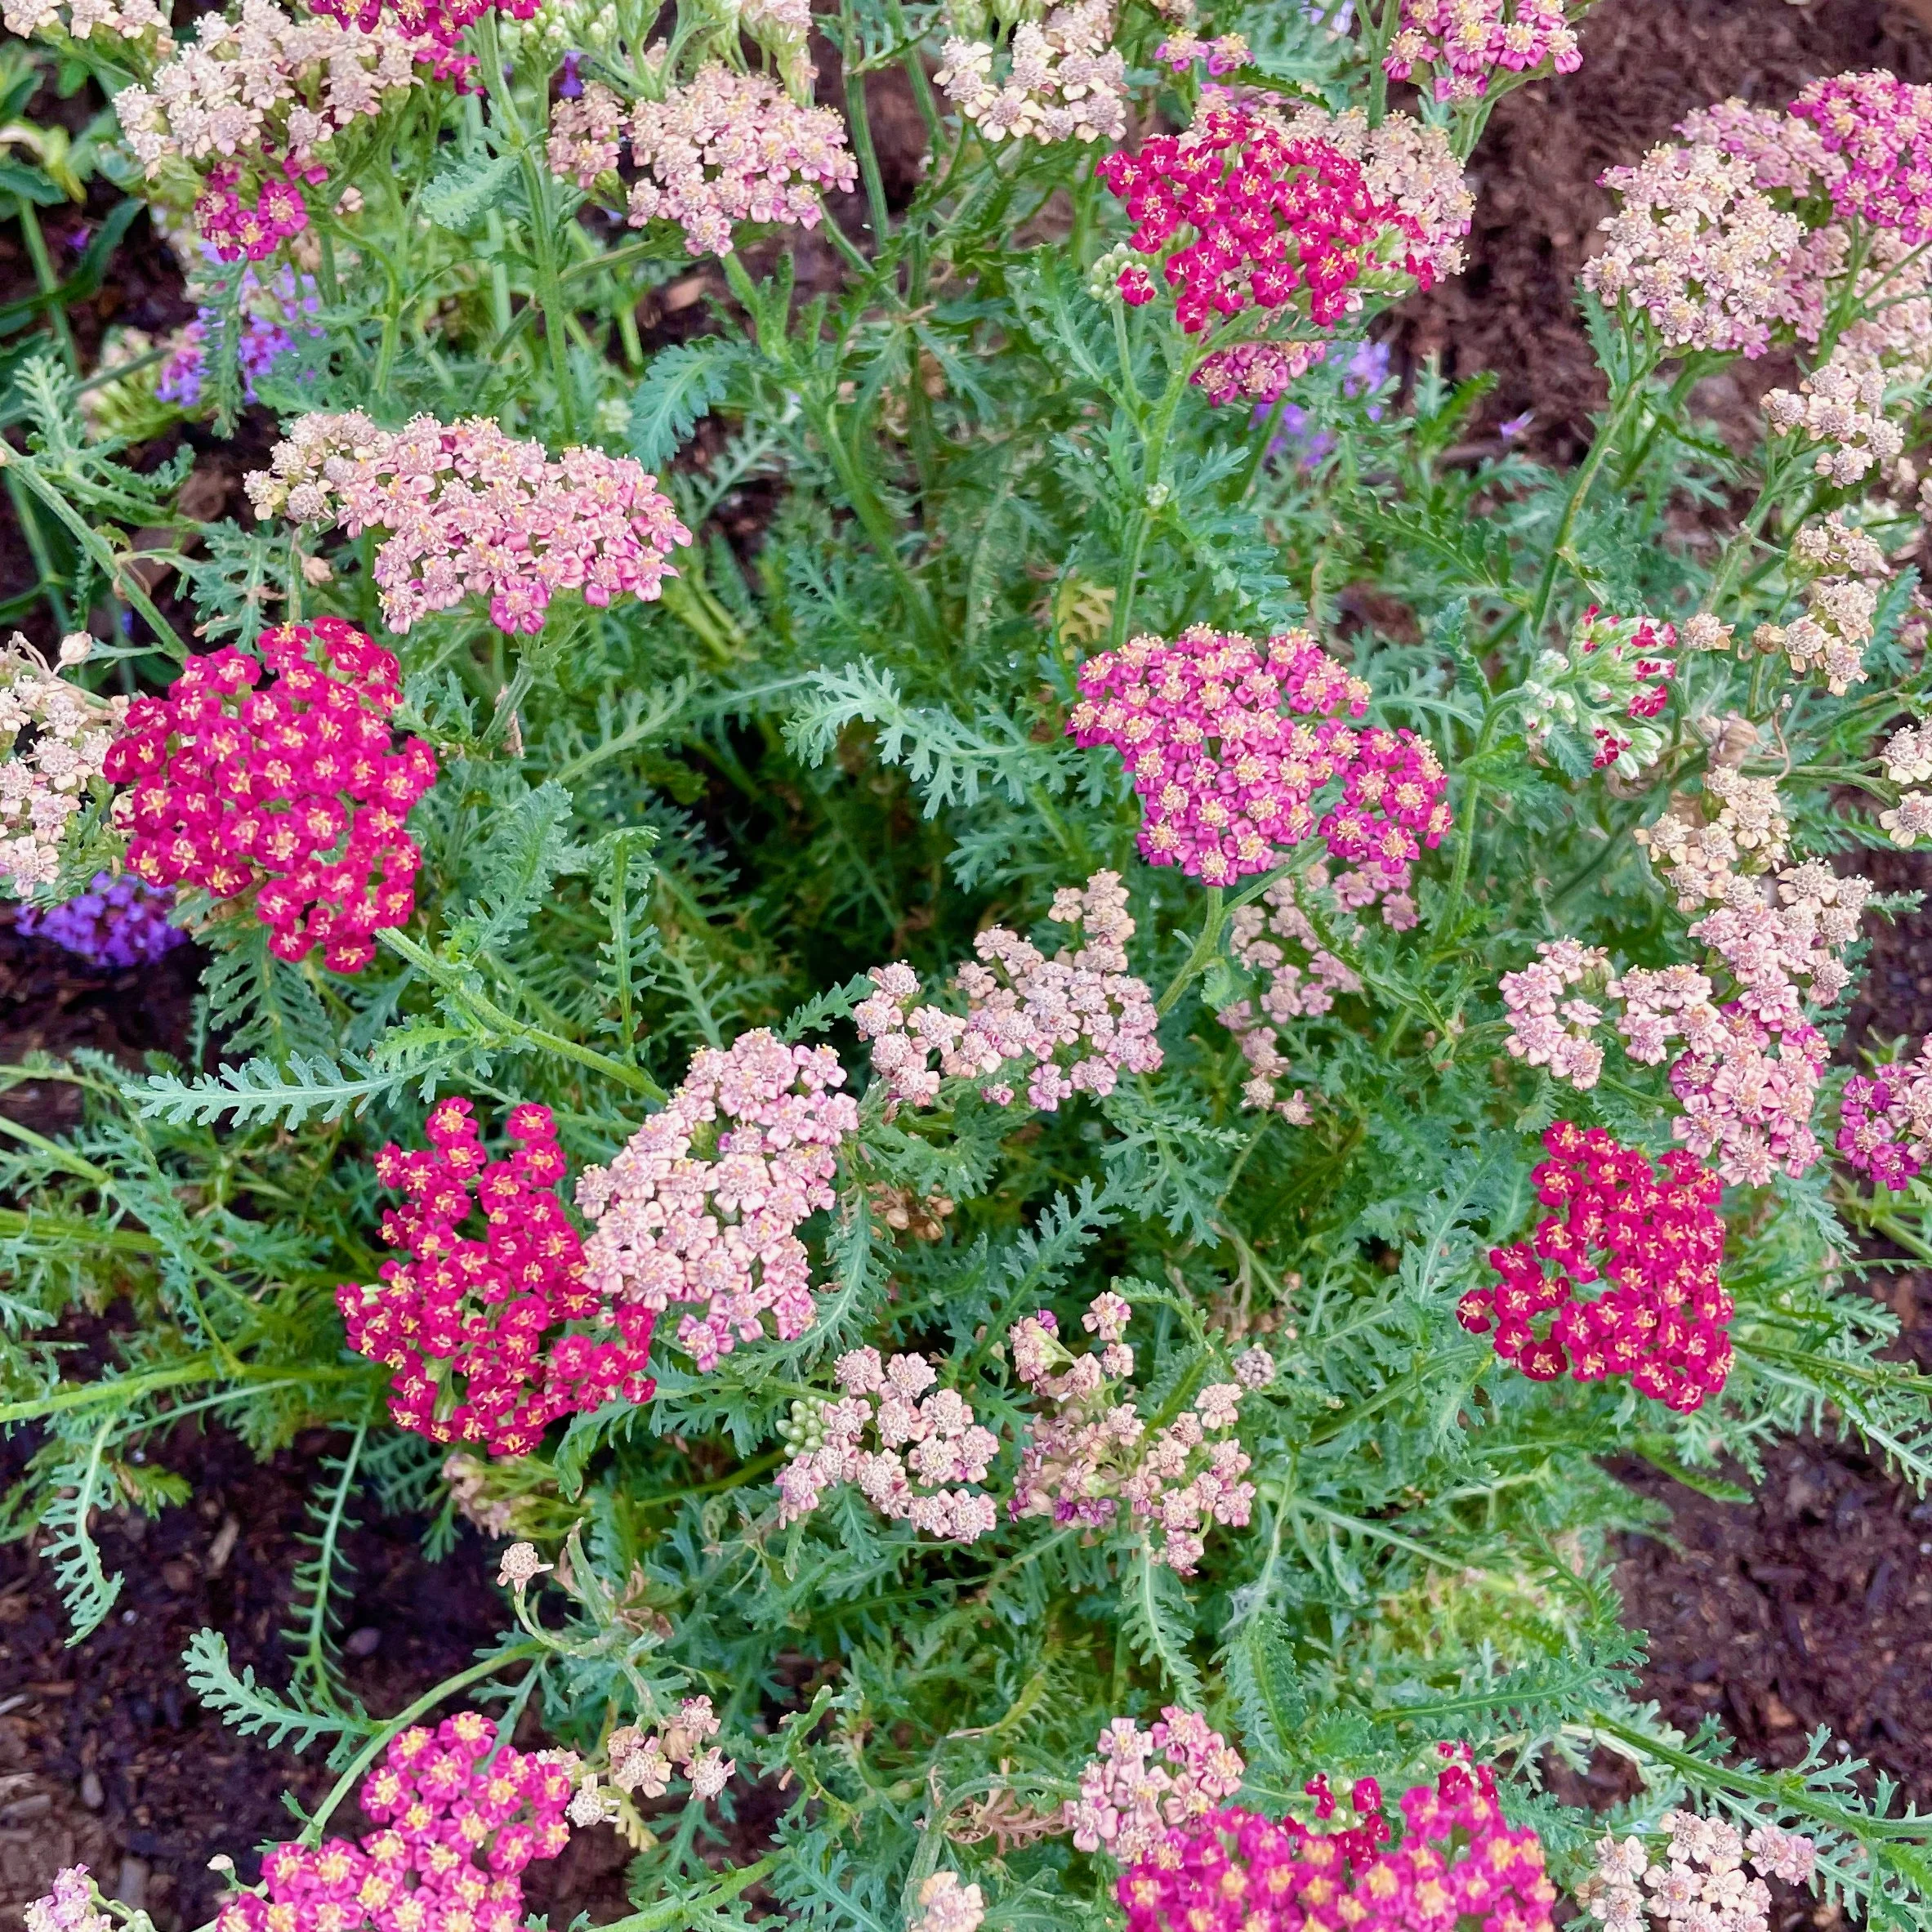
Achillea millefolium ‘Colorado’ | Yarrow
Gaillardia aristata | Blanketflower
Plant Placement Isn’t Just About Height
Traditional advice says to put tall plants in back and shorter ones in front — but real gardens aren’t always that simple.
Because this bed sits just beyond my office window which is at garden level, visibility mattered. I wanted:
A rose as a focal point that blooms all season
Lower plants near the window to preserve the view
Taller plants positioned where they wouldn’t block light
Designing for how you actually use and experience a space is just as important as following rules. So this bed doesn't have a traditional structure, but it works from both sides which is important for me. And I have a lovely view all year!
Watering & Mulching
After planting, I installed a soaker hose throughout the bed to ensure deep, consistent watering while plants establish. I covered the soaker hose with mulch to reduce evaporation and protect the hose from sun damage. I leave the soaker hose in all year round. When I need to water, I just hook it up to my garden hose and run it for an hour or so. I won't refresh the mulch until the soaker hose is exposed again. These plants don't need a lot of mulch. But I do chop and drop in this bed, so that discarded plant material acts as a mulch refresh, too.
Now that they are established, this bed only gets watered every two weeks or so. All of these plants are drought-tolerant. They can handle the heat, too. But I do water them to keep them healthy – especially because they get very little moisture from rain or snow due to their location.
The rose is the exception to this rule! I water the rose every time I water my front porch pots or anything else nearby. And I feed and mulch it like any other rose in the garden.
What to Expect Over Time
There’s a common saying with native plants:
The first year they sleep.
The second year they creep.
The third year they leap.
This bed already looks good, but it will continue to improve over the next several seasons. Gardening isn’t about instant perfection — it’s about patience, observation, and adjustment.
at the close…
Change is one of the few constants in gardening. Plants grow. Conditions shift. Some things work, others don’t.
Expecting a garden to stay exactly the same is a recipe for frustration — but embracing change is where the joy comes in.
Refreshing an established garden bed doesn’t require starting over. Often, it just takes:
Time
A willingness to move plants
A few thoughtful additions
And a lot of trust in the process
If you’re working with a tired or overgrown garden bed, take heart. With a little observation and some well-chosen native plants, it can become even better than it was before.
Happy Gardening!
Angela
Subscribe now so you never miss a thing!