DIY Garden Ponds and Water Features
Easy Ways to Attract Birds and Wildlife
When we started to plan this garden, one of the things that was most important to my entire family was putting in a pond. Partly, I wanted the romance and beauty of water as a reflective surface. I love the integration of water with plants. I mean what grand garden doesn’t include water? So as we laid out the initial plans for our garden, one of the first additions was a pond.
But we did not have the budget for some big, excavated, professionally-installed pond with a waterfall and the whole shebang. We needed something that was a DIY solution that wouldn’t take very long to install.
And it needed to be inexpensive.
Since installing that first pond, which I will tell you all about, I have actively sought out different ways to incorporate water into our garden, because almost immediately after putting in that first pond, the wildlife found it and declared it their own. The benefits for our local wildlife were immediately apparent. And it was so exciting to watch! It was a tangible, visible sign that what we were doing was working.
Now, six years later, I consider a pond to be a giant neon sign for wildlife. It tells them: welcome! And they may find the pond first, but then they find the seedheads and the shelter and the delicious leaves and the pollen and the nectar and insects and everything else that we have laid out in our voluptuous buffet for wildlife.
And the benefits aren’t just for wildlife. Having a pond brings the potential for a whole different type of gardening with all kinds of different plants. It adds a beautiful focal point and an incredible place to sit and to be in the garden.
And as it turned out, that first garden pond was just that — the first of many.
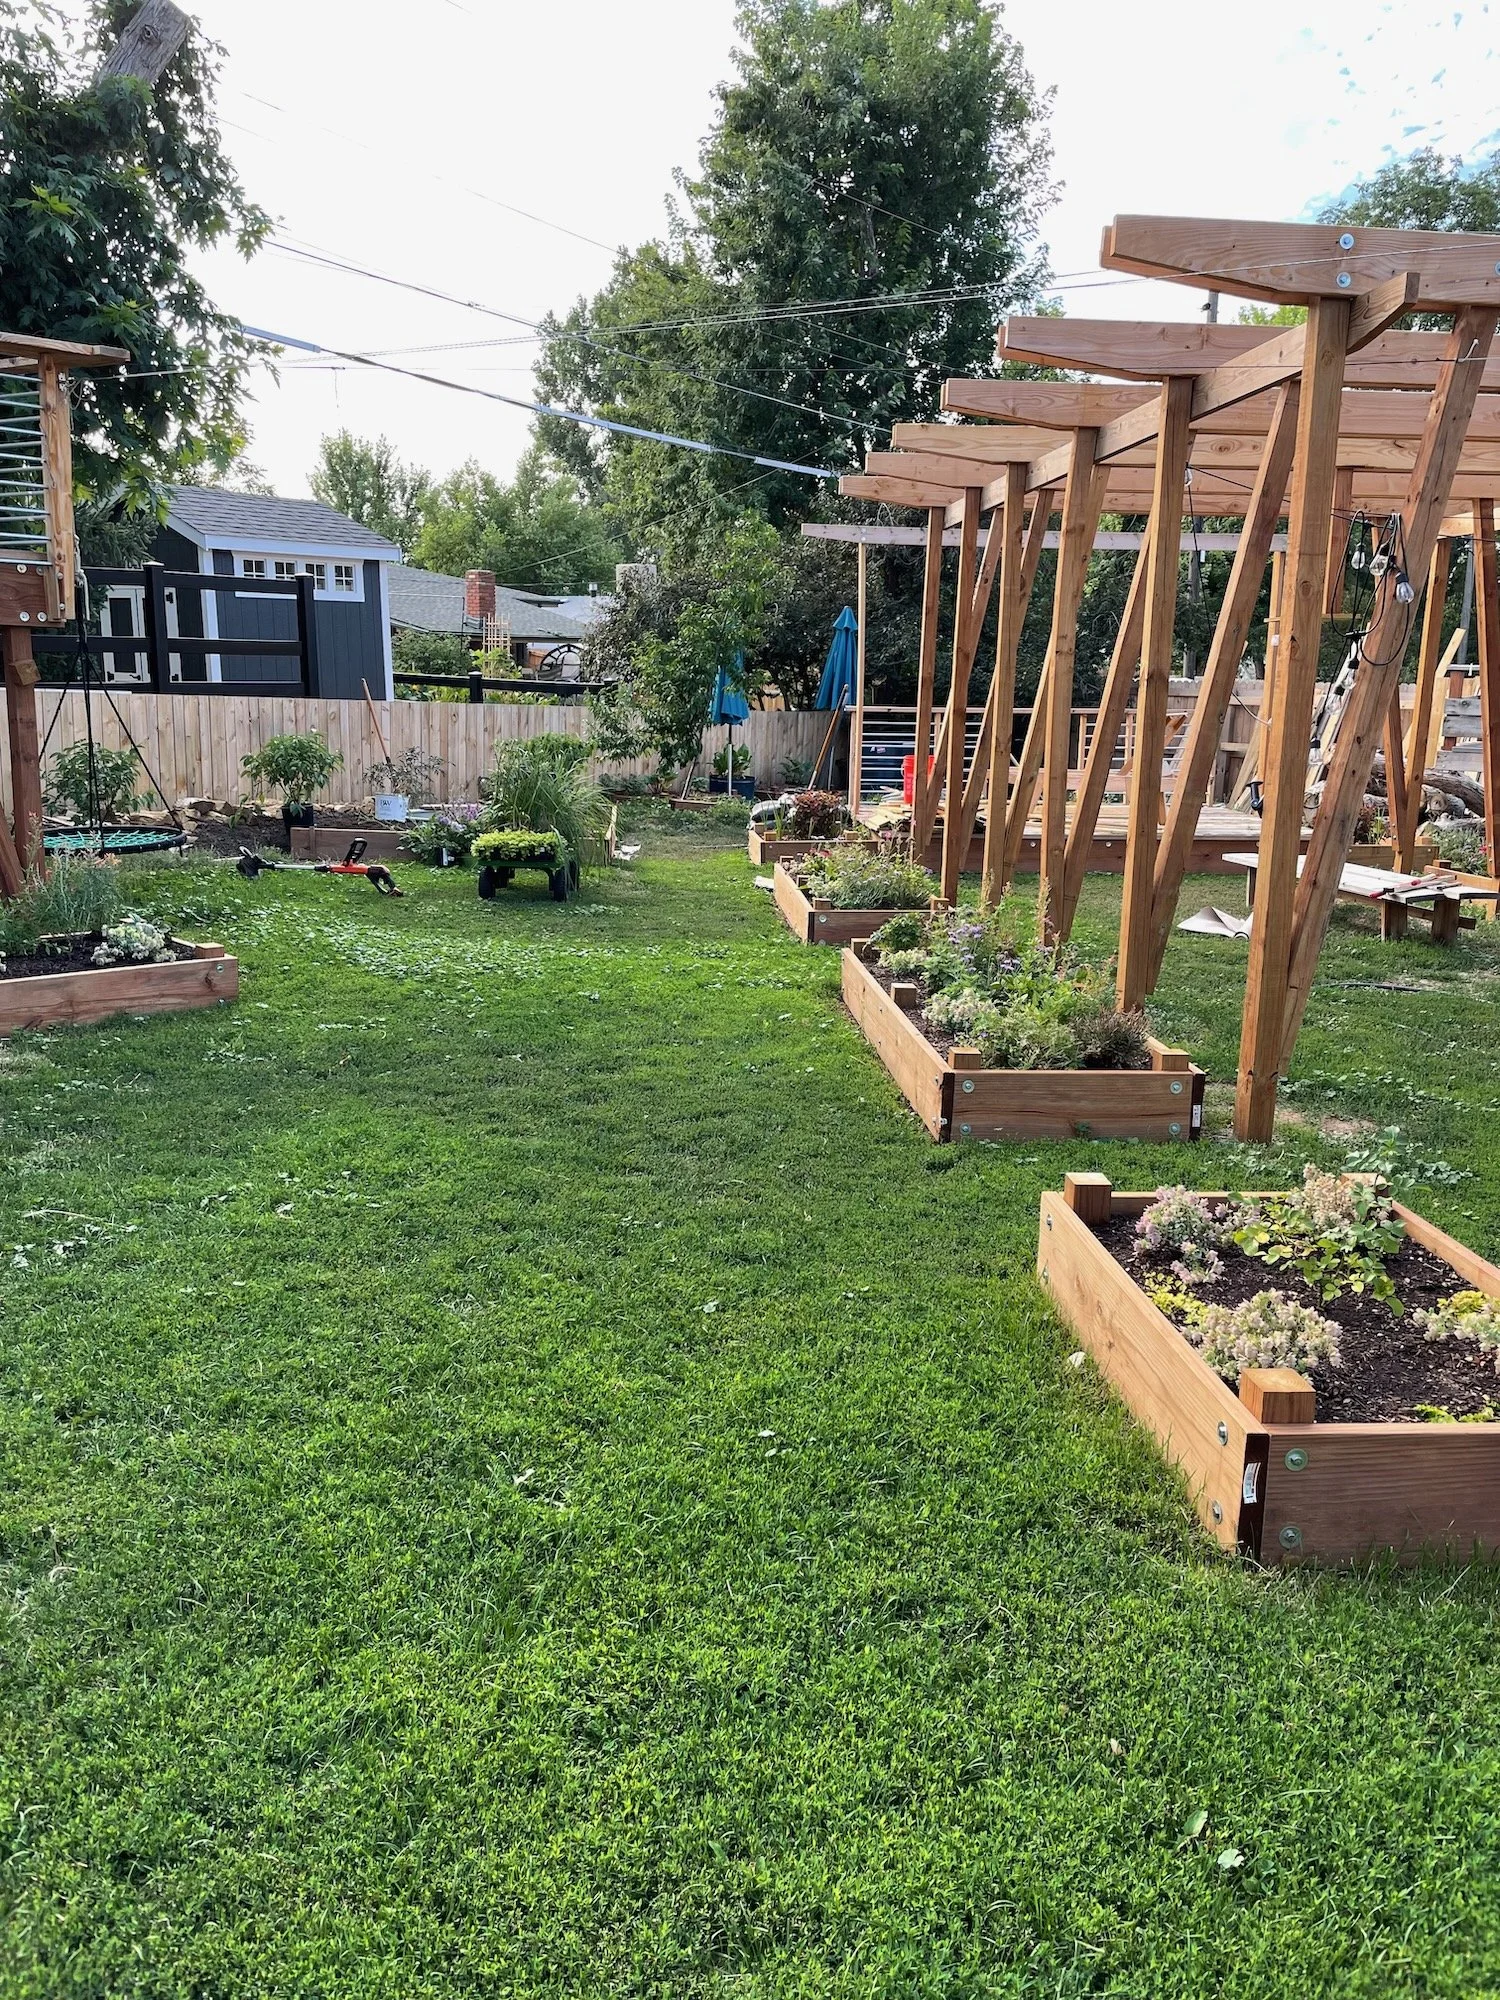
So today, I’m going walk you through the myriad ways that I have incorporated water into our garden. From our main pond to our fountain to the other smaller water sources that we have scattered about. These are all DIY projects. Every single one of them is done on a minimal budget. And every single one is clearly used and appreciated by the creatures with whom we share a garden.
The Large Pond
So let’s start at the beginning: our very first pond. Our site plan called for a pond at the end of what we call the Grand Garden. This is a long grassy area that is now planted out with Dog Tuff grass. However, when we started this project it was just weeds that we kept neatly mowed. This expanse (and that makes it sound big – it isn’t) iss the place for dogs and kids to play.
So we put the pond at the end of that long stretch.
Now at that end of the garden, the soil is an absolute mess. In the 1980’s the homeowners here covered a quarter of the backyard with what must have been a foot of play sand and built a play structure. When they were done with that era in their lives, they covered the sand with a few inches of topsoil. So we have three or 4 inches of topsoil, then eight or more inches of play sand, and then heavy clay soil. The weeds don’t even want to grow back there. Nothing can grow in that.
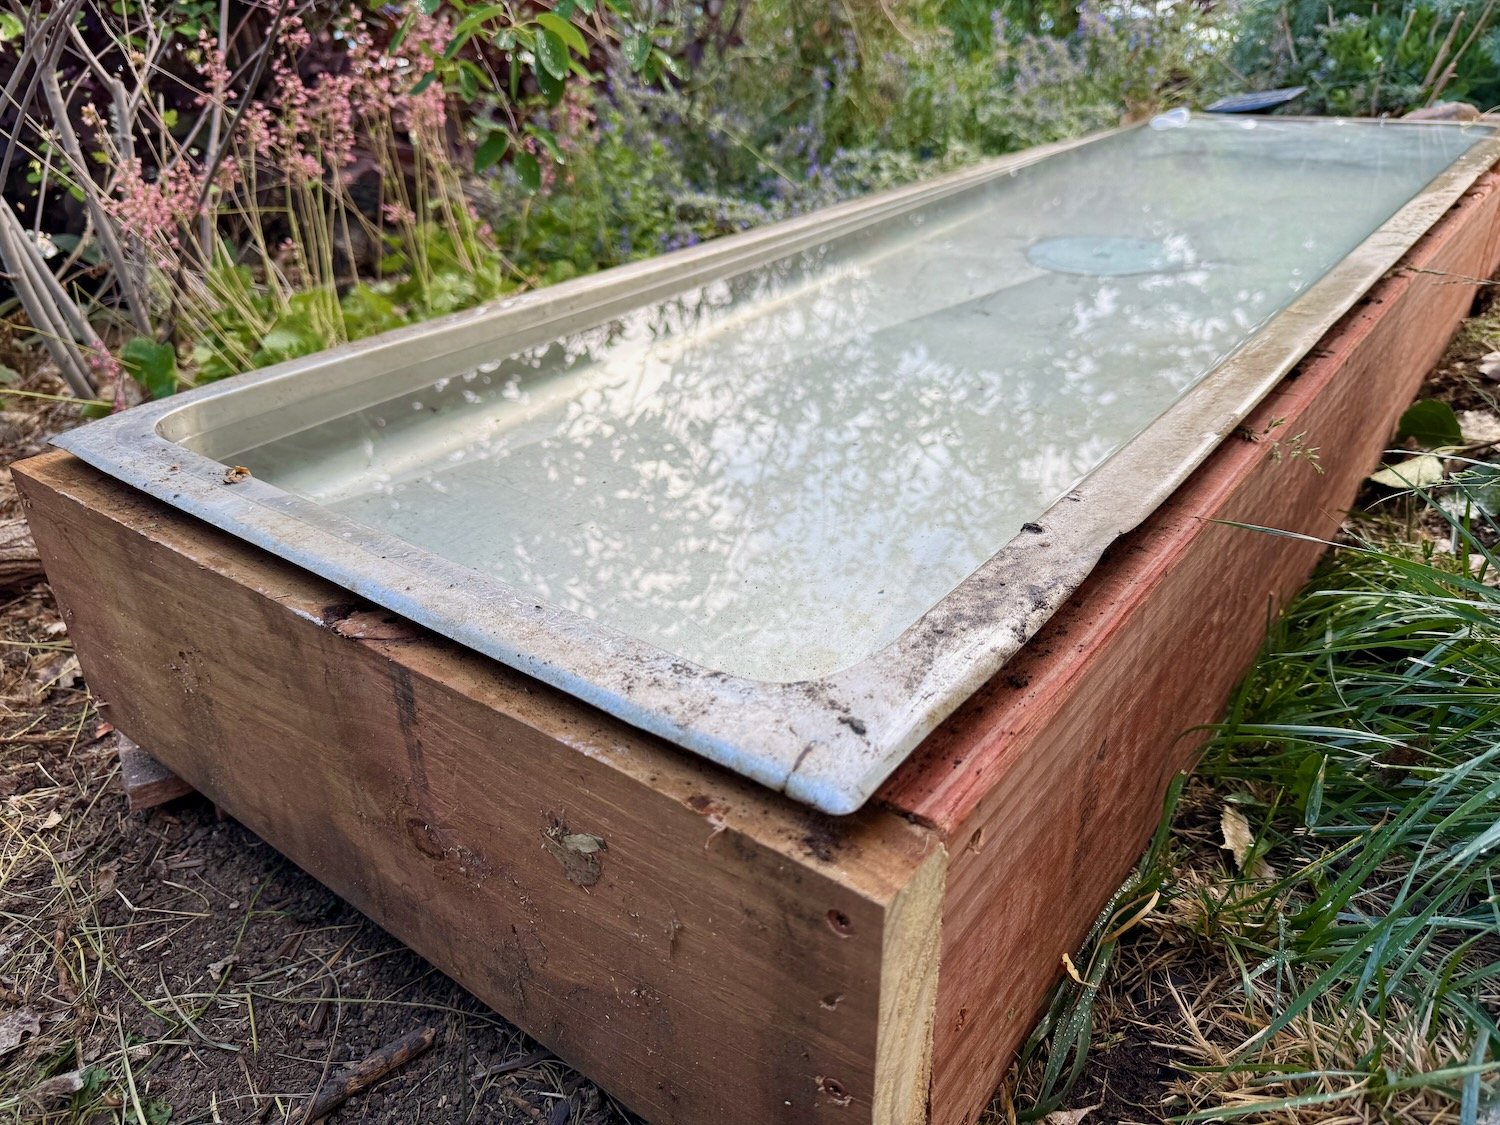
But I wanted a lovely pond surrounded by plants. So we built a raised bed.
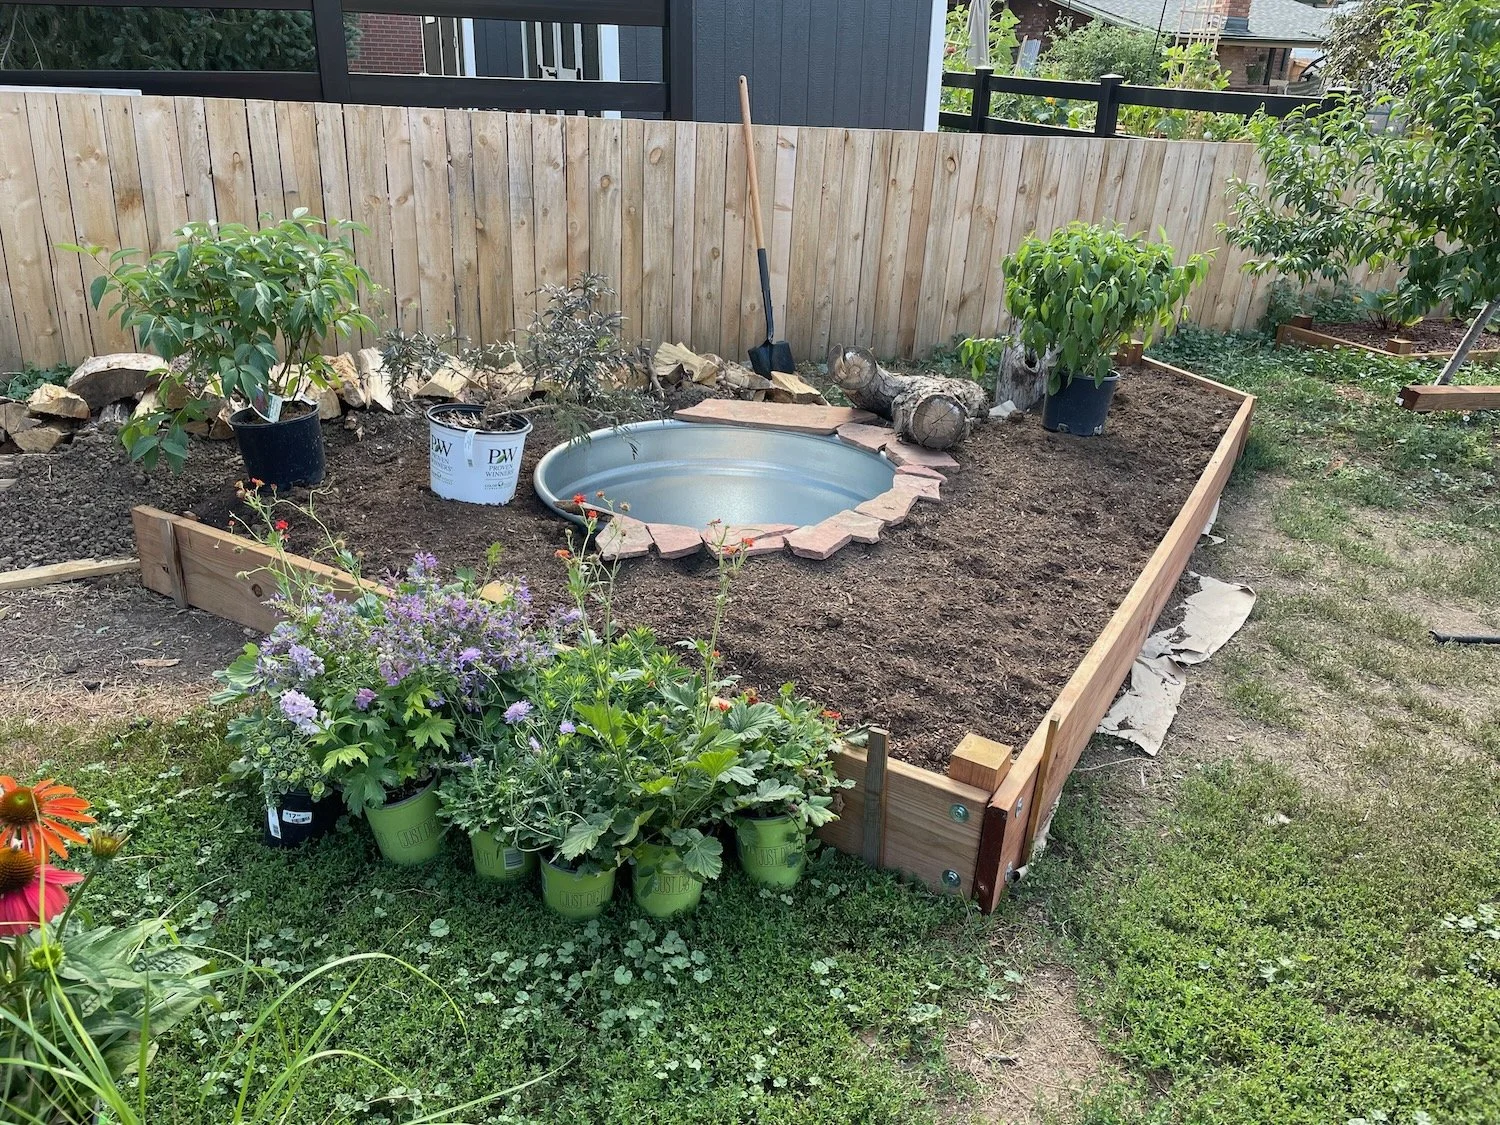
The Pond Garden bed during construction.
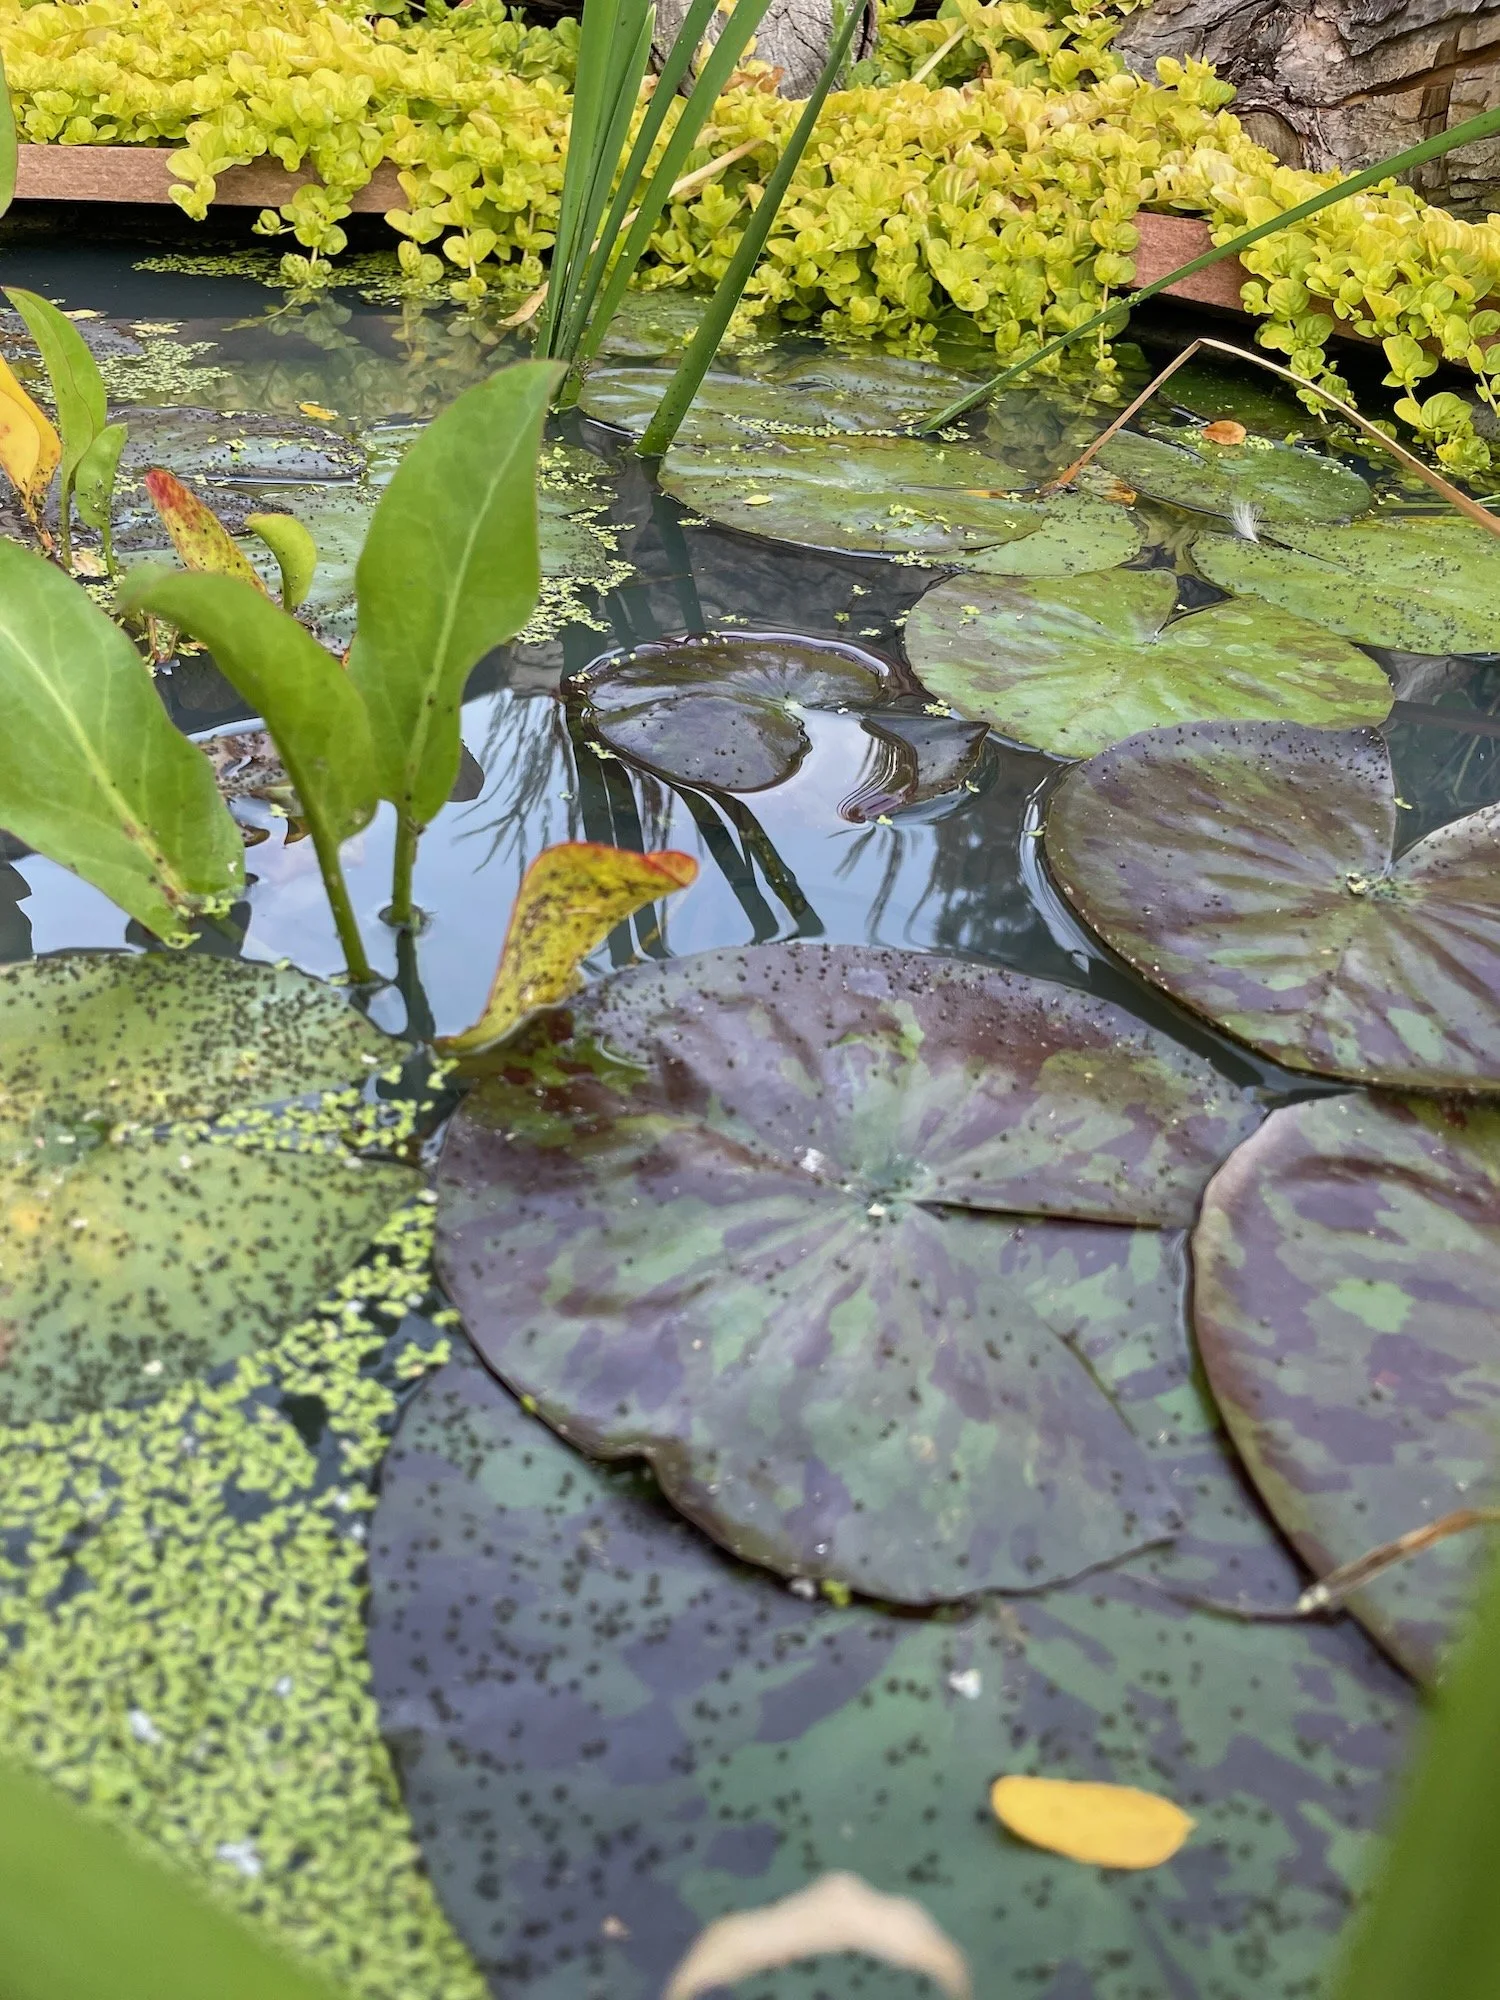
On the advice of my uncle, Dr. Todd Livdahl, who is a mosquito expert, we went to a local pond and scooped up several inches of pond muck from the bottom. We poured this on the bottom of the pond and then filled it with water.
We did all of this in the fall, so we didn’t even add water plants until the next spring. But right away the birds showed up. So did squirrels. And in the spring: ducks arrived. It was quite remarkable how quickly everyone discovered our pond.
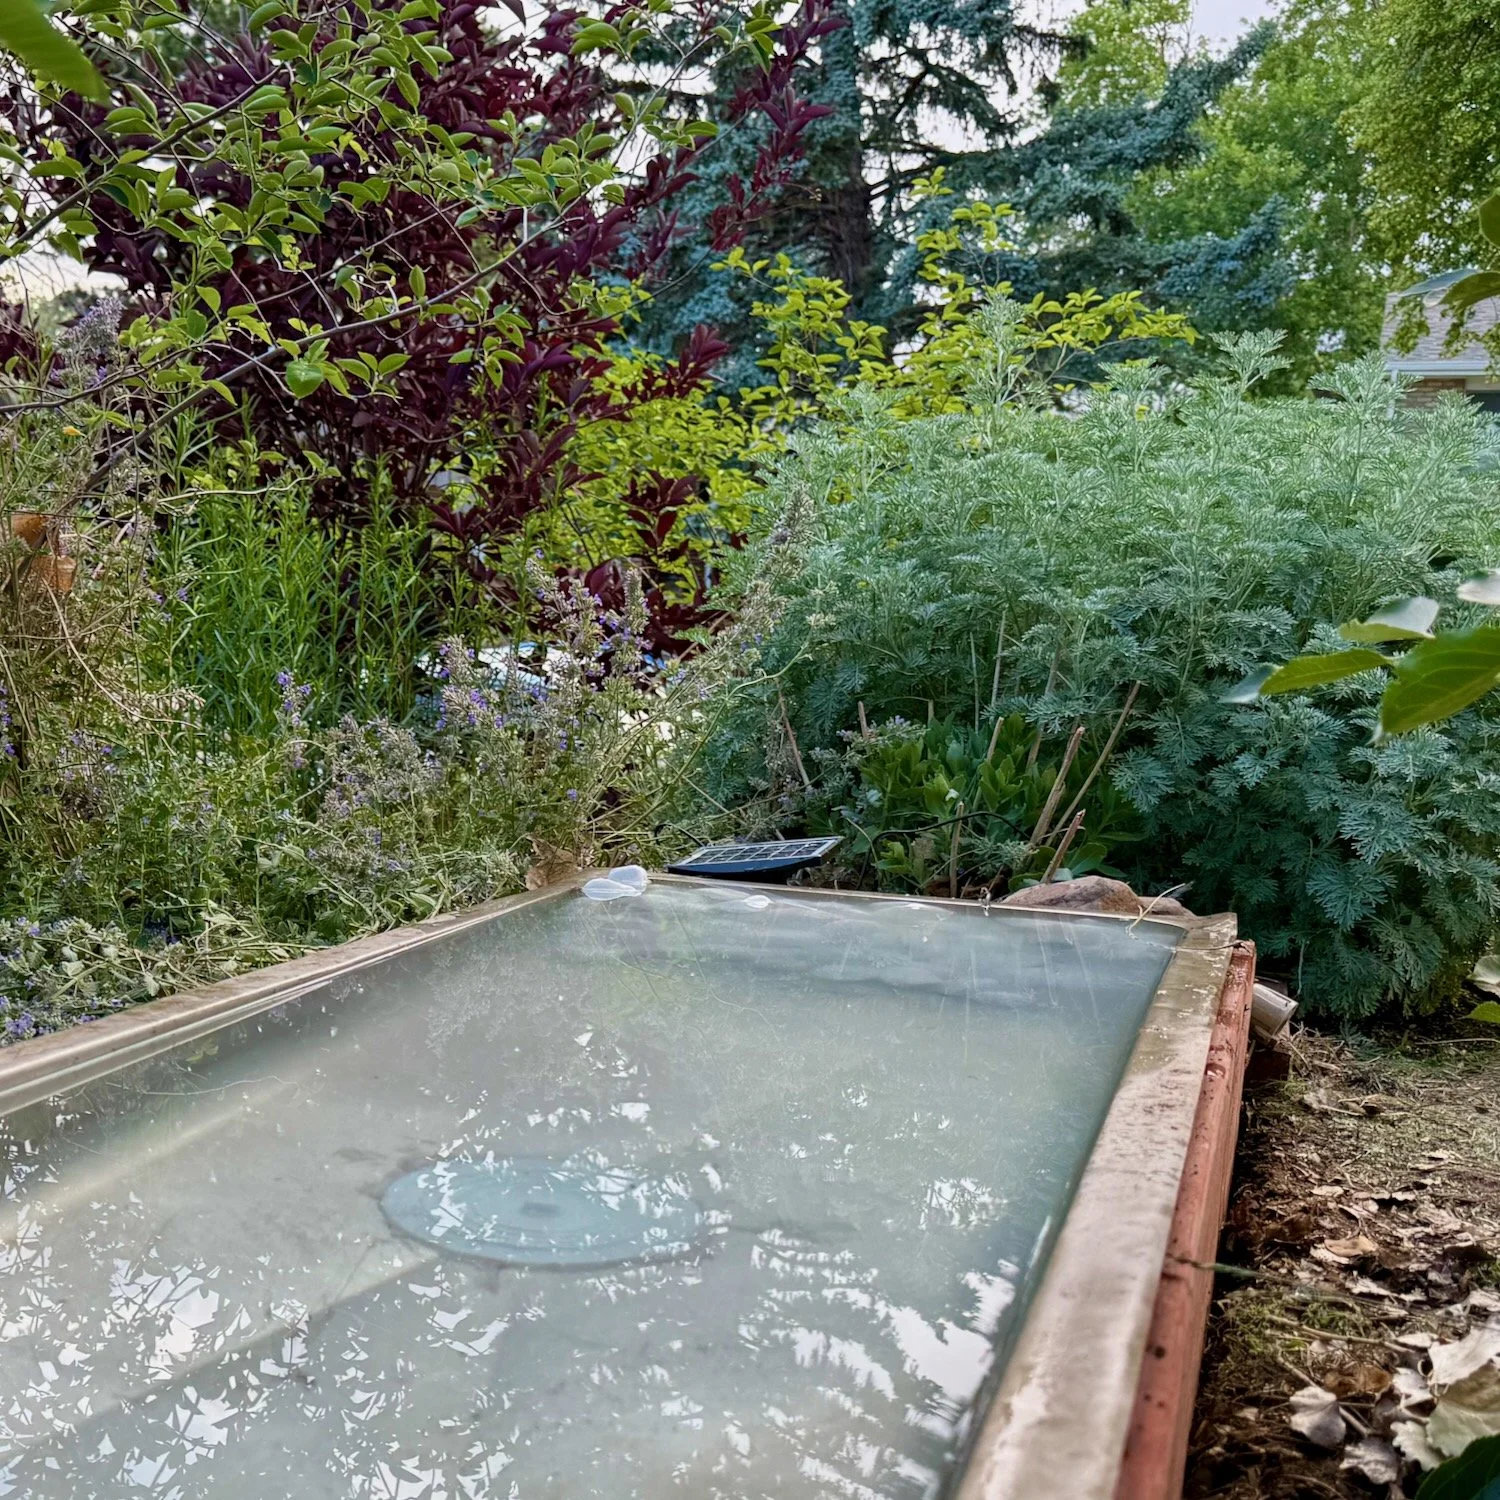
The Pond Garden bed when it was first planted out.

That is what we have done in many parts of our garden. In this case, the raised bed was designed to house the pond. And we decided to mirror the stock tank pool with a pond also made from a stock tank.
It worked brilliantly! We built the raised bed, placed the stock tank inside and then filled the raised bed. The plantings are largely drought-tolerant plants, and the pond is an oasis!
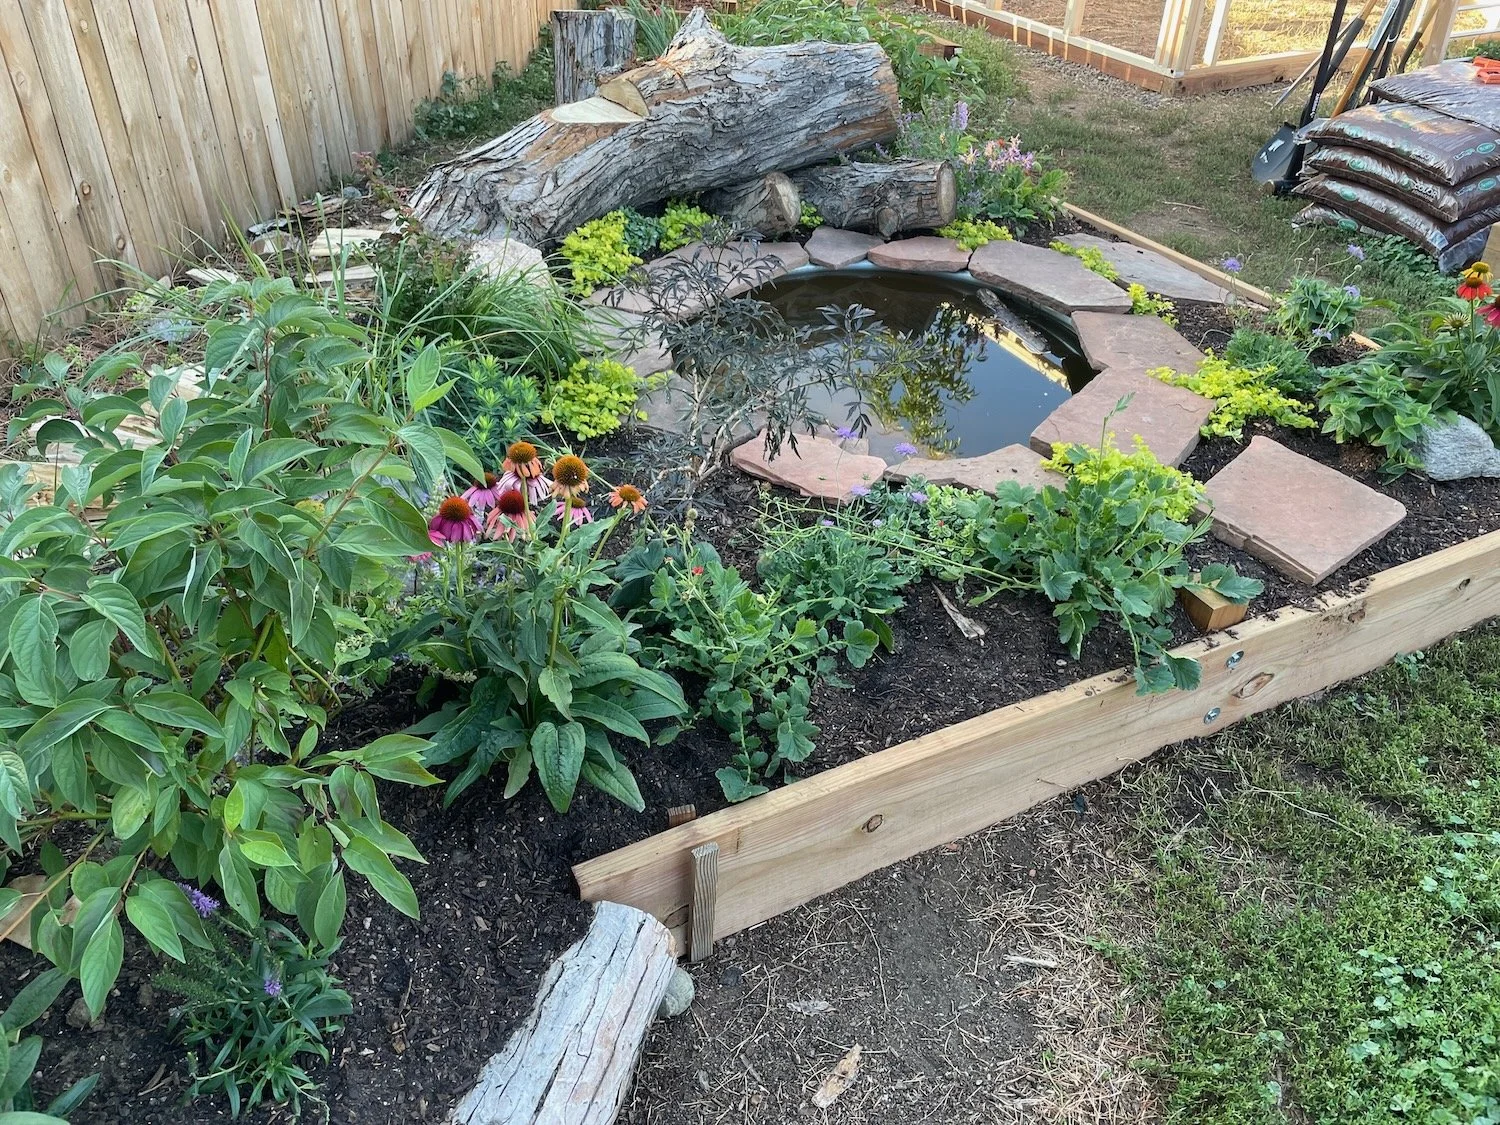
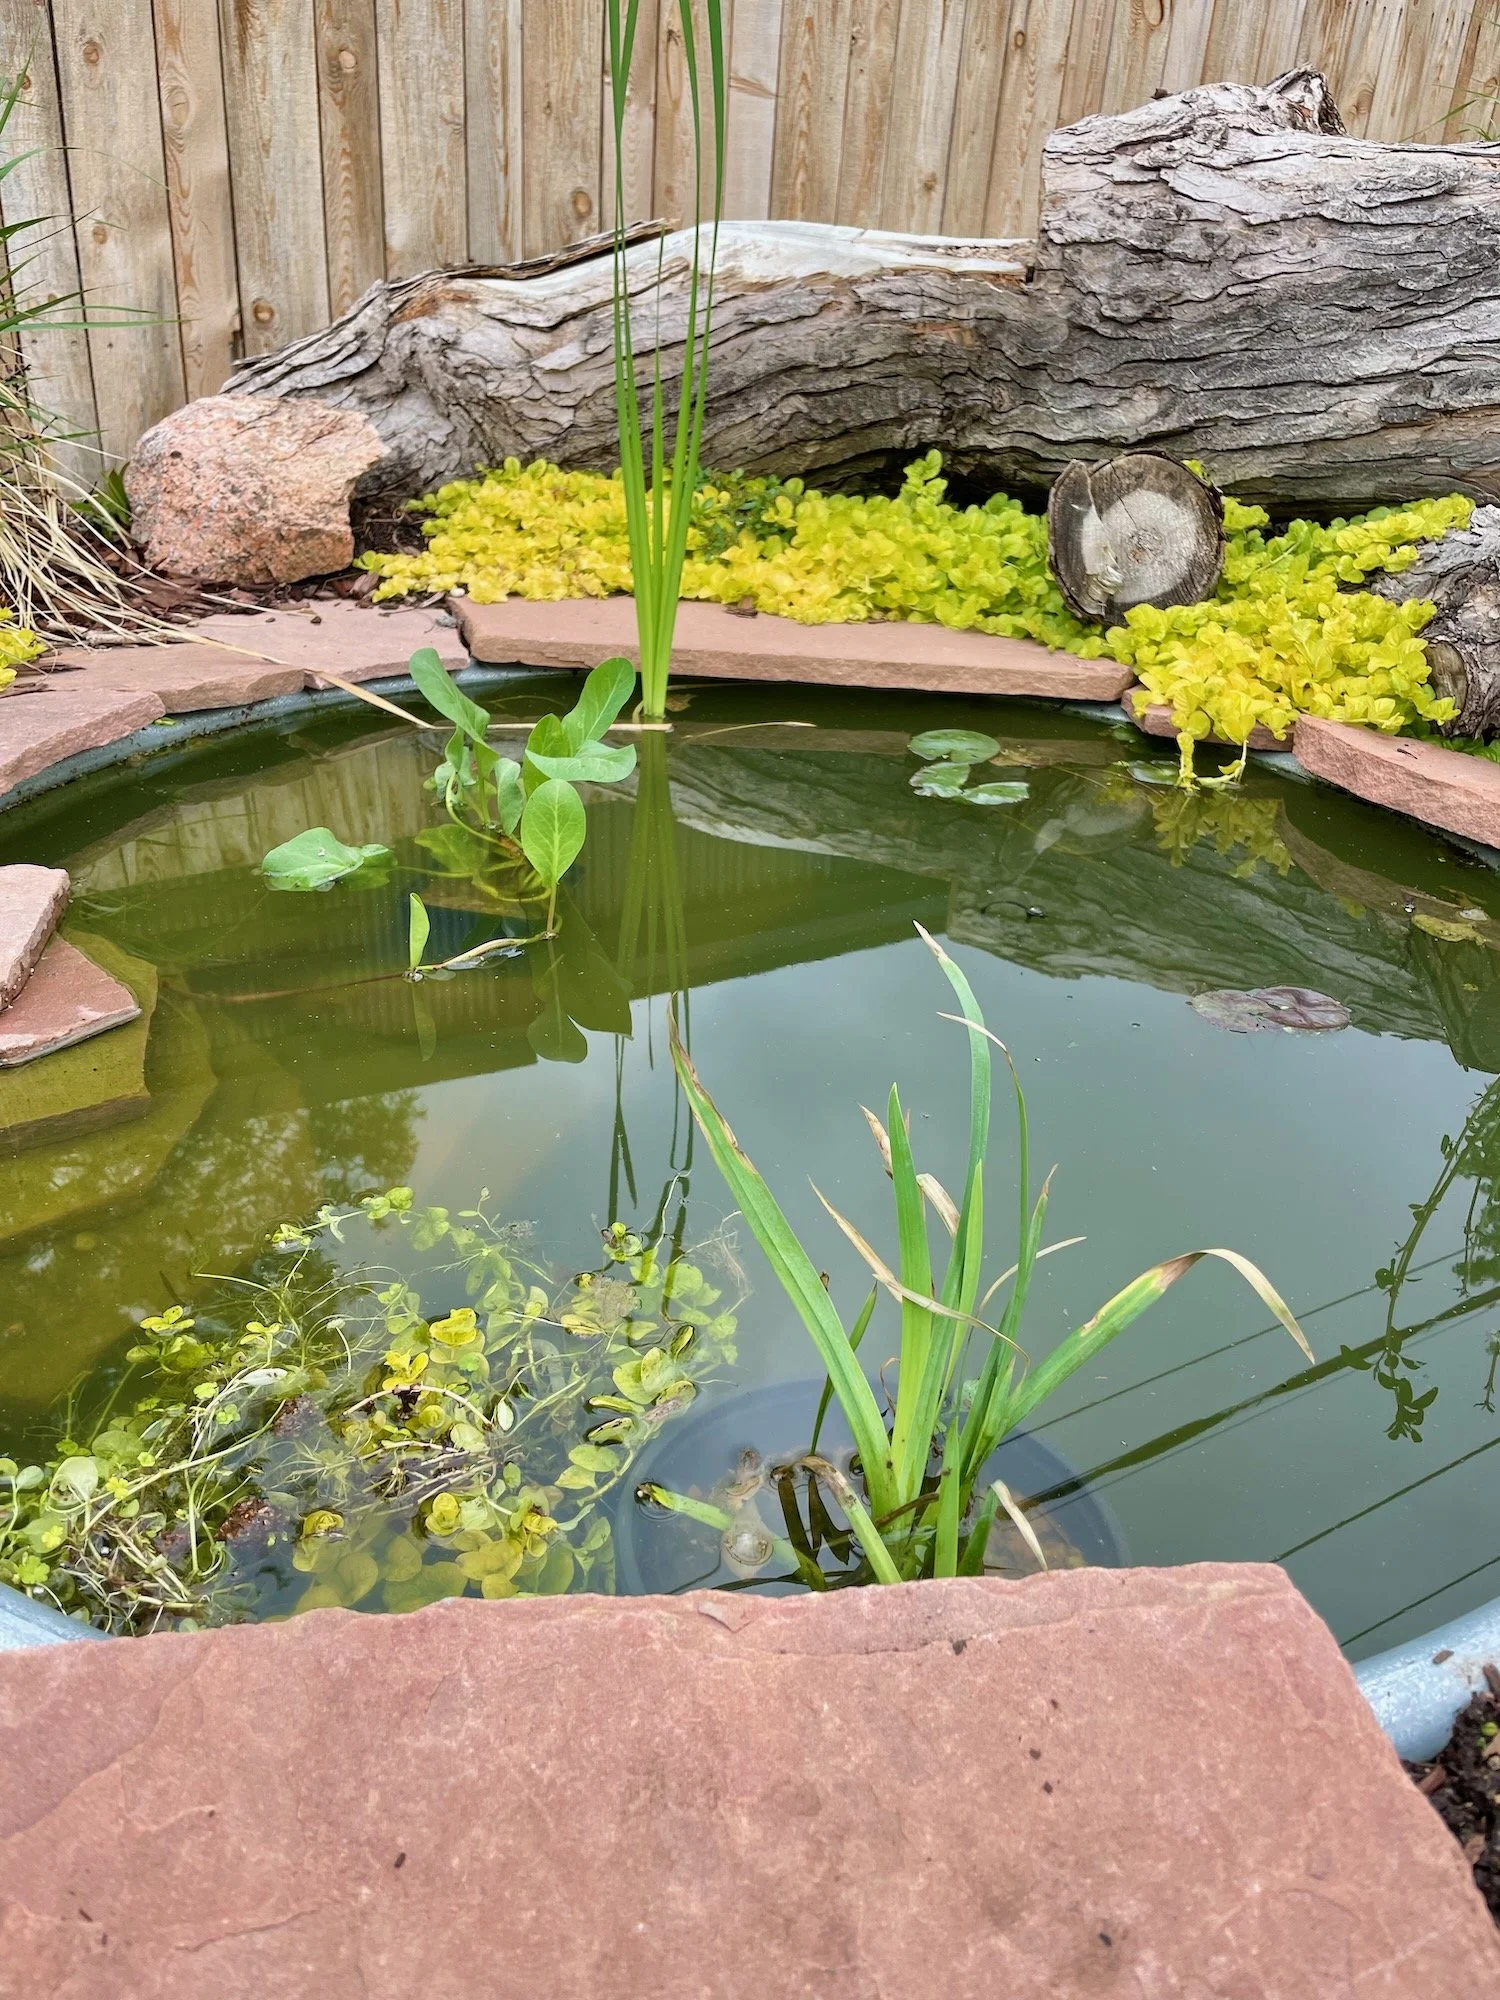
It is nearly 2.5 feet deep, and about 4 feet across. We needed to ensure that any creature who got into the pond would be able to get out, so using stones and bricks that we already had in the yard, we created a set of stairs. On the bottom, we also laid a few inches of river rock – something we happened to have around. This creates cracks and crevices where pond-dwelling creatures can find shelter.
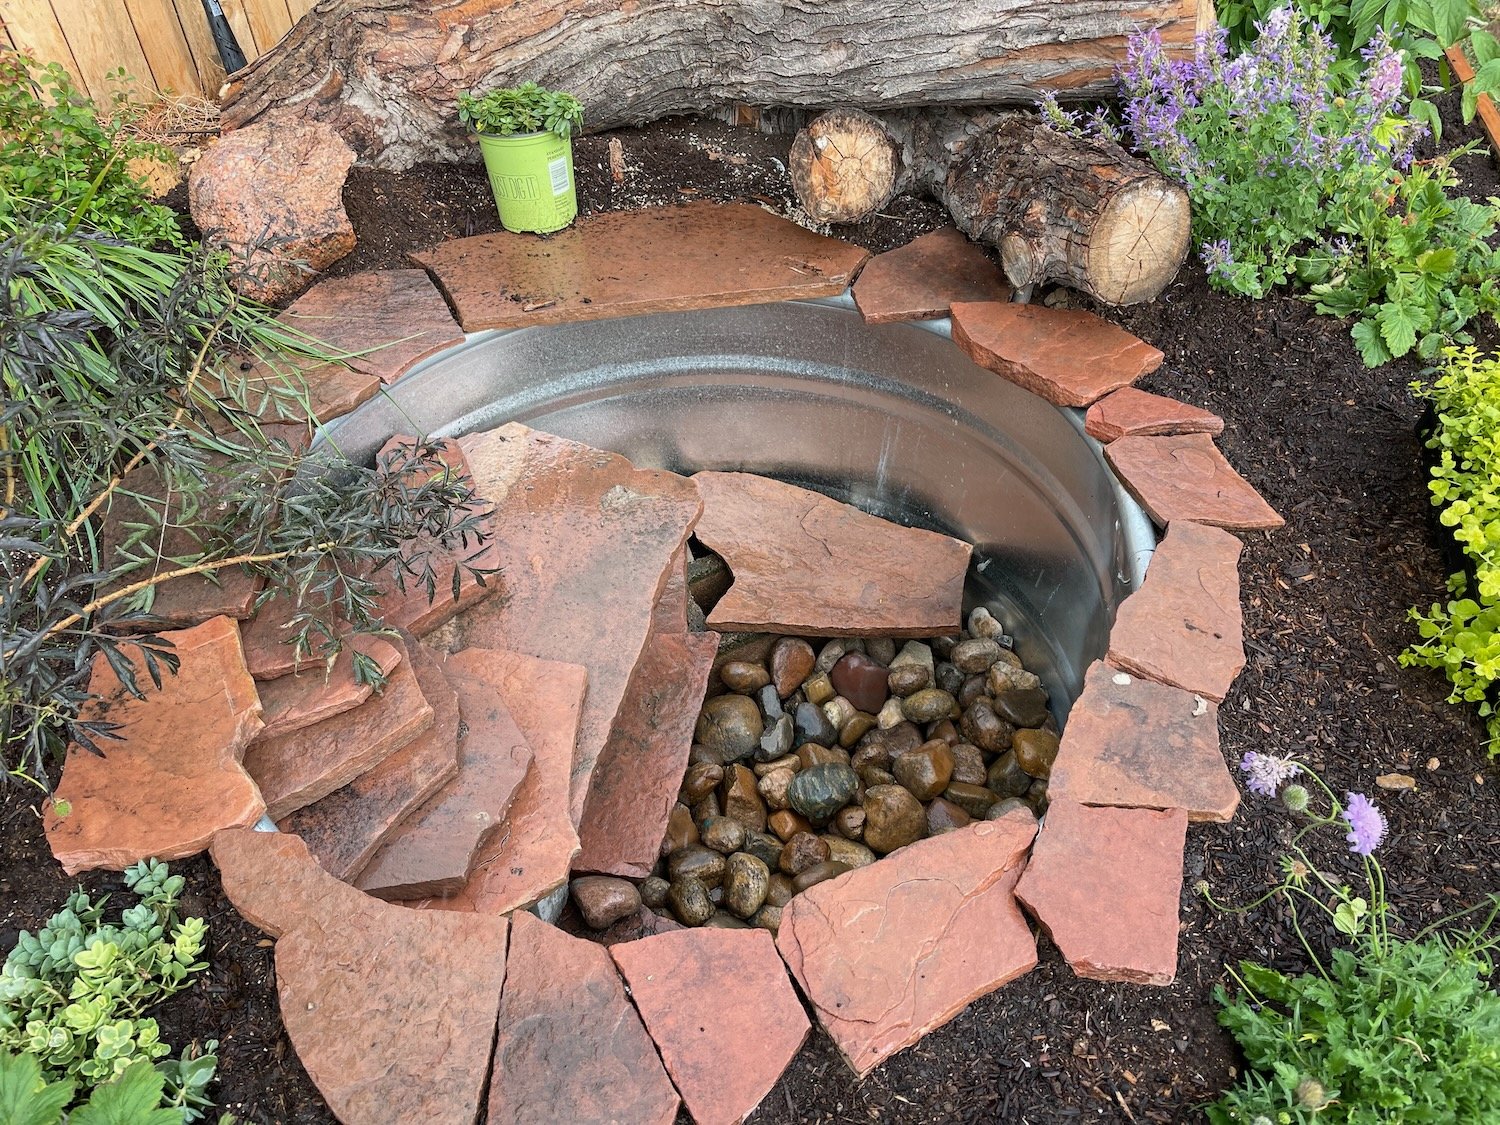
We used bricks and stones to make an escape route for creatures — and to create levels for pond plants.
Now that the plantings are mature, and the pond plants are established, the only real maintenance is to keep the water topped up. I use rainwater harvested in my greenhouse to keep the pond full. And I treat it with mosquito dunks once per month spring through fall.
Building an Escape Route
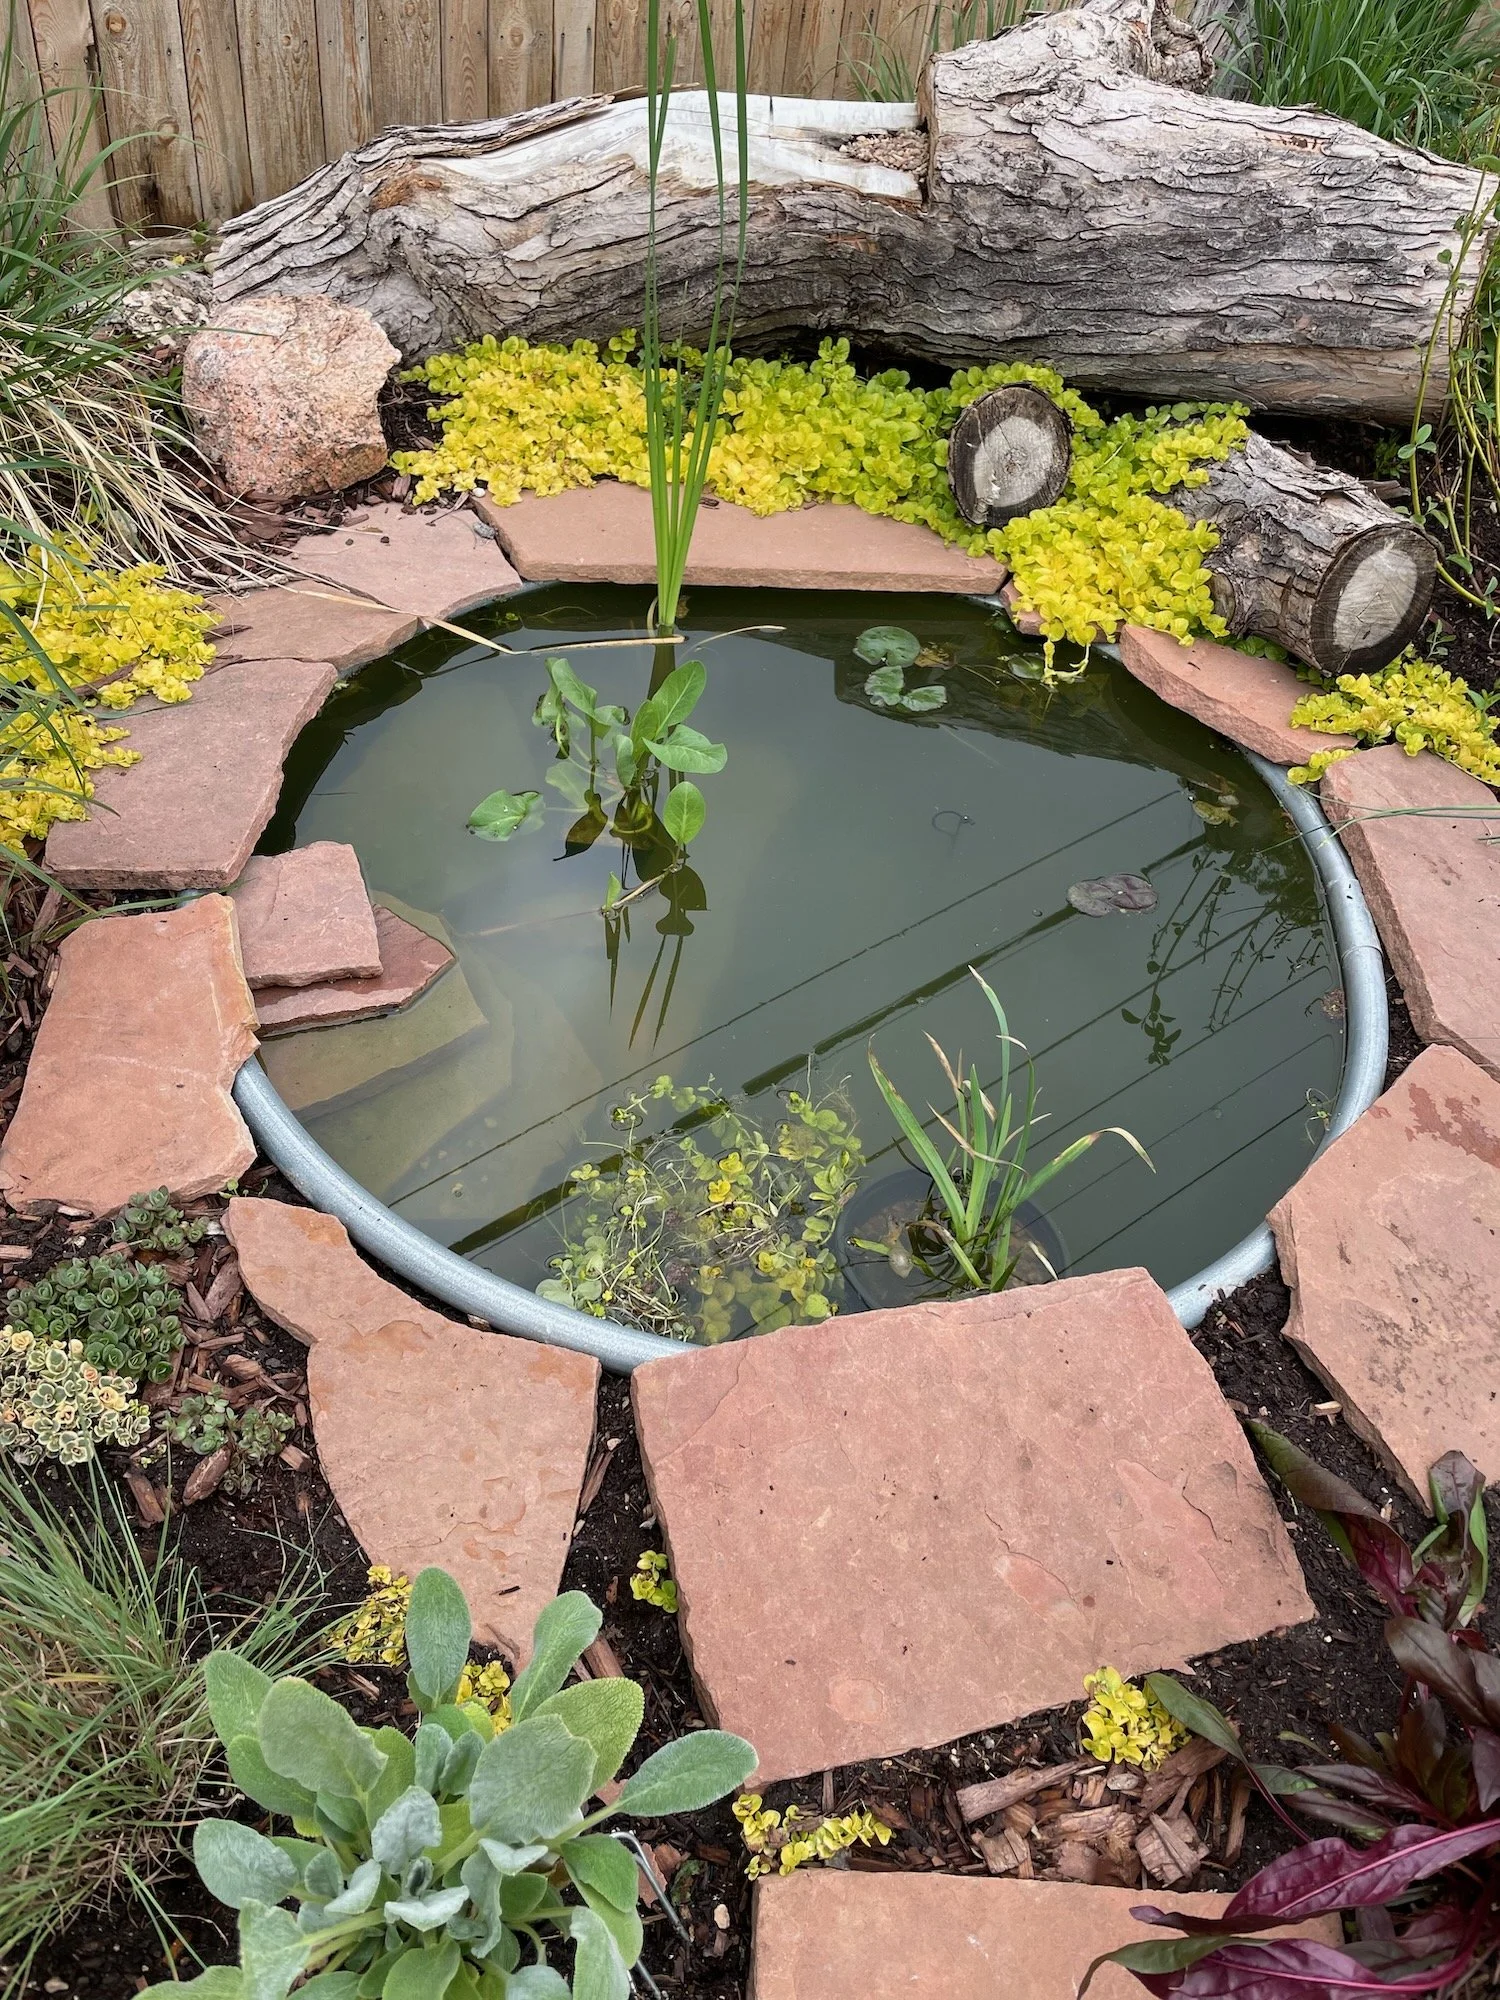
You can see the steps from the bottom of the pond even when it is full.
Just like with humans, wildlife sometimes get into a body of water and can’t get out. So providing escape routes in your ponds and water features are important. In our large pond, we built a shallow stone stairway. That’s more elaborate, but it could be simpler.
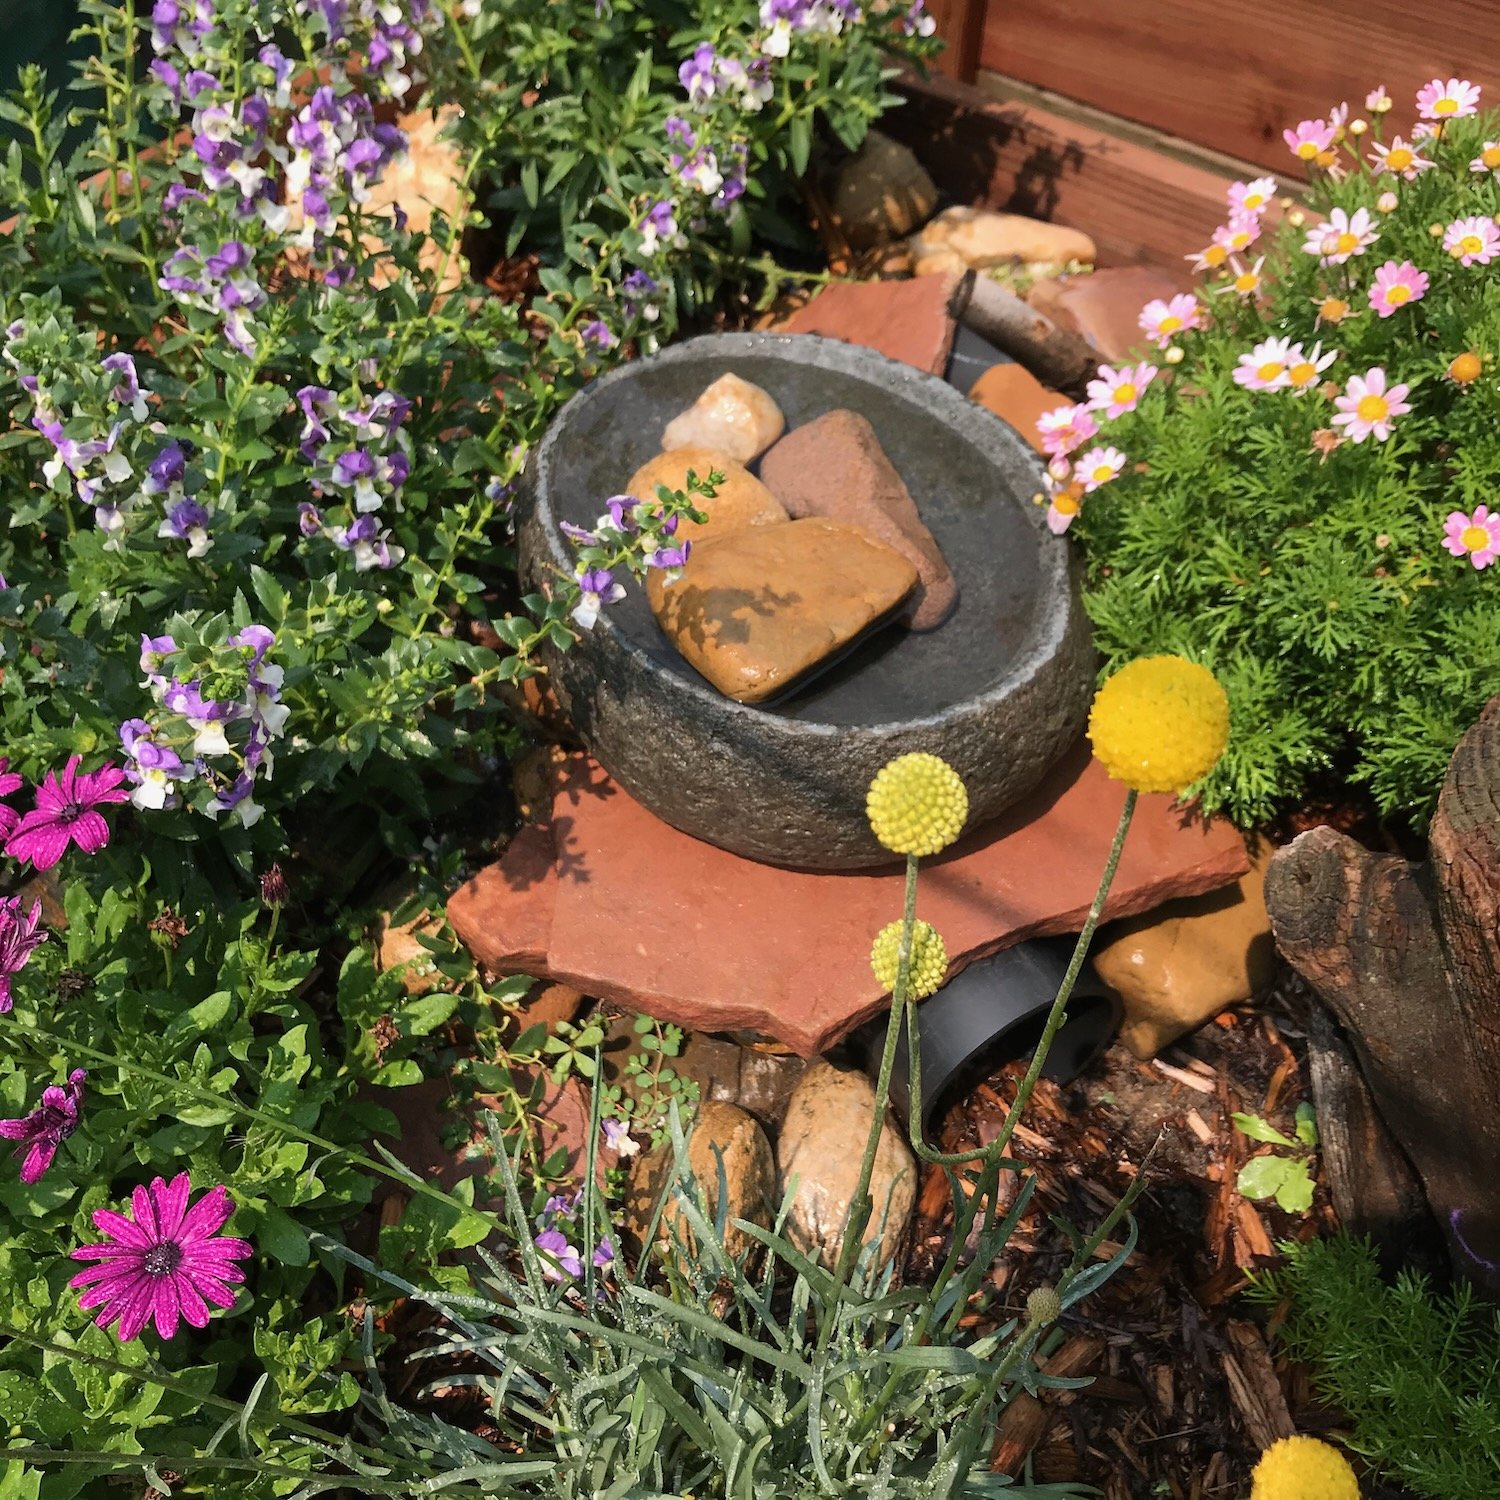
In our large fountain, we have a very big rock which is partially submerged. Birds often stand on the stone to get a drink, but it is also sloped in such a way that a creature could use it to crawl out if they fall in. Even in the most shallow ponds like our container ponds, we have created stony beaches as a means of escape.
You could use a branch, stones, a scrap of metal – anything that could work as a lifeline for little creatures who find themselves needing a little assistance. And I place stones in my birdbaths, too. The surfaces make it easier for bees and other insects to drink.
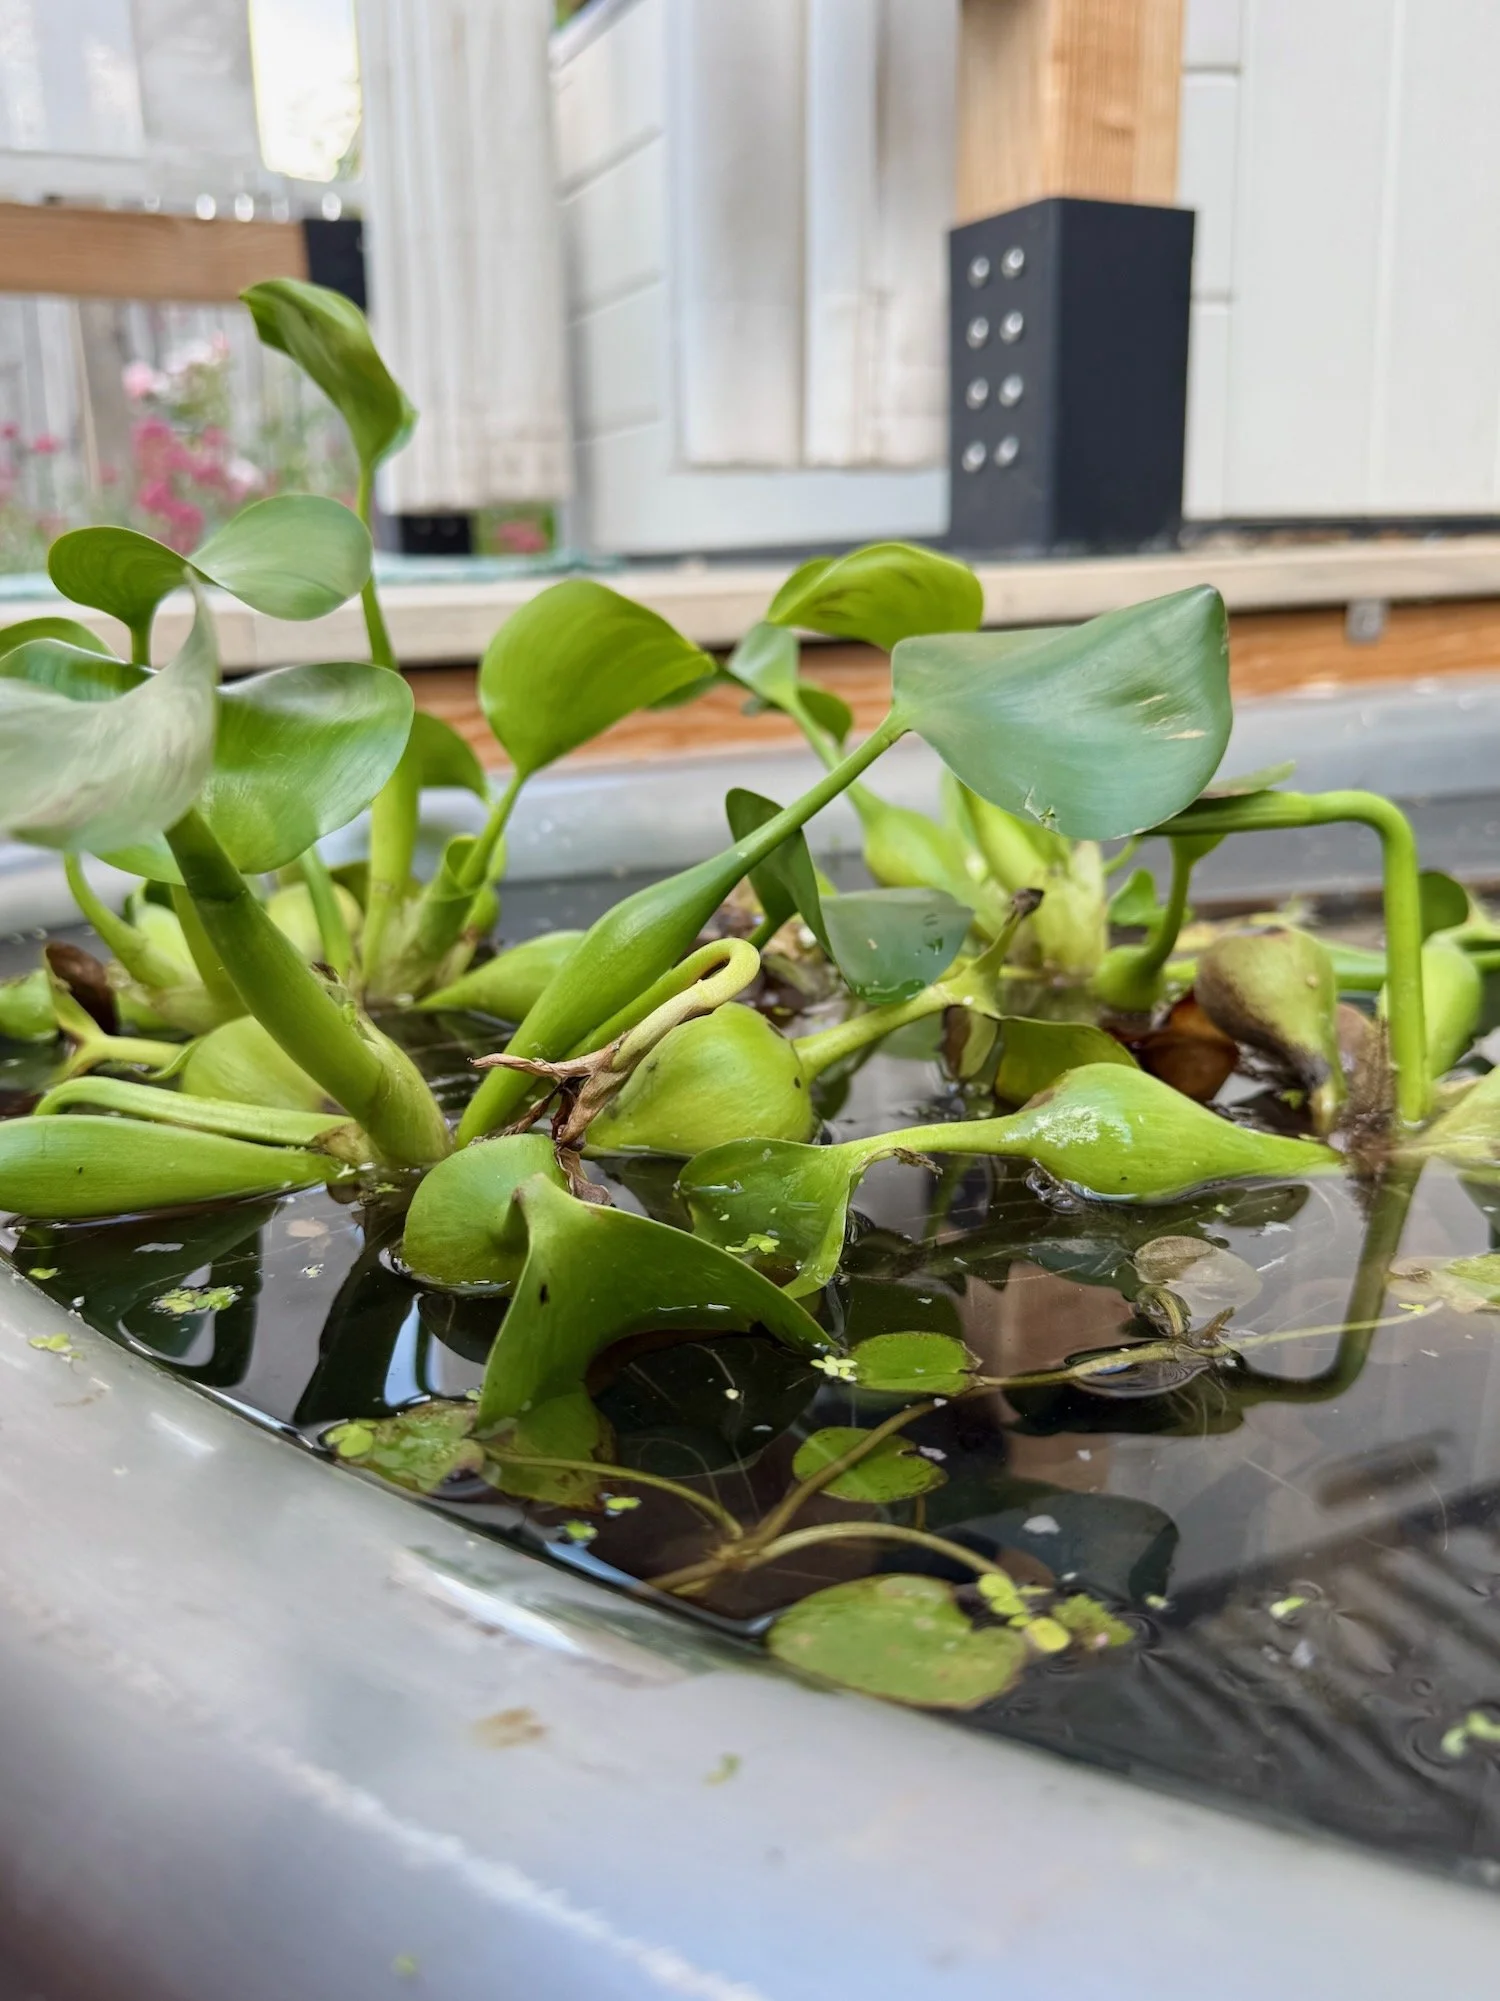
The Container Ponds
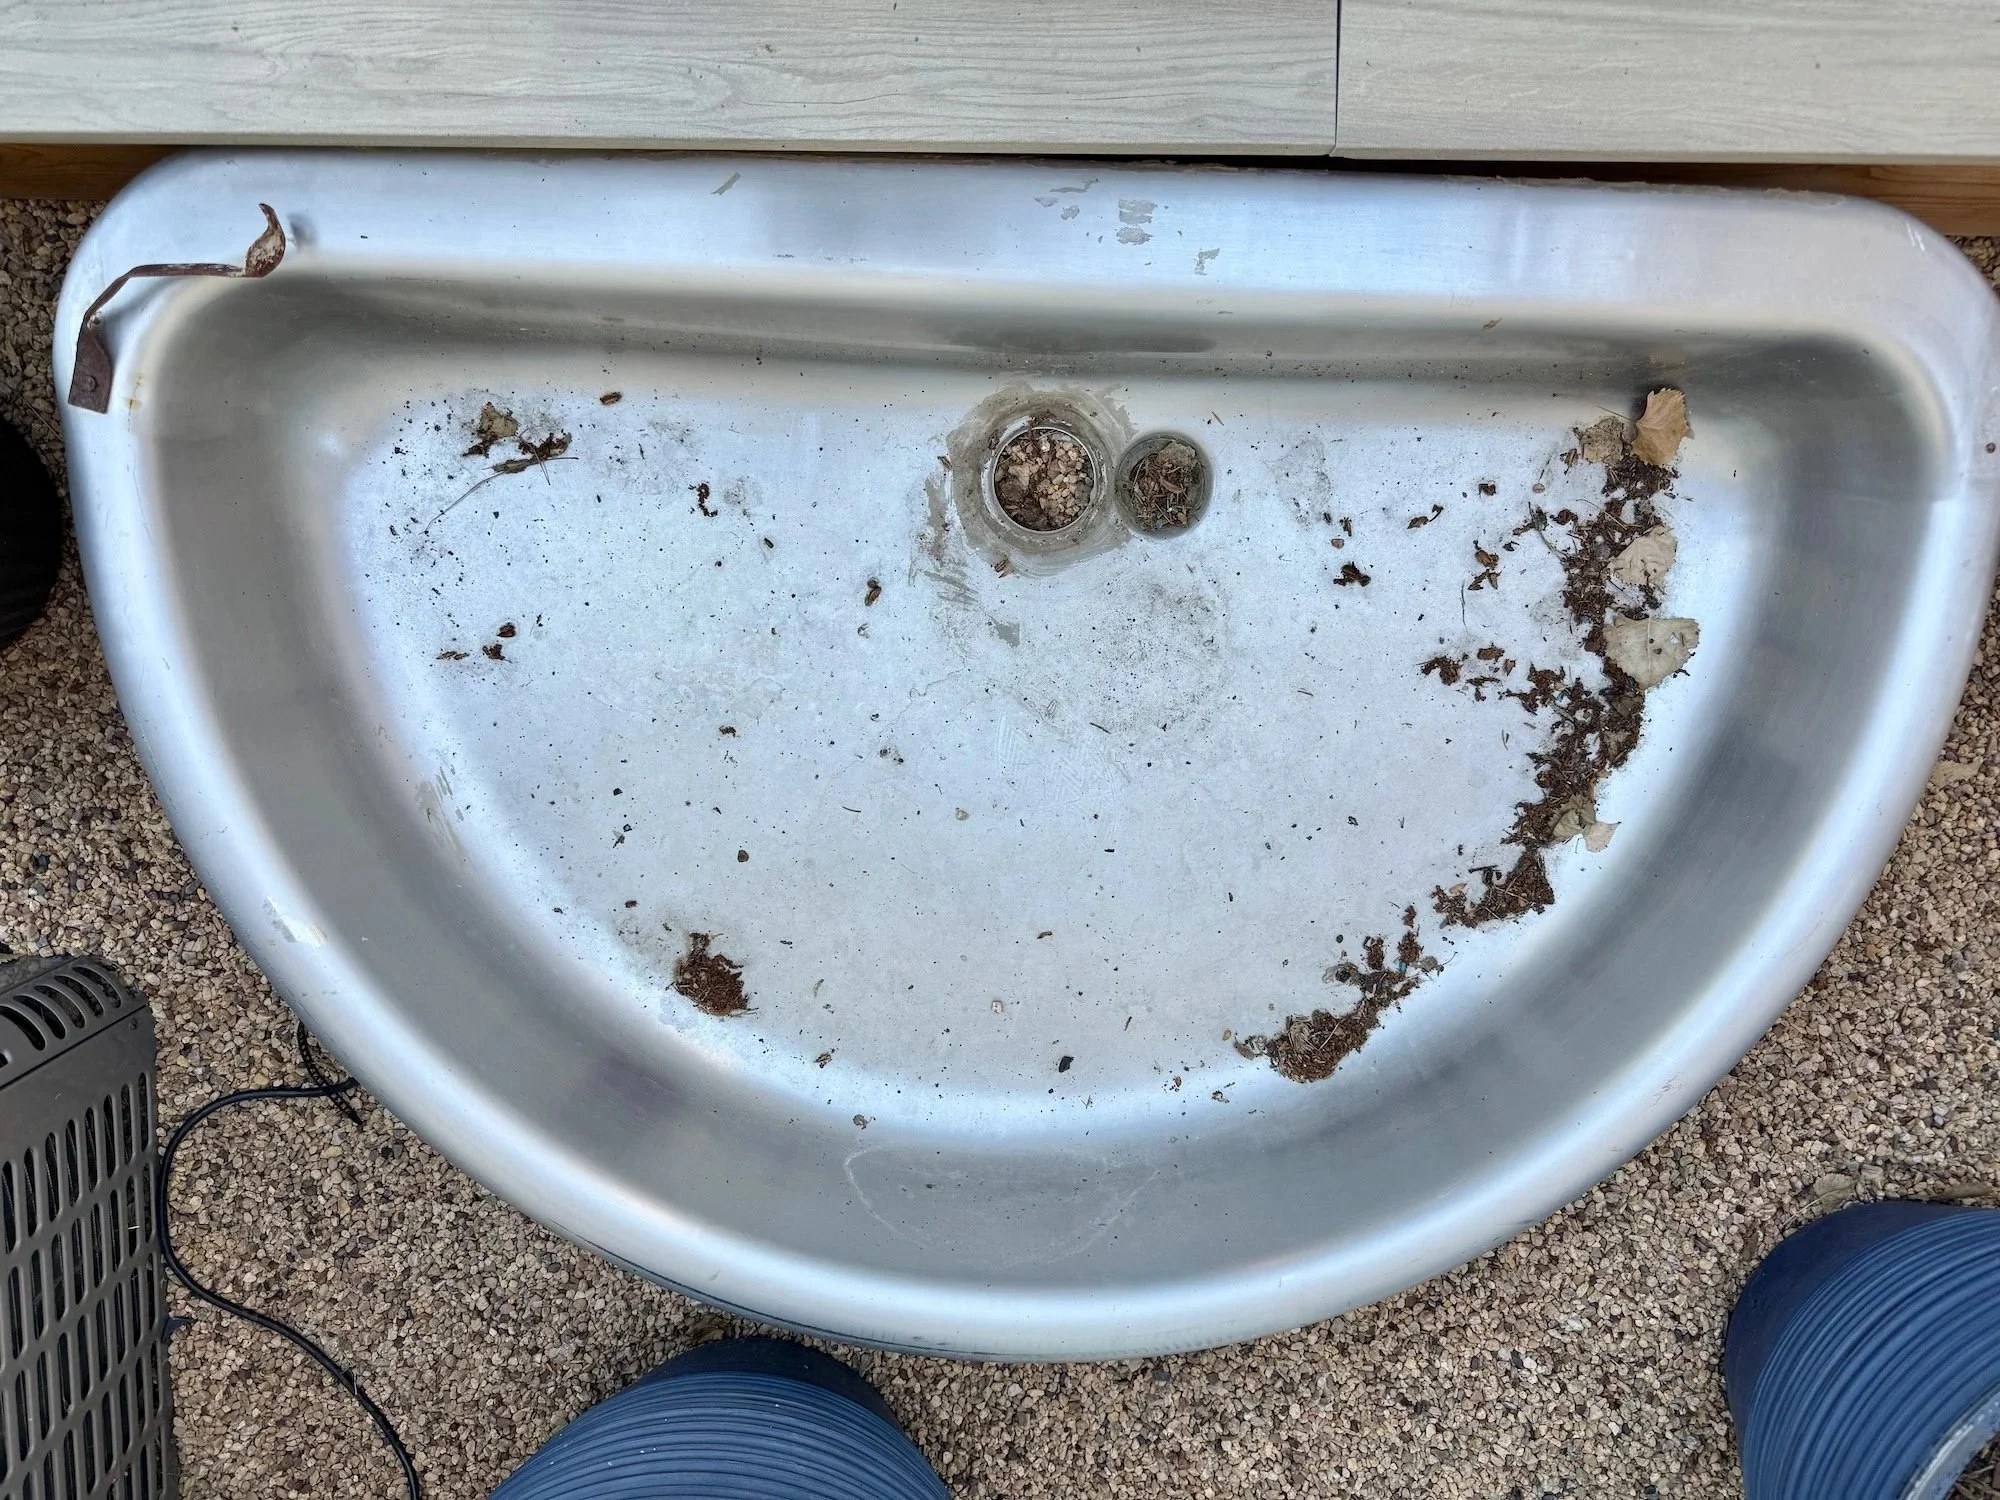
The Half Moon Pond when it was just a sink.

Would you forgive me if I started calling this The Lake of Shining Waters?
And now it is a small pond with plants and a few fish.
The RHS (the UK’s Royal Horticultural Society) began a campaign several years ago encouraging everyone to add a pond to their garden. But their messaging has been incredibly clever. They have said over and over again: a pond doesn’t have to be any bigger than a “washing up bowl.” These “container ponds” are still large enough to host frogs and salamanders and beneficial insects and birds – and with a little maintenance they can be mosquito-free, too. Read more here.
Well, I have a thing for finding unusual items on FBMP. And two of those unusual items have been really cool sinks. One of them is a very large, industrial stainless steel sink that is a half circle. The other is very shallow but long and skinny. Both have made fantastic little ponds.
The skinny pond is in the wildlife garden. It is quite shallow, but it’s a great place for birds and bees to have a drink. I have to fill it nearly every day. But that’s OK! It is just near the Amelanchier trees which are full of berries right now. So the birds are in and out of there all day long. I love watching them stop for a drink before heading back to their nests full of berries for their young.
The half moon pond is deeper. It’s situated just off the deck, so honestly, it’s more of a pond for us rather than for wildlife. But that doesn’t mean that creatures don’t find it. It’s just not the first one they find.
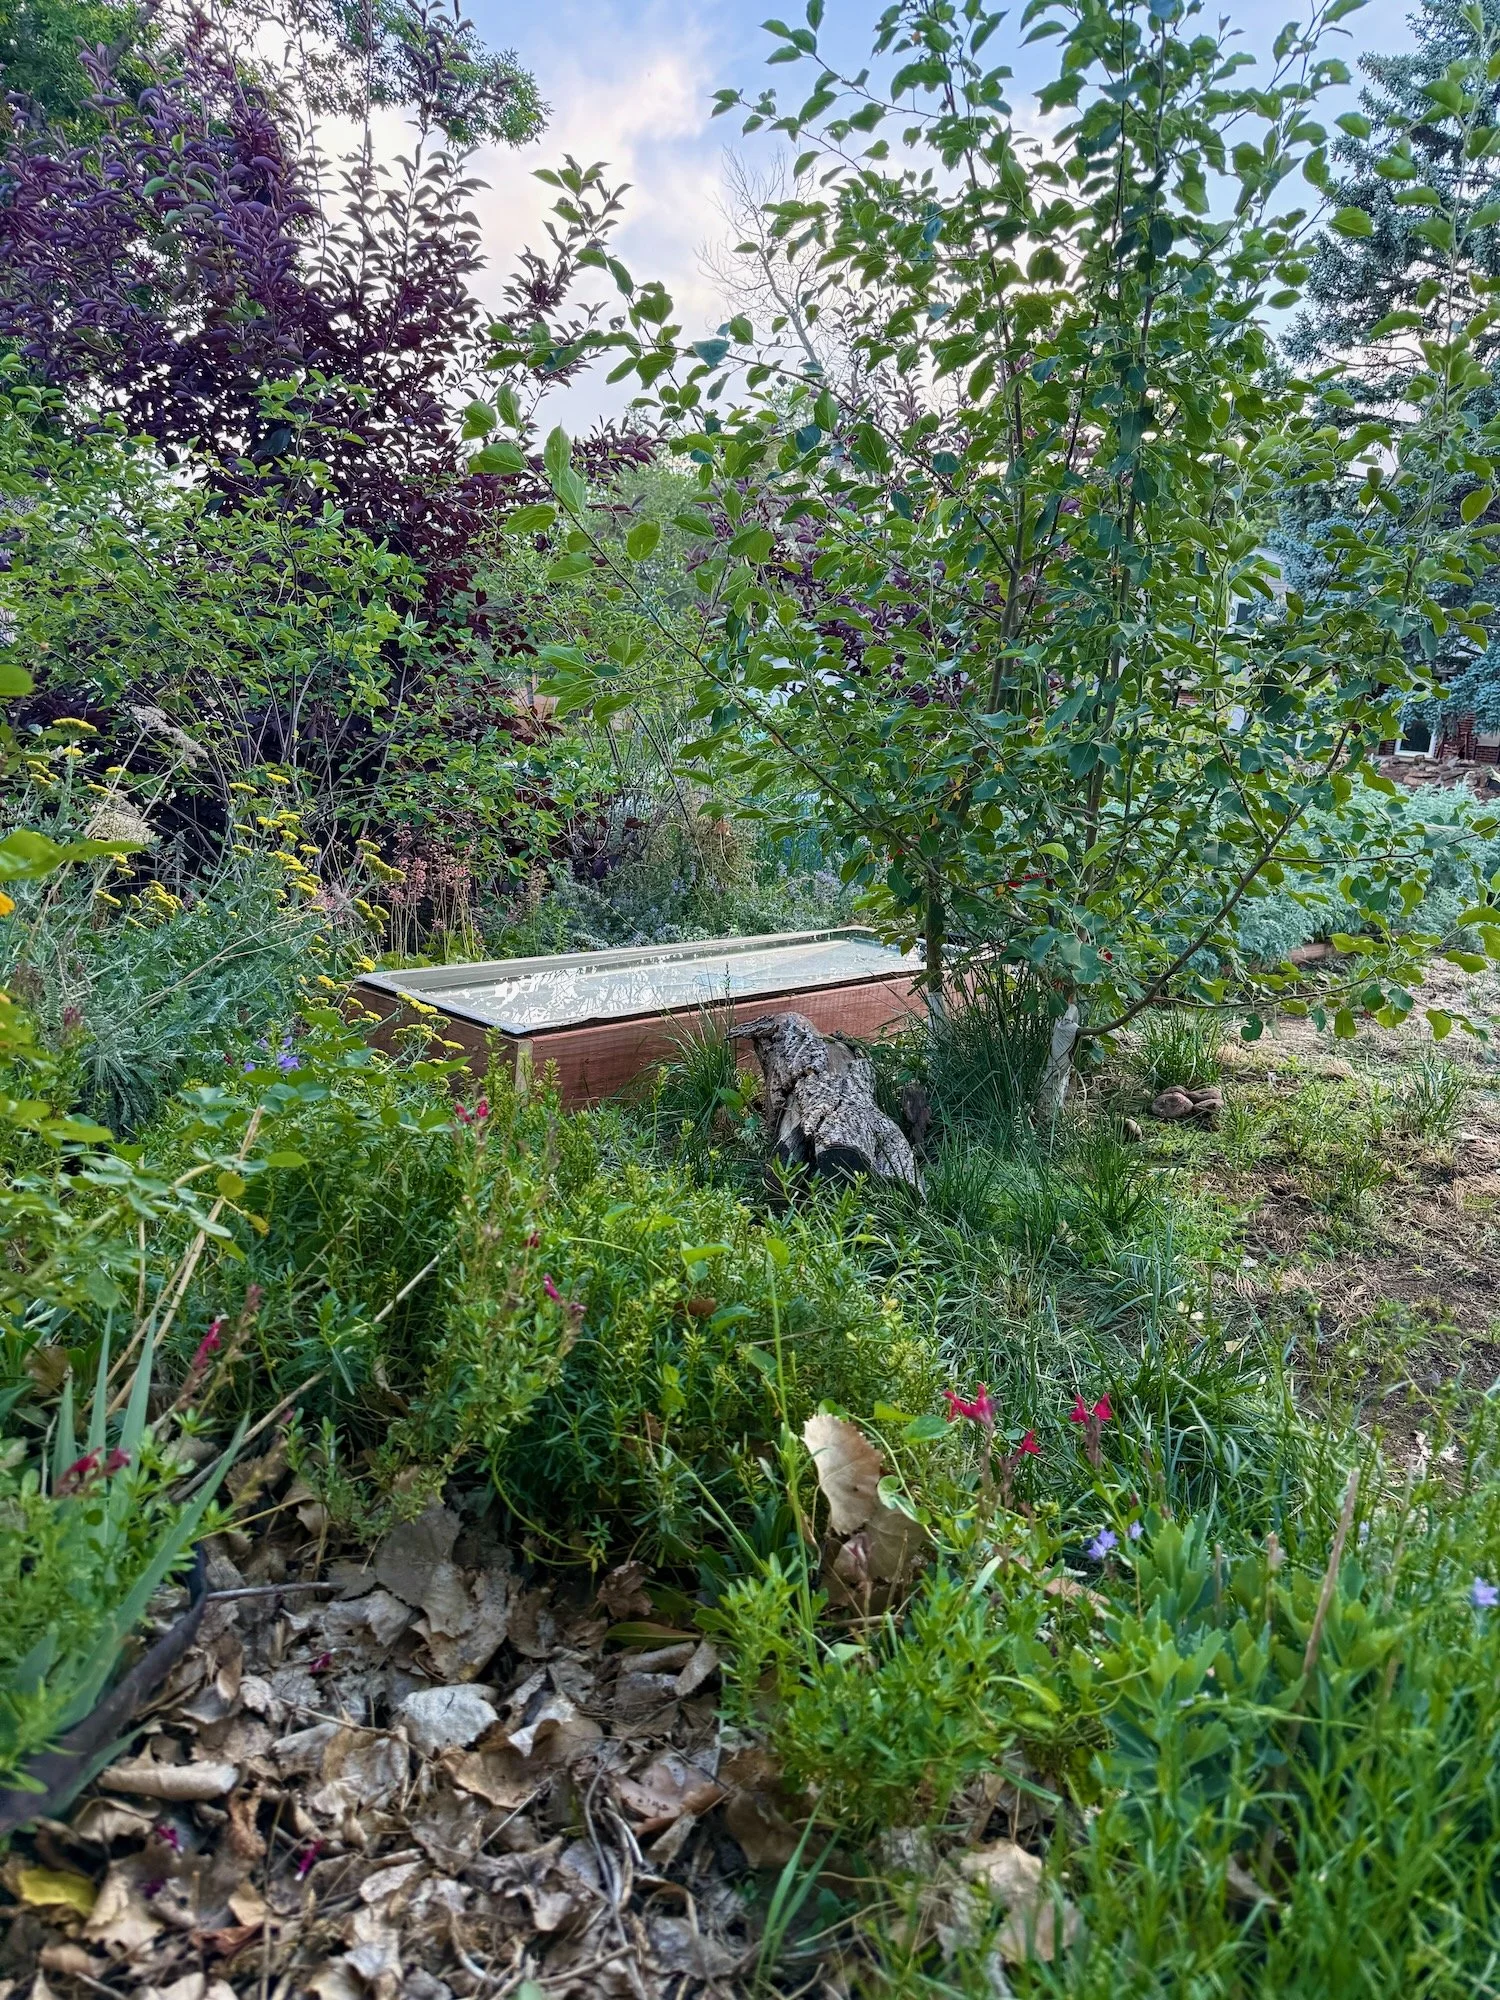
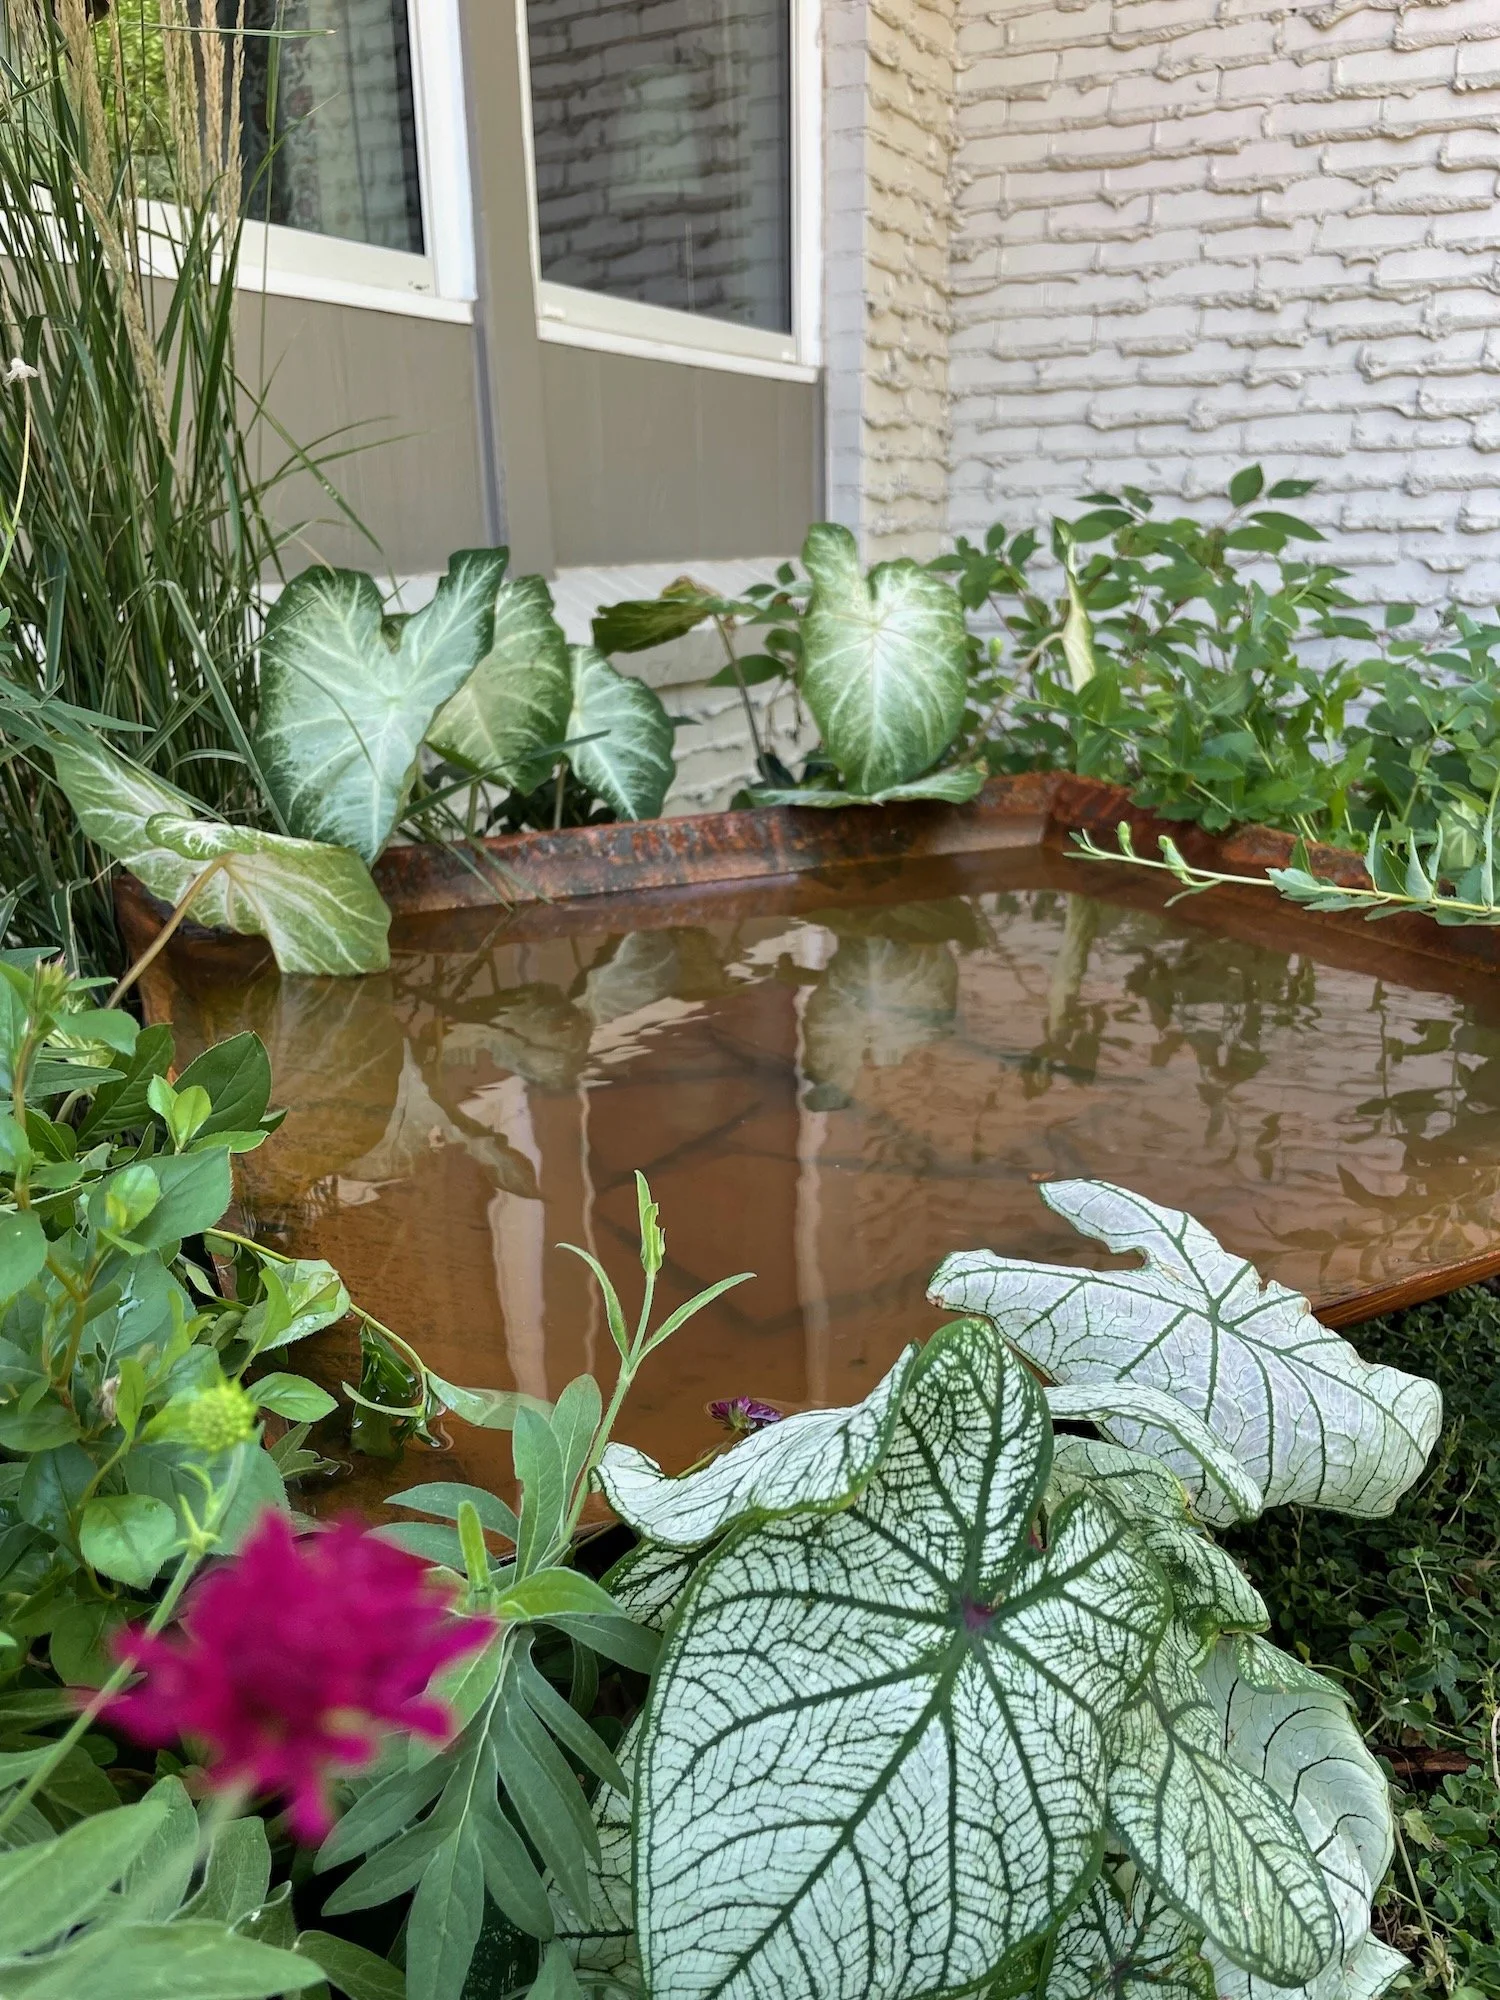
Additionally, I have another pond made from a Corten steel planter. And I have seen dozens of birds gathered at it at one time. I will say this: this planter is not perfectly watertight. I’m going to have to make some changes as a result. I think the freeze-thaw cycle has put a strain on the joints. But the message is this: a planter with a watertight bottom can make a great and inexpensive container pond!
How to Stop Up a Sink Pond
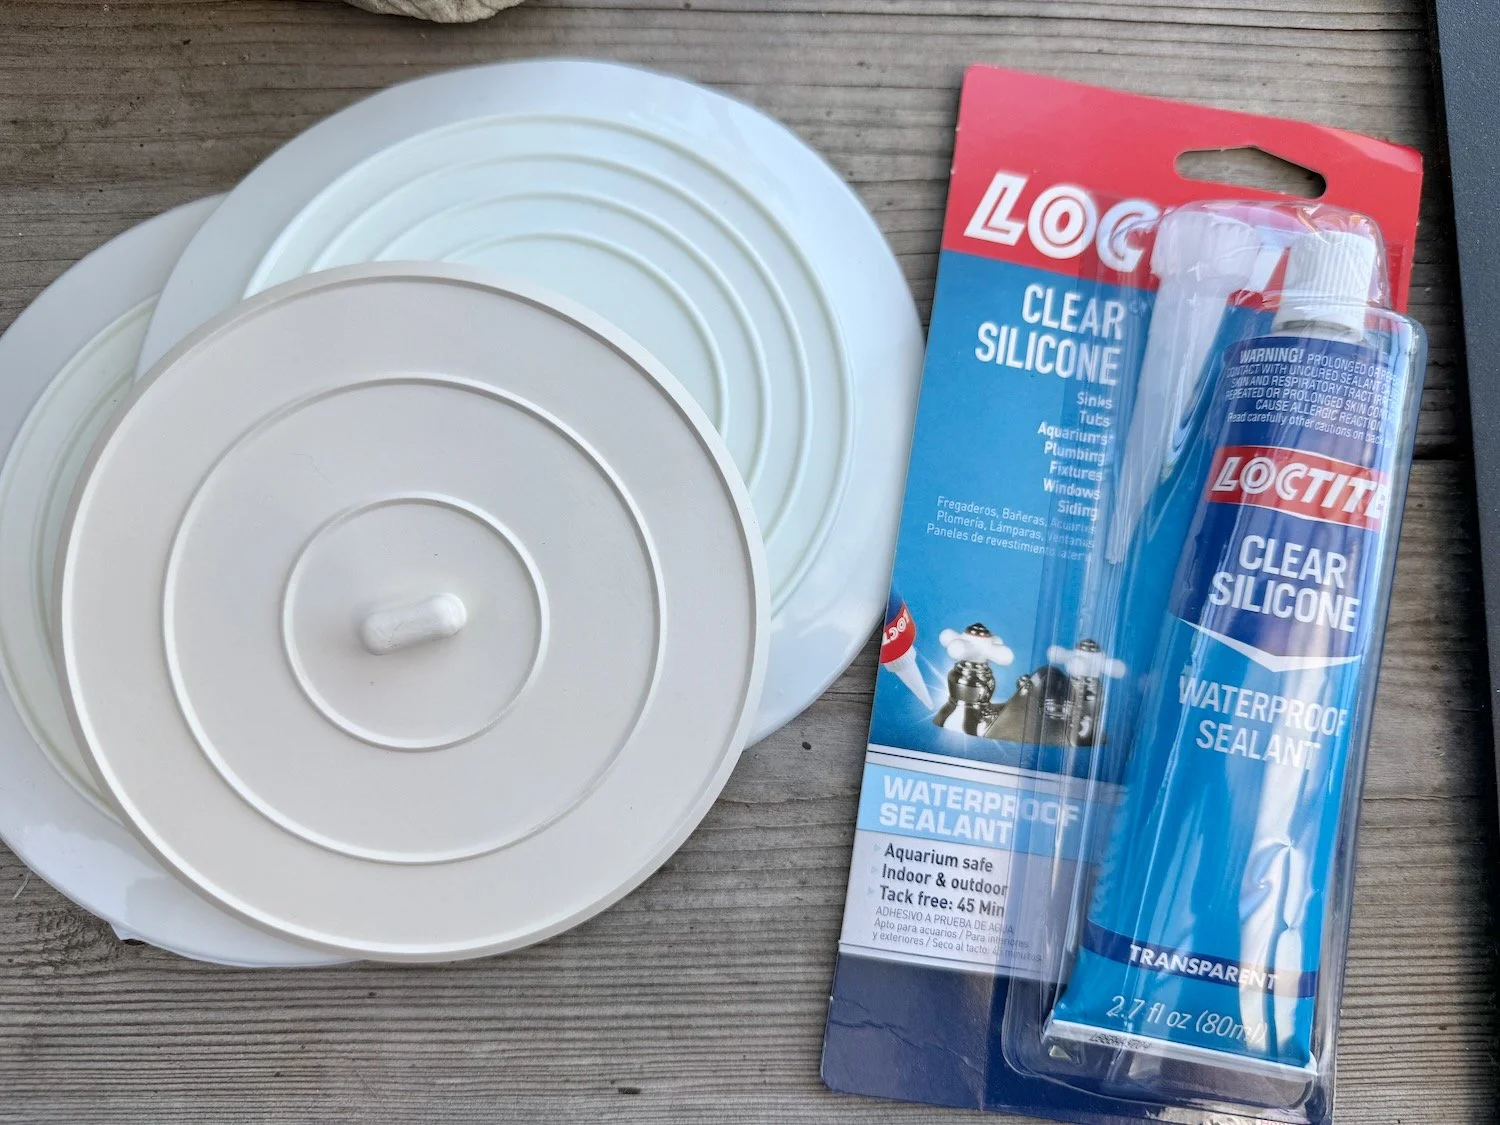
For most sink ponds all you need is some silicone and a bathtub stopper to make it watertight.
There are several ways to make a sink watertight. If you have a sink with standard-sized plumbing openings, you can just use plumbing fittings and some plumber’s tape.
However, both of mine are not standard, so I have used bathtub stoppers and aquarium-grade silicone. I do the same in my DIY ollas, and it has held up for years. This method is very easy and inexpensive, too. Just be sure you apply the stopper on the bowl side of the sink – that way the water pressure is helping maintain the seal. Don’t like the look? Just cover the stopper with some pretty stones!
Bird Baths
Now technically, bird baths aren’t ponds. But they are water that birds and insects find and use daily. I used to kind of poo poo the idea of a birdbath. I don’t anymore. But I will tell you this: when I surround a birdbath with plants, it gets used much more frequently. So instead of having freestanding bird baths, I have them tucked in amongst my plants. And OMG do they get used! Constantly. Daily. It’s unbelievably cool!
A birdbath doesn’t have to be big. Just a nice shallow dish of water. I fill mine every day – largely because the water evaporates very quickly. The more shallow your body of water is, the quicker water evaporates. I also wash them out with a bit of dish soap weekly. This helps to prevent algae and bacterial growth.
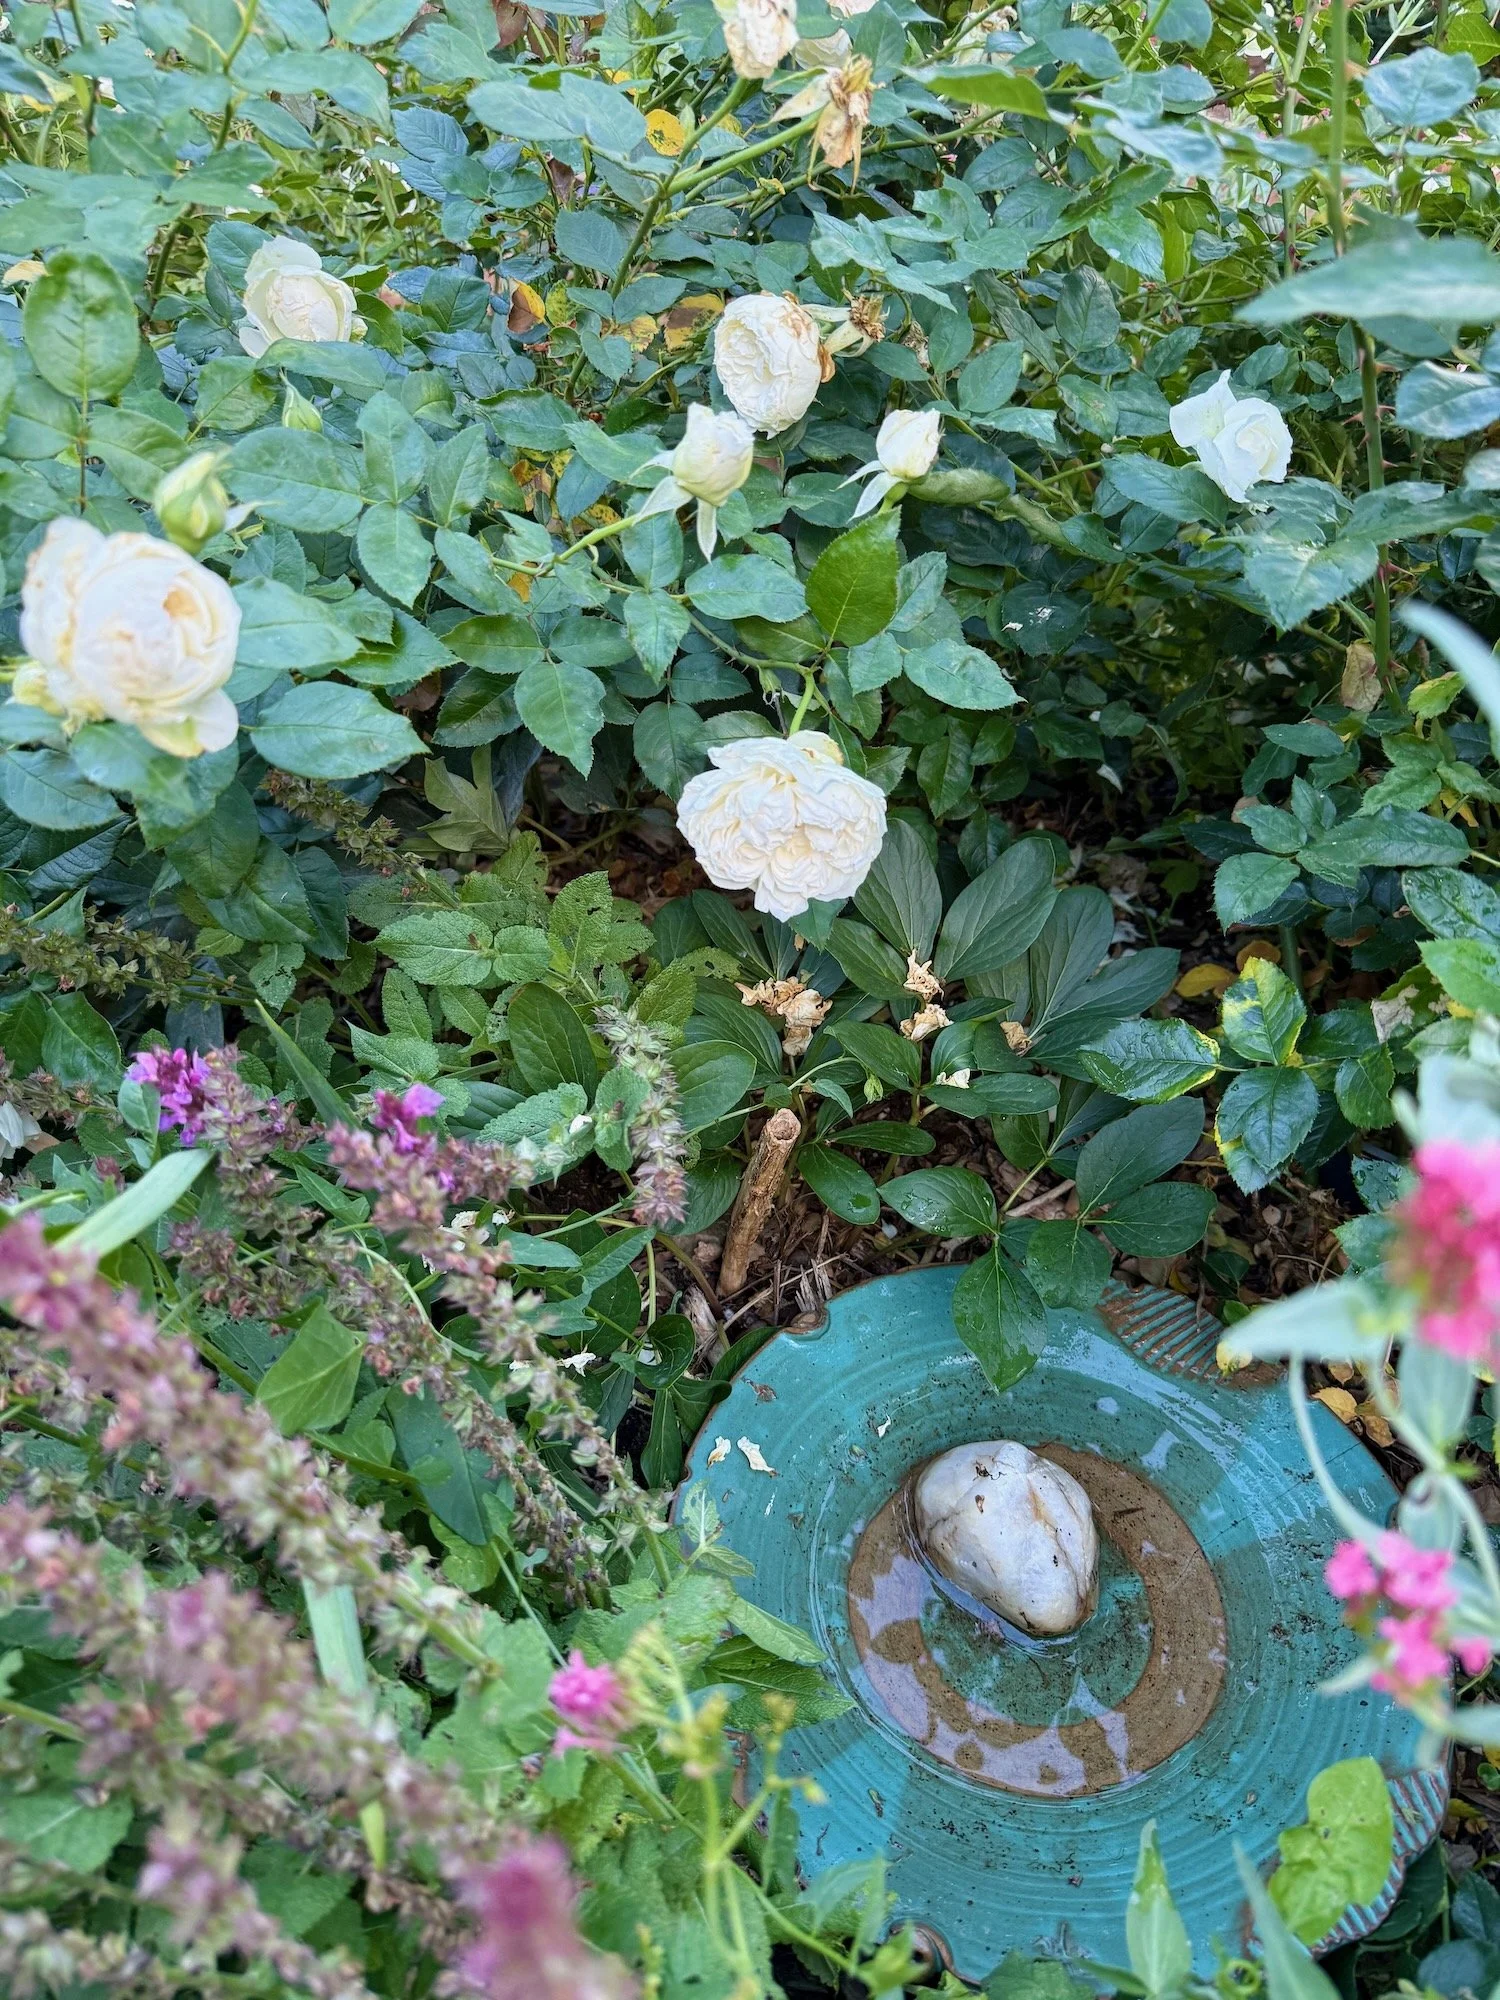
None of my bird baths are traditional bird baths! They are all dishes and platters that I have collected over the years with the exception of one which is a stone that was hollowed out. Interestingly, that’s not the most popular one.
So even if you are gardening on a balcony or in a small patio, you can still have water available for the wildlife that comes to visit. And they will use it!
When I was helping my mom last spring and giving her garden a little love, we planted up this cute little birdbath. We took a large pot, filled it potting mix, and after planting it out with petunias, placed this shallow white dish filled with water in the middle. It’s a lovely little bird bath, and it sits near her bird feeders. The birds love it!

The Fountain
I had always assumed that a fountain would be less attractive to birds than other water sources. I’m not sure why. But that was my assumption. I was clearly wrong. From the day I set up our fountain, which is simply a large planter with a pump in the bottom, the birds showed up. Then this spring: a pair of hawks arrived. They like to bathe in the fountain. And drink in the fountain. It’s astonishingly cool!
So even if your style is more a large body of crystal clear water, the wildlife will come and use it! It’d be a great place for a wildlife camera!
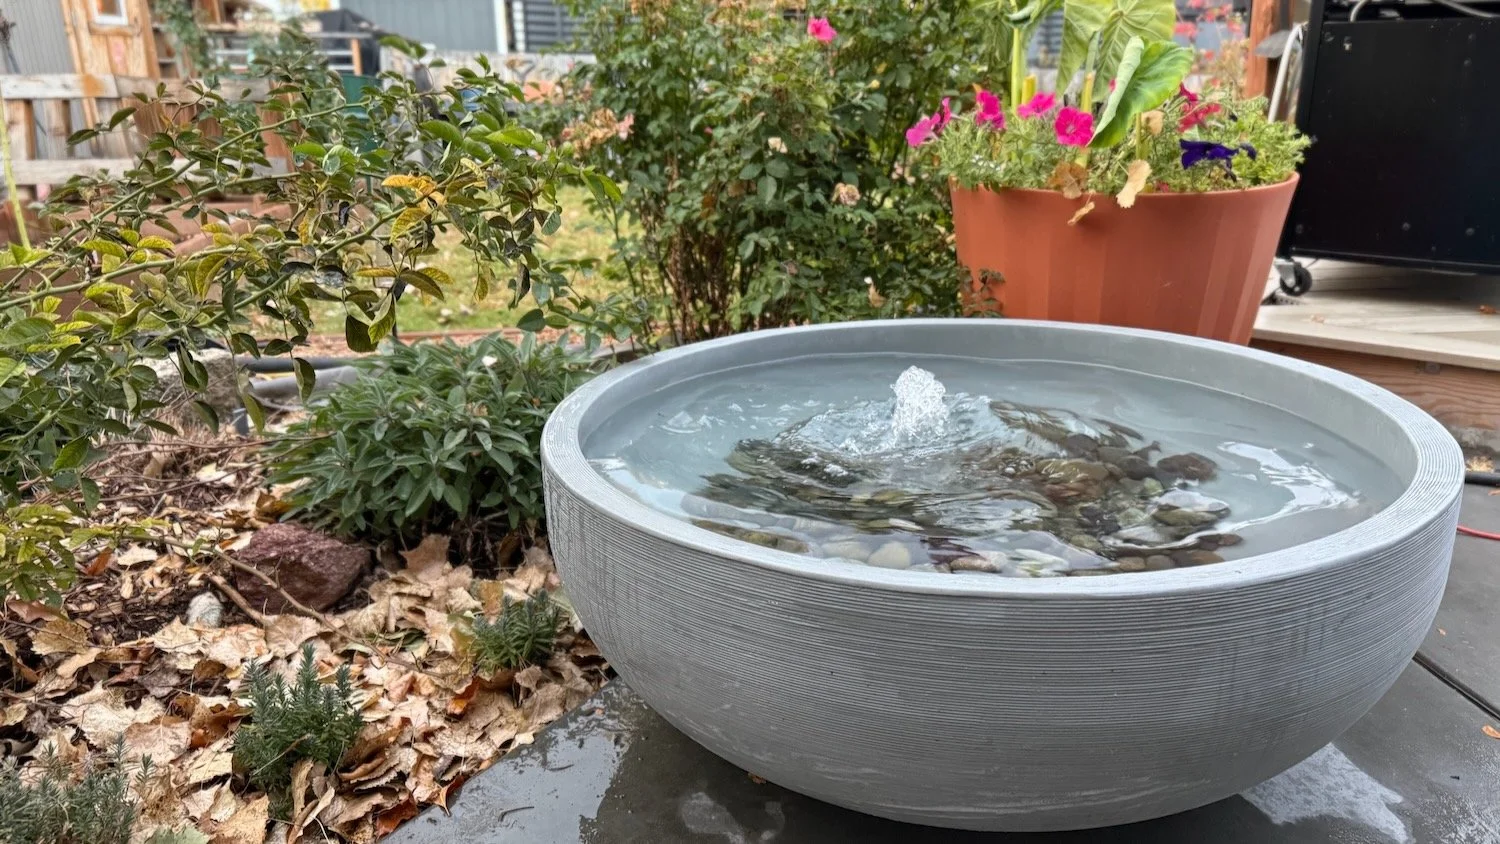
The Fountain is an Oronoco Planter from Crescent Garden (a gift on a previous collaboration). It’s designed to either be a planter or a fountain with an optional plug for the bottom. I just added a cheap pump and some stones. It's very popular with birds — to my surprise!
Where to Place your Pond or Water Feature
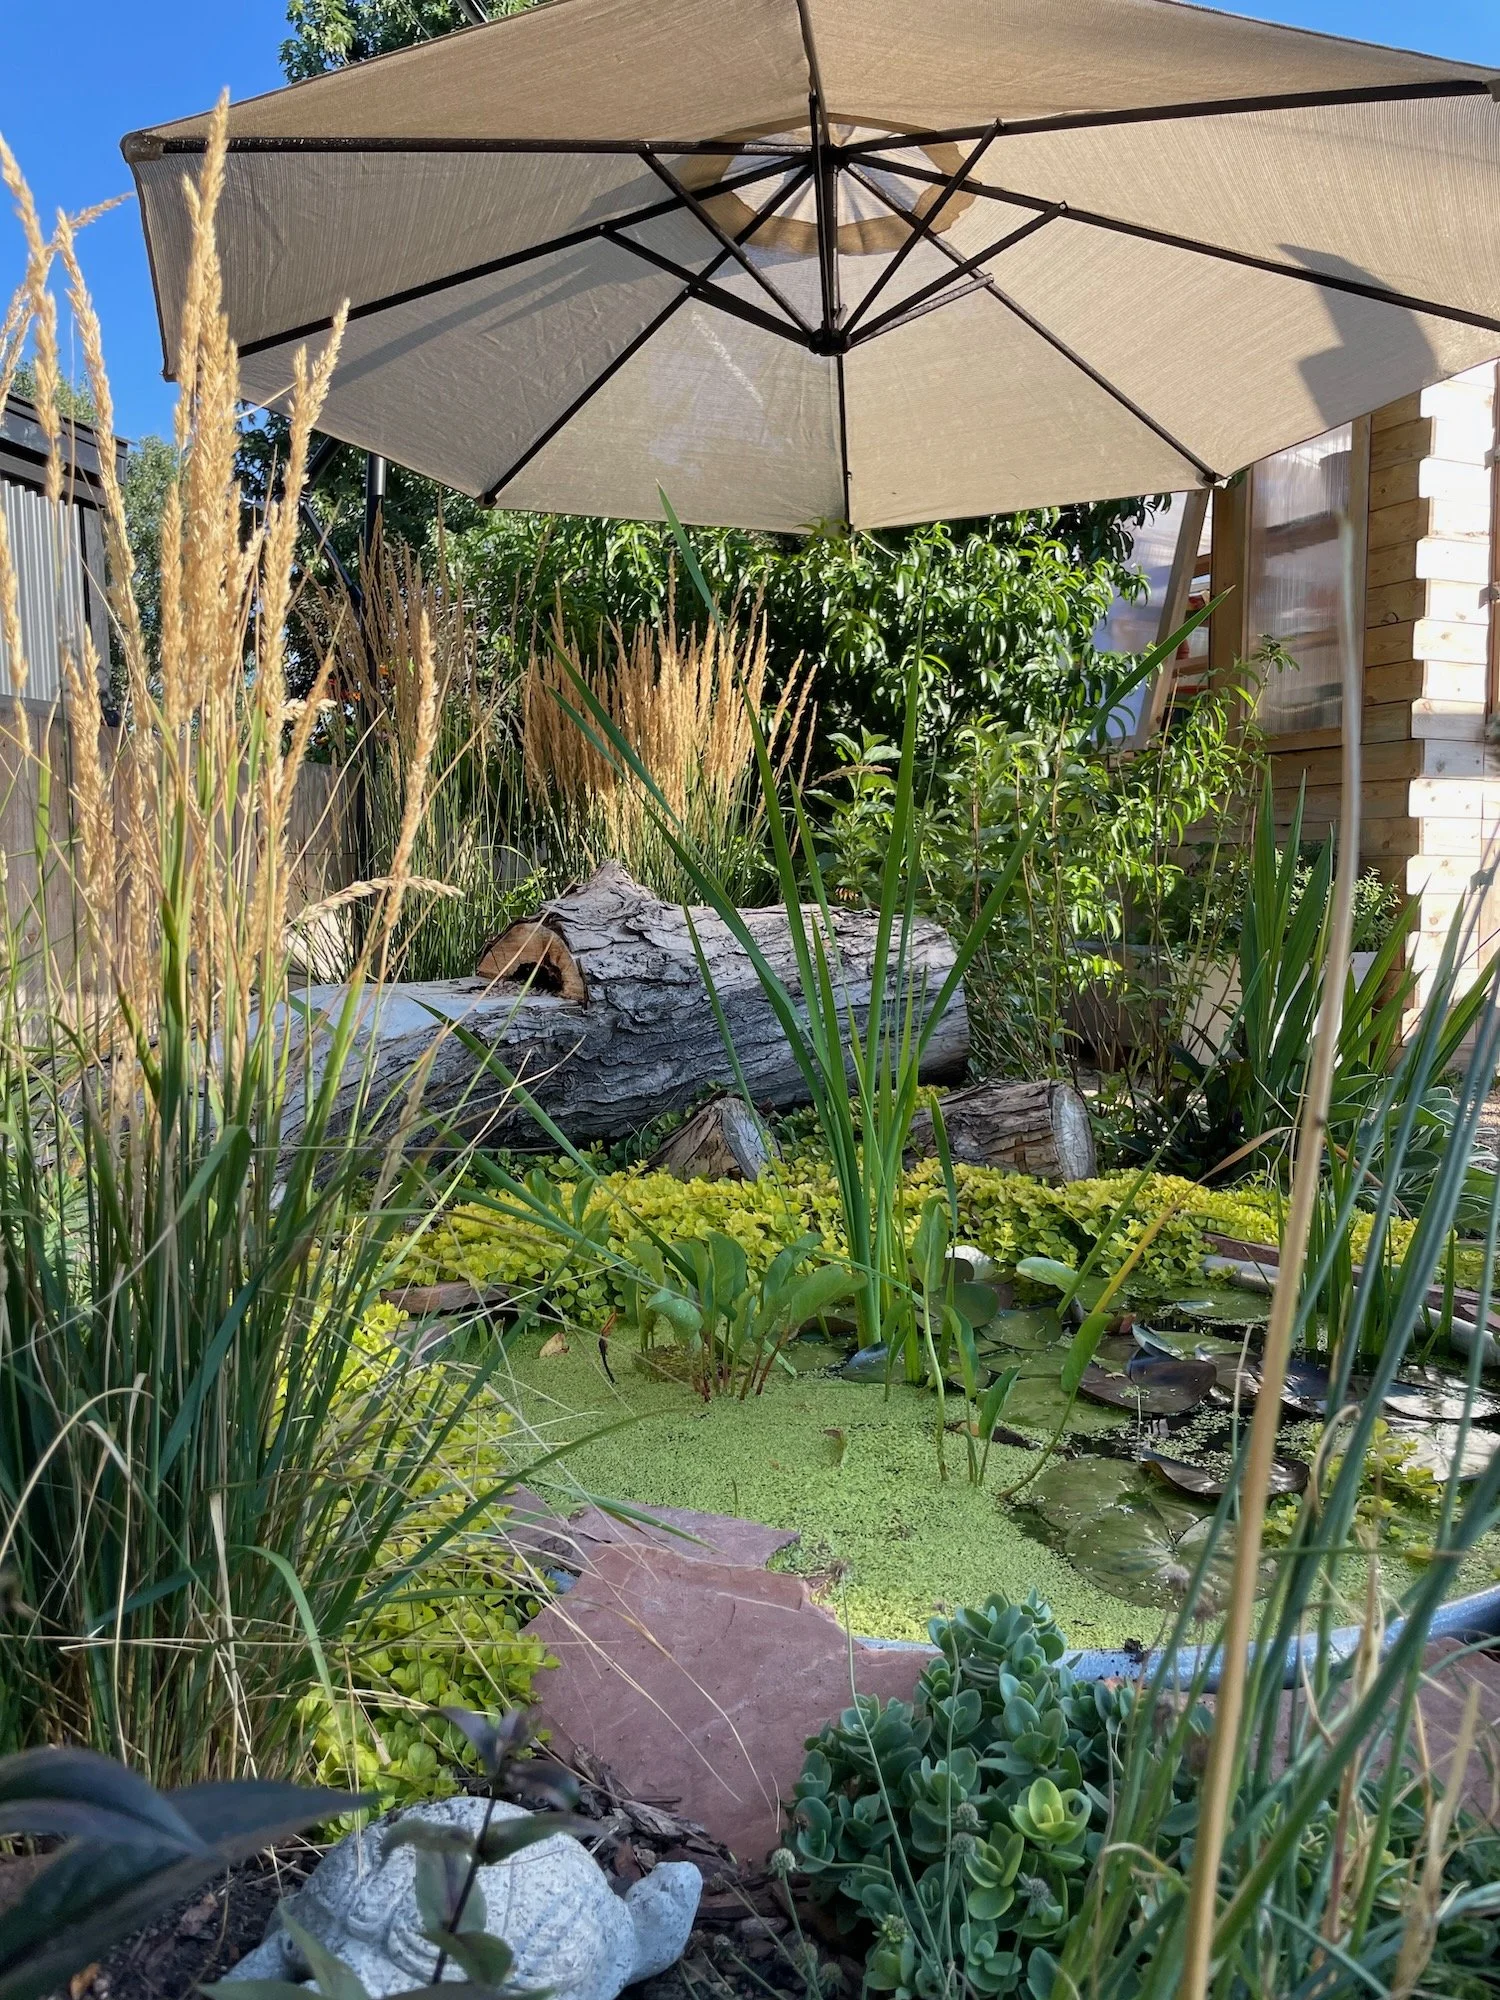
Putting an umbrella up over a pond can keep the water cooler and provide shade for wildlife.
Honestly, for the Large Pond I fretted about this A LOT. Was it too far from the house? Too close to power lines? Too shady? Too sunny? But here’s the thing: water collects where it collects in nature. Your garden is part of nature. So place your pond or water feature where it makes the most sense. There are some things, however, which seem to make some watering holes more popular than others:
A Place to Roost: I have noticed that most birds roost on something tall nearby before coming in to the water source for a bath or a drink. Near The Fountain that place is often the top of our barbeque – so that spot doesn’t have to be fancy. I am sure they do this to make sure the water is safe before coming in.
Close to a Food Source: in the fall when the Monarda and other plants have gone to seed, the bird baths in the Cutting Garden are particularly popular. I watch the finches and other smaller birds pick the seedheads and then come in for a drink and a bath.
Sheltering Plants: bumblebees tend to frequent the birdbaths and ponds that have lots of foliage around them. It may be the cooling shade that they offer. Or the camouflage from predators. Maybe both. But I often see them partaking in a sheltered watering spot.
The more sun on your water feature, the more algae it will grow. So know that. But you can shade the water using pond plants like lilypads which also will help to keep the pond water cooler. When it is very hot for a long stretch, I will even put an umbrella over the Large Pond to provide some shade which is very effective.
For more pond and water feature ideas, check out this post from the 2025 Chelsea Flower Show!
at the close…
So there you have it: our DIY ponds and water features. They have transformed our garden in some really unexpected ways. And we absolutely love them! My goal is to have a water source in every part of the garden one day. We’re not there yet. But it’s also not that far off!
None of them are very fancy. Many of them are repurposed items. But they work! And it’s clear that they are appreciated. And frankly, I will do pretty much anything to help the creatures with whom we share this garden.
If you have questions, don't hesitate to ask!
This post originally appeared on my Substack. Subscribe to my Substack, and all of this gardening goodness will appear in your email inbox weekly!
Happy Gardening!
Angela
Subscribe now so you never miss a thing!